Tag Archives: Parts & Accessories Reviews

Touratech Suspension Service | Gear Review

Touratech Suspension Service
Touratech suspenion service is done at the company’s U.S. headquarters in Seattle. Shockmeister Nick begins the teardown and inspection process on the author’s Extreme shocks.

Rider’s former editor-in-chief, Mark Tuttle, gives us the lowdown on Touratech suspension service for the Touratech Extreme replacement rear shock for his BMW R 1200 GS.


One of the reasons I bought a lightly used 2007 BMW R 1200 GS was for its generous load capacity of 441 lb – a weight limit that’s pretty easy to hit when you’re two-up touring, even before breakfast.  

Touratech Suspension Service
Touratech uses a custom rider profile form to build Extreme shocks tailored to a rider’s needs. For my shock, a heavier spring rate was used – that and its 15mm/65 clicks of remote preload adjustment help it easily adapt to solo or fully loaded two-up riding.

Although my wife and I were careful not to exceed that limit on our first long ride, it turned out that the bike’s stock rear shock simply wasn’t up to the task of carrying the loaded hard luggage, two of us in full riding gear, and 5 gallons of gas. Even with the spring preload maxed out, the back end sagged like an overloaded pickup truck, drastically slowing the GS’s normally responsive steering. The shock also bottomed out way too easily over big bumps. 

Touratech Suspension Service
Purging the old oil and nitrogen prior to disassembly.

As soon as we got home, I gave the folks at Touratech USA a call. Back then as now, Touratech offers high-end Extreme front and rear shocks developed in Germany and built in the Netherlands by TracTive for 2007-2013 BMW oil-cooled R 1200 GS models. Although there’s more emphasis on the company’s replacement shocks with electronic suspension adjustment (ESA) these days, Touratech still sells and services TracTive Extreme components for many ADV bikes. These components are popular among riders who like to “geek out” on manually set suspension settings and get more in touch with their bike. 

Touratech Suspension Service
Replacing the damping piston ring is included in the $150 fee for conventional shock service.

Once I mounted up the Extreme shocks on my Beemer, I couldn’t have been more pleased. I wrote a full Touratech motorcycle suspension review for Rider in 2013, including a complete rundown of the shocks’ specs and features. 

Suffice it to say that the rear Extreme shock solved all my load carrying and handling problems and gave the bike a much better ride to boot. For that 2013 review, however, I wasn’t aware that Touratech specifies “regular” service intervals for its Extreme shocks. That makes sense; unlike the stock shock, as usual a poor compromise between performance and longevity, better performance means using parts that may wear. For comparison, rock-hard stock tires (a.k.a. rim protectors) versus premium replacement rubber with good grip but less longevity come to mind. 

Touratech Suspension Service
After 10,000 miles, the old shock oil (on left) didn’t look too bad compared to the new slippery stuff.

Touratech says that whether it’s time for shock service at 10,000 miles or 30,000 miles really depends upon how hard the shock is used and how concerned the owner may be about preventing problems on a long remote ride. Over time, shock oil breaks down and gets contaminated, seals wear, and nitrogen pressure decreases, all leading to reduced performance and longevity issues, and you don’t want to damage something like the shock shaft, for example, by waiting too long. If you’re the type who’d rather not make the call, Touratech recommends two years or 20,000 miles on its Suspension Service Center website

Touratech Suspension Service
The complete set of disassembled shock parts laid out for inspection. Mine also needed a new seal head and bump stop.

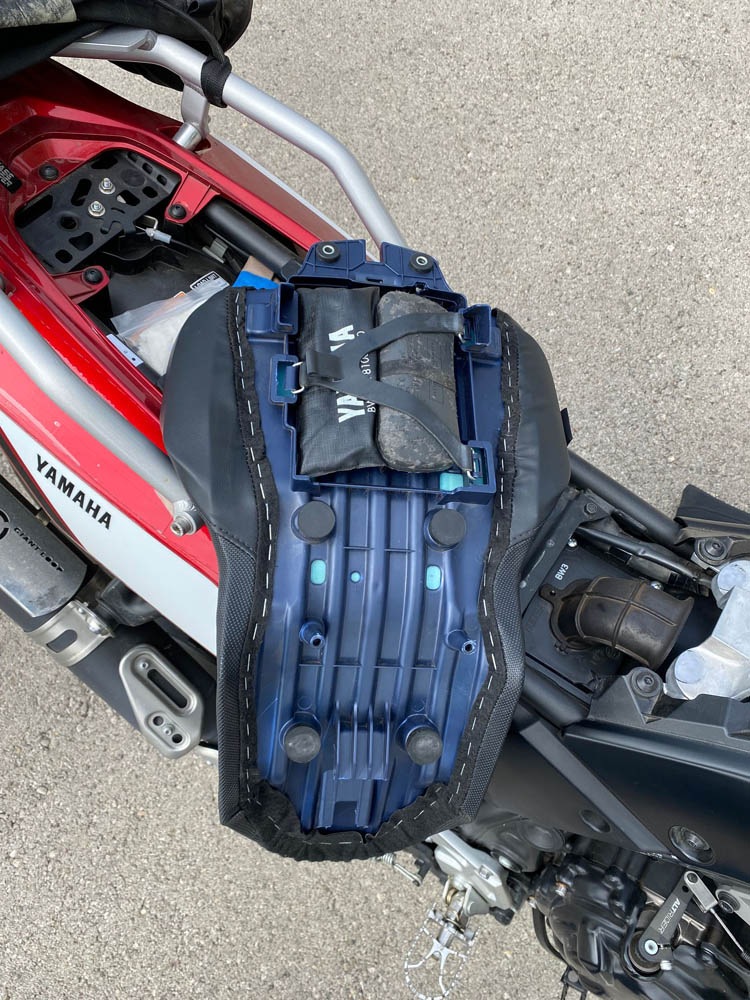
In my case, the first interval turned out to be almost exactly 10,000 miles when I noticed that the lower shock seal was weeping oil – the first stage in the “weeping, seeping, leaking” progression from bad to worse. An hour later, I had the shock boxed up and ready to ship to Touratech in Seattle. Once service is complete, return shipping is included in the $150 fee ($200 for ESA shocks). In my case, it was Touratech’s slower season, so the turnaround time was only about two weeks, but it can take up to five at busier times. 

Touratech Suspension Service
The old parts were returned neatly packaged along with the fully serviced shock – impressive. Ready for 10,000 to 30,000 more miles.

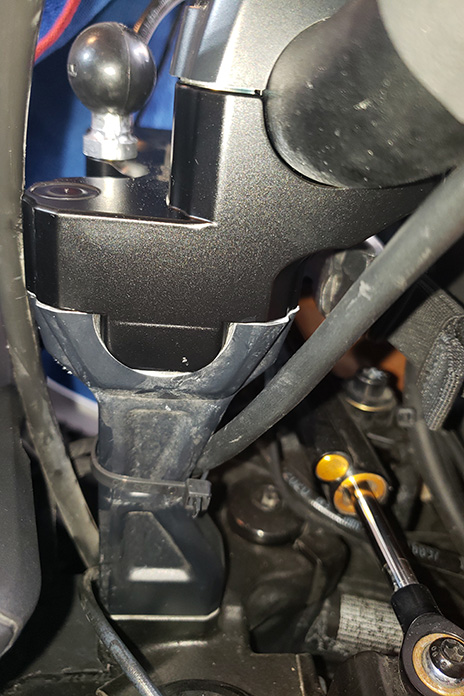
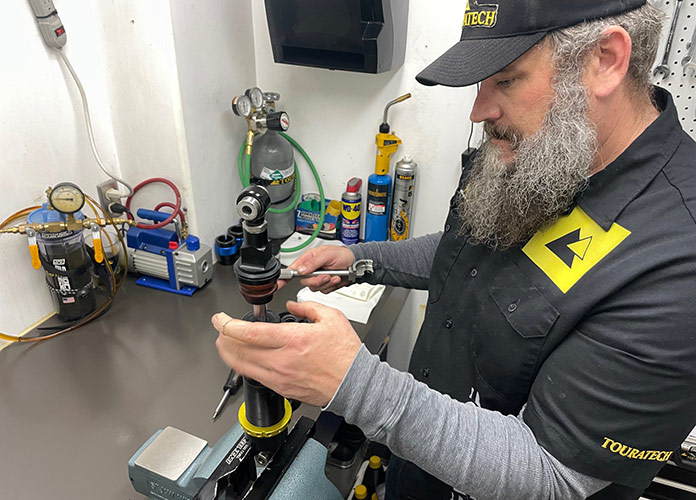
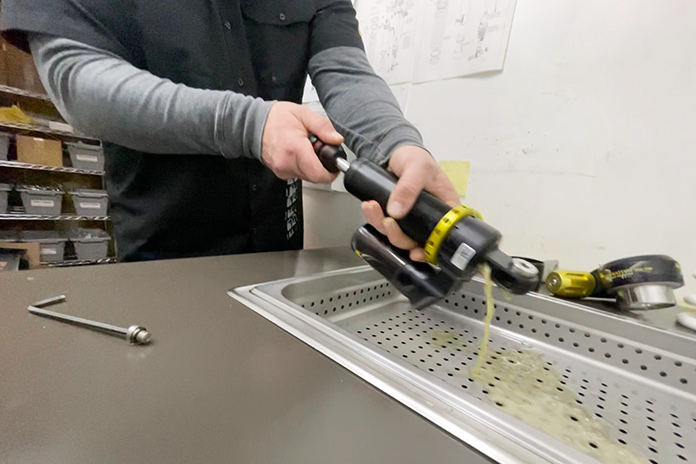
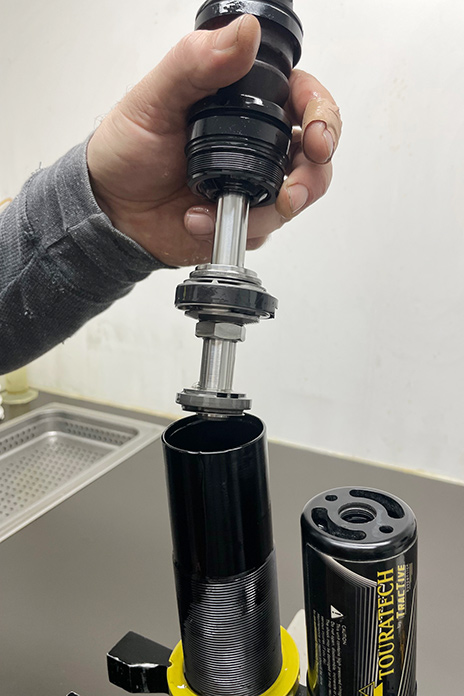
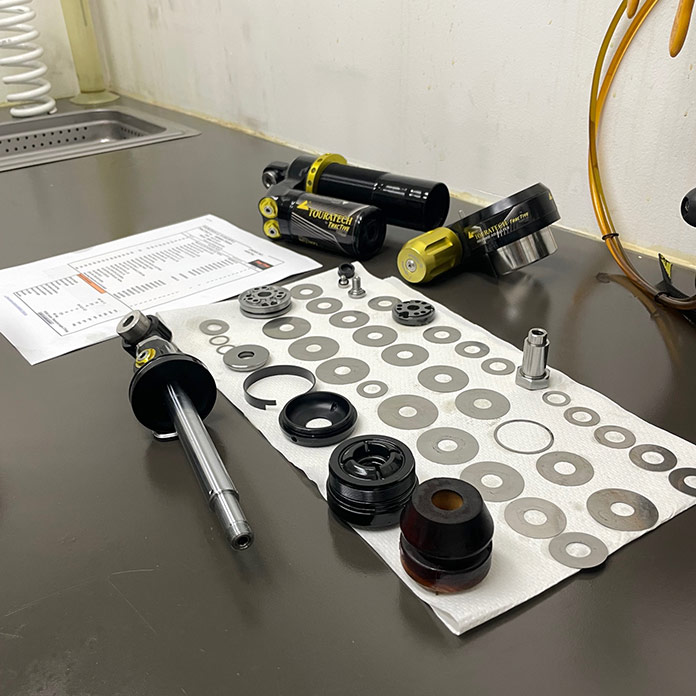
For this conventional shock service, Nick at Touratech disassembled, cleaned, and inspected the shock body and shaft, preload adjuster, damping piston, and shims. Replacing the damping piston ring is included. If any other worn or damaged parts need replacing (like the bump stop and seal head on my shock), Touratech only charges the cost of the parts – all labor is included. The remote reservoir did not need servicing, but oddly, the retainer ring for the lower clevis had come partially adrift, so Nick replaced the lower clevis, retainer ring, and circlip for good measure. The gang at Touratech had never seen this happen before; must have been that big jump… 

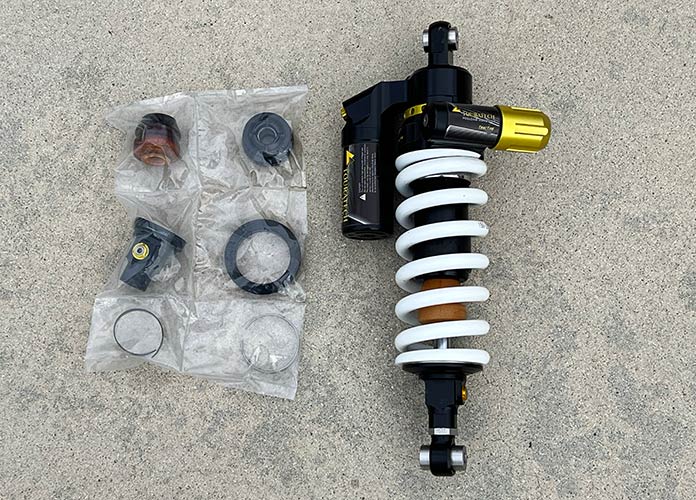
Once the shock was reassembled with fresh oil and nitrogen, Nick carefully boxed it up and shipped it back, and I was riding the BMW again within three weeks. Although I hadn’t noticed any degradation in performance before it was serviced, the rear suspension felt firm, supple, and controlled, as good as the first day I installed the Extreme shock back in 2013. 

Touratech also changes shock springs and services its electronic shocks and fork cartridges, all at a reasonable cost with free return shipping – all good reasons to consider putting its suspension products on your ADV bike in the first place. 

For more information, visit the Touratech website

The post Touratech Suspension Service | Gear Review appeared first on Rider Magazine.

Source: RiderMagazine.com

Wunderlich Side Wind Deflectors for BMW GS | Gear Review

Wunderlich Wind Side Deflectors for BMW GS
Wunderlich Side Wind Deflectors fit 2017-18 R 1200 GS and 2019-23 R 1250 GS models (but not GS Adventure models) and are available in clear or tinted (shown).

After more than 17 years of riding successive generations of BMW RTs, I recently switched to riding a 2020 R 1250 GS. Even though my new-to-me GS is equipped with an oversized Puig Touring windshield, the amount of turbulence and wind noise at speed is significantly higher than it was on my former RTs. My last was a 2015 R 1200 RT equipped with the superb Werks Quiet Ride windshield, which enveloped the rider in a still pocket of calm air regardless of how fast the bike was moving. In fact, I’ve hosted several conference calls for work while traveling down the highway at extra-legal speeds, and nobody even knew I was in motion.

Related: 2021 BMW R 1250 GS | Road Test Review

Wunderlich Wind Side Deflectors for BMW GS
Wunderlich Side Wind Deflectors installed on my new-to-me 2020 BMW R 1250 GS.

In fairness, I never expected this level of protection from the GS, which is designed for adventure touring, not sport-touring like the RT. But for long highway trips and especially on cold days, I wanted more wind protection than what the stock bike offers. The hunt for solutions led me to Wunderlich Side Wind Deflectors, which fit 2017-18 R 1200 GS and 2019-23 R 1250 GS models, but not GS Adventure models.

Wunderlich Wind Side Deflectors for BMW GS

Wunderlich’s deflectors are made of scratchproof, shatterproof 5mm acrylic plastic, and they’re available in clear or the dark tinted finish shown here. The kit includes two deflectors, a one-page installation sheet, and mounting hardware. Two brackets per side provide anchor points for the winglets, secured in place with standard M5 T25 Torx hardware running through a series of stabilizing collars and sleeves. There’s a bit of play for adjustability and fine tuning, if necessary.

Wunderlich Wind Side Deflectors for BMW GS
Wunderlich Side Wind Deflectors are larger than the ones that come as standard on BMW GS Adventure models.

As expected, it’s easiest if you install everything loosely at first, and then tighten down only once final adjustment is completed. Final installation as shown took less than an hour, working methodically. The Wunderlich winglets themselves, each measuring roughly 13 x 4.25 inches at the edges, are quite a bit larger than the stock deflectors on GS Adventure models, which measure roughly 10.5 x 3.5 inches.

Out on the road, the Wunderlich Side Wind Deflectors had a significant impact on the level of wind blast, overall turbulence, and noise experienced at highway speeds. The stock GS has moderate protection for the rider’s torso, but heavy airflow to the rider’s arms. I found that adjusting the windshield to a forward position (nearly vertical) in conjunction with the installed winglets notably diverted air around both my torso and my arms. This provided significant relief on long days gobbling up miles on the slab, which can get tiresome if the rider is being blown all over the place. For hot weather rides or if otherwise desired, the winglets can be quickly removed via 3x M5 T25 Torx bolts per side, allowing for maximum airflow.

Wunderlich Wind Side Deflectors for BMW GS

Overall, the Wunderlich winglets are a worthy addition for BMW GS riders who partake in long trips at sustained high speeds, cold weather journeys, or otherwise desire a more composed operating environment. They’re priced at $289.95. (They’re also available for 2015-19 BMW S 1000 XR models for $271.95.) – Moshe K. Levy

For more information: See your dealer or visit WunderlichAmerica.com

The post Wunderlich Side Wind Deflectors for BMW GS | Gear Review appeared first on Rider Magazine.

Source: RiderMagazine.com

Harley-Davidson Introduces Screamin’ Eagle 135 Stage IV Crate Engine

Harley-Davidson has announced the new Screamin’ Eagle 135ci Stage IV Crate Engine for original, equipment-style 2021-later Harley-Davidson Touring models. Inspired by the Harley-Davidson Screamin’ Eagle King of the Baggers factory racing team and boasting the most displacement ever on an H-D crate engine, the Screamin’ Eagle 135 makes a claimed 130 hp and 143 lb-ft of torque at the rear wheel. MSRP is $7,995.95. For more information, read the press release below from Harley-Davidson.


Harley-Davidson Screamin' Eagle 135ci Stage IV Crate Engine

Milwaukee, WI (March 1, 2023) – Harley-Davidson riders craving no-compromise performance have a thrilling new option with the introduction of the Screamin’ Eagle 135ci Stage IV Performance Crate Engine. This complete Milwaukee-Eight engine for 2021-later Touring models is the new benchmark for factory-engineered American V-Twin performance, offering the most displacement, and the most power, ever created by Harley-Davidson for a street-compliant crate engine.

The engine’s development was fueled in part by the efforts of the Harley-Davidson Screamin’ Eagle factory racing team competing in the MotoAmerica Mission King of the Baggers roadracing series. To simplify set up of high-performance engines Harley-Davidson offers the new wireless Screamin’ Eagle Pro Street Performance Tuner, the only tuner available to maximize performance while being emissions and warranty compliant.

Engineered and tested as a complete collection of high-performance components and assembled from the bottom up at Harley-Davidson Powertrain Operations in Menomonee Falls, Wisconsin, this street-tuned 135-cubic-inch (2212cc) Screamin’ Eagle Crate Engine is designed to run with a wide-open throttle at high engine speeds and provide instant passing power from cruising speed. The engine delivers 143 lb-ft of rear-wheel torque at 3500 rpm and 130 rear-wheel hp at 5500 rpm – approximately 28 percent more torque and 41 percent more horsepower at the rear wheel than a production Milwaukee-Eight 117 engine.

Harley-Davidson Screamin' Eagle 135ci Stage IV Crate Engine

Related: Harley-Davidson Announces Screamin’ Eagle 131 Crate Engine For Select Softail Models

This street-ready performance engine features the following premium Screamin’ Eagle components:

  • New 68mm throttle body and matching CNC-machined intake manifold, originally developed for Harley-Davidson Screamin’ Eagle factory racing team engines, to maximize airflow to the engine.
  • Screamin’ Eagle Extreme CNC-ported cylinder heads provide significantly improved efficiency of cylinder filling, leading to more explosive power and increased rear-wheel torque when compared to stock. High-performance valve springs remain stable with the high-lift cam and in high-rpm operation.
  • Screamin’ Eagle Pro Billet Cam Plate and Oil Pump provides higher pressure when the oil is hot to keep pressure drops to a minimum.
  • New 10.7:1 high-compression forged pistons.
  • SE8-517 high-lift camshaft, high-performance cam bearing and high-performance tappets.
  • Patent-protected 4.31-inch steel sleeve cylinders and new 4 5/8-inch flywheel (bore x stroke is 4.31 x 4.625).
  • New high-capacity 6.8 gram/second fuel injectors.
  • Screamin’ Eagle Ventilator Extreme Air Cleaner and Screamin’ Eagle Street Cannon mufflers (each sold separately) are not required but are highly recommended for peak performance.
Harley-Davidson Screamin' Eagle 135ci Stage IV Crate Engine

The Screamin’ Eagle 135ci Stage IV Performance Crate Engine is intended for bolt-in installation in an original equipment-style 2021-later Harley-Davidson Touring chassis. No special fabrication or engine-mount relocation is required. The engine is backed by up to two-year manufacturer’s warranty for unmatched confidence when dealer-installed through the Custom Coverage program.

See all of Rider‘s Harley-Davidson coverage here.

With an MSRP of $7,999.95, the Screamin’ Eagle 135ci Stage IV Performance Crate Engine is offered in Black or Chrome finish with 135 Stage IV badging on the cylinder heads and timer cover.

Harley-Davidson Screamin' Eagle 135ci Stage IV Crate Engine

Two versions of the engine will be offered: For 2021-later Touring models equipped with Air/Oil-Cooled Milwaukee-Eight engine, and for 2021-later Touring models equipped with a Twin-Cooled Milwaukee-Eight engine. The engine does not fit Trike models. Installation requires the separate purchase of Head Pipe P/N 65600177. Air-Cooled models require Oil Cooler Fan Assist P/N 62700204 or Fan for Factory Oil Cooler P/N 26800195. All models require ECM recalibration with Screamin’ Eagle Pro Street Tuner for proper installation. Does not fit California models.

Find more information at Harley-Davidson’s website.

The post Harley-Davidson Introduces Screamin’ Eagle 135 Stage IV Crate Engine first appeared on Rider Magazine.
Source: RiderMagazine.com

Aerostich Zovii Alarmed Grip Lock | Gear Review

Aerostich Zovii Alarmed Grip Lock BMW R 1200 RT
Aerostich Zovii Alarmed Grip Lock on a BMW R 1200 RT

Previous to hearing about the Zovii Alarmed Grip Lock, I was apparently naive when it came to motorcycle theft. At home, I always lock both my ignition and fork. What I didn’t know is that fork locks are relatively easy to break, albeit noisily. The noisy part is helpful if your bike is parked at your house, but what if you’re not home or you’ve taken it on a ride? Thieves can also lift a bike into a vehicle in a matter of seconds and take it elsewhere to disable security measures.

To address these issues, Aerostich offers the Zovii Alarmed Grip Lock, a waterproof nylon-construction lock with a 10mm carbide-reinforced hardened steel locking pin and a built-in 120dB anti-theft security alarm. For comparison, most emergency responder sirens range from 110-129db.

Aerostich Zovii Alarmed Grip Lock

The lock is lightweight and compact. It weighs 8.7 ounces, about half an ounce heavier than my iPhone and case, and at 6 x 2.25 inches, it fits easily in the interior pockets on my leather jacket.

See all of Rider‘s Parts & Accessories reviews here.

To activate the alarm, clamp the lock around either grip and front lever on your bike and depress the lock button to arm it. No key is required to activate.

Unfortunately, the width of the stock grips and levers on my Harley Heritage Softail doesn’t allow the device to clamp entirely shut, so I tried it on a friend’s BMW R 1200 RT. The Zovii clicked on his grip and lever easily. However, when we took the bike off the centerstand and rolled it, I was surprised the alarm didn’t make a peep.

Here’s where a slight design flaw exists. The instructions say the unit beeps twice when you unlock it; however, we discovered after tinkering with it that two beeps means the alarm is disabled, even when it’s locked shut. Seems to me when you clamp the unit together and push the lock in, you also want to activate the alarm. However, you must make sure you hear a single beep (followed about five seconds later by a longer tone). If you clamp it together, push the lock in, and get two quick beeps, you must unlock it with the key and push it in again to get the single beep indicating that the alarm is activated. Slightly annoying, but I can see certain circumstances where this might be a good feature, primarily if you’re carrying the Zovii around and have to clamp it shut to do so.

Aerostich Zovii Alarmed Grip Lock

Once we figured out the beeps, a slight jostling of the handlebar was enough to sound the warning tones. If we kept messing with it, we got the whammy 120 decibels, which is disarmed by unlocking the unit. The warning tones are nice in case you accidentally bump the bike or are concerned about how gingerly you have to unlock it when it’s armed.

So besides the minor inconvenience of the single vs. double beep – and the much bigger inconvenience of not fitting my bike – the Zovii is an inexpensive product (just $60) that’s loud enough to send a would-be thief scurrying back to the shadows.

The Zovii Alarmed Grip Lock is available at the Aerostich website.

The post Aerostich Zovii Alarmed Grip Lock | Gear Review first appeared on Rider Magazine.
Source: RiderMagazine.com

Helibars Tour Performance Handlebar Risers | Gear Review

HeliBars Tour Performance Handlebar Risers

Seeking relief from some of the strains of adventure bike riding, I thought I would test out one of the HeliBars Tour Performance Handlebar Risers. The riser positions the handlebar 2 inches higher and 2 inches closer to the rider, significantly altering the handlebar-seat-footpegs rider triangle.

See all of Rider‘s Parts & Accessories reviews here.

The handlebar position on many adventure bikes is well-placed for both sitting and standing while cruising backroads and maneuvering through technical off-road areas. Even on pavement, I find it helpful to stand up when riding through small towns to give my derriere a chance to get some blood back into it.

On my 2021 Harley-Davidson Pan America, with my 31-inch inseam, when standing on the pegs the stock handlebar position requires me to bend my knees slightly or stoop over a bit, which puts strain on my lower back. This riding position can become tiresome and uncomfortable after riding off-road over rough terrain. After an hour or so, my legs get pretty knackered.

Related: 2021 Harley-Davidson Pan America 1250 Special | First Ride Review

Enter the the HeliBars Tour Performance Handlebar Riser. Installation of the HeliBars riser is straightforward. Remove the stock handlebar, release some of the tie straps that secure brake lines and wires to the handlebar, reposition the lines behind the handlebar mount, and then install the HeliBars riser atop the stock handlebar mount. After that, simply re-install the stock handlebar on the new riser using bolts provided by HeliBars and torque them to appropriate spec. Nothing needs to be removed from the handlebar, and all stock lines are retained.

HeliBars Tour Performance Handlebar Risers

On a recent ride in the San Bernardino Mountains of Southern California, I put the riser to the test on the Santa Ana Divide Trail. It was fairly rutted with several rockslides and water crossings that required frequent standing. The HeliBars riser not only provided a more comfortable position but also helped with controlling the Pan Am and its significant heft. While I previously would have preferred to sit down for most of the ride, I found it equally comfortable to stand up for long stretches of deep sand and rutted two-track.

HeliBars Tour Performance Handlebar Risers

During long stints in the saddle, the new riser minimizes tension in my arms and shoulders, reducing fatigue and some of those post-ride aches and pains that are familiar to all of us. One downside to the new handlebar position is that it might block part of your view of the TFT dashboard depending on your height. For example, I now must lean forward a bit to see the clock since it’s located in the lower left corner of the screen.

HeliBars Tour Performance Handlebar Risers

HeliBars Tour Performance Handlebar Risers are machined from a single piece of 6061 T6 aluminum with nice craftsmanship, and their solid design reduces flex. They are functional, stylish, and manufactured on American soil in Cornish, Maine. The riser for the Harley Pan Am is priced at $199 – or $209 with the optional RAM ball mount. HeliBars also makes risers and replacement handlebars for a wide variety of other motorcycles. For more information, visit the HeliBars website.

The post Helibars Tour Performance Handlebar Risers | Gear Review first appeared on Rider Magazine.
Source: RiderMagazine.com

National Cycle Extreme Adventure Gear | Gear Review

National-Cycle-Extreme-Adventure-Gear-XAG 2022 Honda CB500X
2022 Honda CB500X decked out in National Cycle Extreme Adventure Gear

Adventure bike owners love to add “farkles” from companies such as National Cycle to their bikes. A farkle, as many of you know, is an accessory, often a fancy one, that a motorcycle owner is likely to brag about. Some say the word is a mashup of “function” and “sparkle,” but we’ve also heard it’s an acronym for Fancy Accessory, Really Kool, Likely Expensive. (When I Googled “farkle,” the top result was from Dictionary.com: a combination of fart and chuckle, an involuntary fart caused by laughter. Gotta love the internet.)

Best known for its windscreens and windshields, National Cycle also makes accessories for select motorcycle models. As part of its Extreme Adventure Gear (XAG) line, it makes accessories for the ADV-styled Honda CB500X, and we installed some XAG accessories on our 2022 test bike.

Related: 2019 Honda CB500X | First Ride Review

One of the most popular upgrades for adventure bikes is supplemental protection against rocks, road debris, and tip-overs. We started off with National Cycle’s XAG Polycarbonate Headlight Guard (P/N N5400, $84.95), which is made of tough 3.0mm polycarbonate reinforced with the company’s proprietary Quantum hardcoat – said to provide 10 times the strength and 30 times the scratch resistance as acrylic, a claim National Cycle backs up with a three-year warranty against breakage.

National Cycle Extreme Adventure Gear XAG Polycarbonate Headlight Guard 2022 Honda CB500X
National Cycle XAG Polycarbonate Headlight Guard

The guard is thermoformed for an exact fit over the 2019-2022 CB500X headlight, and its crystal-clear optics do not distort or reduce illumination. Installation is simple: Just clean the headlight, remove the adhesive backing on the marine-grade Velcro tabs, and press the guard onto the headlight lens.

Next, to add crash protection as well as a place to mount auxiliary lighting, we installed the XAG Adventure Side Guards (P/N P4200, $429.95), which are also available for the Yamaha Ténéré 700. Made of black powdercoated steel, they complement the CB500X’s styling, especially the Pearl Organic Green/Black color scheme on our 2022 model. The guards are also treated inside and out with an electrophoretic coating to eliminate rust and corrosion.

National-Cycle-Extreme-Adventure-Gear-XAG-Adventure-Side-Guards 2022 Honda CB500X
National Cycle XAG Adventure Side Guards

The installation instructions provide a list of basic tools needed as well as a QR code that links to a helpful video. Installation is straightforward and took about 30 minutes, with the only challenge being a little extra effort needed to line the guards up with the engine mount holes.

The left and right guards attach to the engine in two places, and they bolt together in the middle just below the headlight. Once installed, they provide solid, sturdy protection. A flat metal tab with an open bolt hole that’s welded to the lower part of each guard provides a good attachment point for auxiliary lights.

As Reg Kittrelle says in his Triumph Tiger 900 GT Low review in the upcoming February issue, an ADV is a “motorcycle that can comfortably take me to distant places carrying lots of stuff.” The Honda CB500X is comfortable, but in stock form, it doesn’t provide many options for carrying gear, so we installed the XAG Luggage Rack (P/N P9304, $184.95). Like the side guards, the luggage rack is made of black powdercoated steel.

National Cycle Extreme Adventure Gear XAG Luggage Rack 2022 Honda CB500X
National Cycle XAG Luggage Rack

Also like the guards, installation of the rack requires only basic hand tools, takes about 30 minutes, and is clearly demonstrated in the instructions and video. On a stock CB500X, installation requires removal/reinstallation of the passenger grab handles since the mounting brackets share the same bolt holes. On our test bike, the grab handles had already been removed when Honda’s accessory saddlebag mounts were installed. And be advised: National Cycle’s luggage rack is not compatible with Honda’s accessory saddlebags.

The rack is a solid, stylish, practical add-on. It measures 8.625 inches front to back and has a tapered width that narrows from 6.75 inches at the front to 5 inches at the rear. The rack’s slotted surface and two holes on either side provide anchor points for straps or bungee cords. It sits a bit higher than the passenger portion of the seat, but together they provide a platform up to 23 inches in length for carrying a drybag, duffel, or tailbag.

Related: Motorcycle Camping on a Honda CB500X and Husqvarna Norden 901

Although we didn’t request one for our test bike, National Cycle also makes the XAG Lowering Kit and Kickstand (P/N P4900, $119.95) for the CB500X. It includes a shorter sidestand and two aluminum suspension link arms that lower the seat height by about 1.5 inches (from 32.8 to 31.3 inches). Only basic tools are required, installation takes 30-45 minutes, and you’ll need a wheel chock and a hydraulic jack or lift. As with the other accessories, in addition to the step-by-step instructions with photos, there’s a helpful video.

National-Cycle-Extreme-Adventure-Gear-XAG-Lowering-Kit-and-Kickstand 2022 Honda CB500X
National Cycle XAG Lowering Kit and Kickstand

We put as many miles as possible on our test bikes, so we’re always interested in accessories that improve comfort. We’ve tested National Cycle’s VStream windscreens on many different motorcycles over the years, and we’ve consistently been impressed with their ability to improve wind protection while also reducing turbulence and buffeting. With their patented “V” shape, VStream windscreens are made of 3.0mm Quantum-hardcoated polycarbonate – the same durable material used for the headlight guard (and with the same warranty against breakage).

The VStream windscreen comes in three sizes for the CB500X, as seen below.

National-Cycle-Extreme-Adventure-Gear-XAG-Vstream-Windscreen 2022 Honda CB500X

The Low windscreen is 16.75 inches tall, just slightly taller than stock, and it’s available in dark or light tint for $121.95. We opted for the Mid windscreen ($133.95), which is 19.25 inches tall (more than 2.5 inches taller than stock), much wider than stock near the top, and available only in light tint. The Tall windscreen ($139.95) is 21.75 inches tall (more than 5 inches taller than stock), even wider near the top, and available only in clear.

National Cycle Extreme Adventure Gear XAG Vstream Windscreen mid 2022 Honda CB500X
National Cycle VStream Windscreen Mid size

Compared to stock, the Mid-size VStream pushes air higher up and around the rider. Airflow hits at helmet height, but there’s no buffeting. There’s also excellent visibility over the top of the windscreen, providing an unobstructed view of the road ahead.  

Unlike most farkles, National Cycle’s XAG accessories are practical and reasonably priced. If you’ve got a Honda CB500X, check ’em out by clicking on the linked product names above.

The post National Cycle Extreme Adventure Gear | Gear Review first appeared on Rider Magazine.
Source: RiderMagazine.com

Legendary Best Motorcycle Seats | Gear Review

Legendary Best Motorcycle Seats

As I roll gently into my retirement years, I’ve taken to scouting used motorcycles on Craigslist to stock up my garage. I never know what will grab my attention and tickle my heart, and as I unearth hidden two-wheeled treasures, I’m usually delighted to inherit a rich assortment of accessories previous owners have lavished upon their bikes – now to become my next ride.

When acquiring used bikes, the one item that often requires my attention is the seat. Many riders work at lowering reach to the ground, but I’m 6 feet tall with a 31-inch inseam and grouchy hips. I like legroom. So when a newly acquired bike doesn’t fit me correctly, I head over to Legendary Best Motorcycle Seats in Ventura, California.

I’ve been using BMS for seat alterations for decades, beginning back in their Ojai days under Bill “Rocky” Mayer (BMS used to stand for Bill Mayer Saddles). Now, longtime stalwart Adrian Mercado handles the business, turning out the same quality work he’s crafted for all these years.

Legendary Best Motorcycle Seats

Read more of Rider‘s gear reviews

The personal fitting service at BMS is terrific. If you can devote a half day or so on site, Mercado and his crew will craft a custom-made seat built to your liking and personal fit while you wait. BMS also appears at rallies and other riding events across the country to provide custom services, or you can also send in your seat with your necessary personal dimensions for mail-order service.

Mercado listens to your requests, then makes suggestions based on his decades of seat-building experience. He’ll give you what you want, but I’ve learned to follow his advice, typically after some give-and-take regarding comfort versus aesthetics. The decision often comes down to a simple question: Do you want the bike to “look right,” or do you want the seat to coddle your rear end over a full day’s ride? Personally, I tend to lean toward the comfort side, but you can have it your way, exactly so.

Legendary Best Motorcycle Seats

Custom-built BMS seats absolutely transformed my new-to-me 2015 Ducati Multistrada 1200 S and 2017 KTM 690 Duke. Due to an extra-low seat at purchase, I found the Multi virtually unrideable, while the 690’s aftermarket rearsets shortened the seat/peg relationship and made things too cramped. Mercado fixed all of that, making both bikes more enjoyable – and “all mine” in the process. Nice. Problems solved.

Pricing begins at $595 to build a solo seat, pretty much in keeping with other custom seat options.

For more information, visit the Legendary BMS website.

The post Legendary Best Motorcycle Seats | Gear Review first appeared on Rider Magazine.
Source: RiderMagazine.com

Sargent World Sport Performance Seat | Gear Review

Sargent World Sport Performance Seat

Some things never change, such as the lack of comfort delivered by a typical OEM motorcycle seat. The stock perch on my ’09 BMW F 800 GS was a butt pincher, while my Yamaha Ténéré 700’s seat, with its cool rally look, is more plank-like. It seemed okay at first, but a couple of long rides proved me wrong. The comfort solution for my BMW was a World Sport Performance Seat from Sargent Cycle Products. Hoping lightning would strike twice, I sourced one for the Yamaha, and my derriere hasn’t stopped thanking me since.

Sargent builds its seats from the bottom up, molding Poly-Tec material to fit individual motorcycle models. The new pan for my Yamaha has the same tool storage area underneath as the stock unit, and it fits perfectly to that seat’s attachment points. I only had to transfer the Yamaha’s rubber grommets and washers to the new seat for a painless installation. The World Sport is lower than the stocker by nearly an inch and weighs 0.6 lb more, likely due to a wider pan and larger padded area.

Read more of Rider‘s gear reviews

Atop the pan sits the comfort zone, a sculptured slab of Sargent’s proprietary Super Cell Atomic foam, designed to damp vibration while remaining firm and resilient. A memory foam layer molded inside that slab is said to relieve hot spots by conforming to your rear. One more comfort enhancement – a central channel much like those on some bicycle seats – takes the pressure off your nether region. Covering it all is black, UV-stabilized, marine-grade vinyl, hand sewn to a perfect fit. If my GS seat is any indication, this seat will last for many years with no care regimen other than an occasional scrub-down when it gets dirty.

Sargent World Sport Performance Seat

Wider at the rear than the stock perch but narrowing at the front with rounded edges for better control while standing, the slightly dished seat distributes rider weight over a larger area. I found it comfortable for sitting back on highway slogs, sliding forward for the twisties, and standing on the pegs when off the pavement. The sides are grippy enough for decent control while standing, while not interfering with tossing the bike side-to-side on curvy pavement. All of this adds up to a much-improved perch for extended riding days, something I’ve appreciated on several long rides with the World Sport under my rear.

Sargent offers a host of options and upgrades to the basic model reviewed here ($369.95), starting with color-coordinated welts. I went welt-less, preferring the smoother edge look. Those who want to match up their rear seat can order a do-it-yourself rear cover, and heated seats are available for those wanting bottom-up warmth. Sargent makes the World Sport seat for a dozen brands of motorcycles, and probably yours. When my buns were burning, they put out the fire.

For more information, visit SargentCycle.com.

The post Sargent World Sport Performance Seat | Gear Review first appeared on Rider Magazine.
Source: RiderMagazine.com

S100 Cycle Care Kit | Gear Review

S100 Cycle Care Kit

Like most motorcyclists, I prefer riding bikes to washing them, so I’m always on the lookout for a better (cleaning) mousetrap. When it came time to knock the barnacles off my Harley Dyna, I tried the S100 Cycle Care Kit. The kit includes spray bottles of Total Cycle Cleaner, Detail & Wax, and Corrosion Protectant, a tube of Total Cycle Finish Restorer, a sponge, a drying towel, and a handy carrying case.

Starting with the Total Cycle Cleaner, I sprayed the bike liberally and then rinsed it off. My Dyna was already much cleaner, and I hadn’t even busted suds with the sponge yet. In fact, I only used the wet sponge and cleaner on the spokes to remove some nasty grunge that’s been on there longer than I care to admit.

The drying towel is little strange. It comes sealed in a plastic bag that lives in a hard plastic container, and it’s already wet/slippery when you remove it from the packaging. The directions say to rinse it with very warm water to unfold the towel. A garden hose did the trick, and the magic towel did its job, removing the water and leaving the bike dry and streak-free. Like a regular chamois towel, only better.

Next up was the Total Cycle Finish Restorer. This stuff comes in a tube and helps polish metal surfaces that may have dulled, and it also removes minor scratches. I used it to brighten up the triple trees and the chrome on the forward controls. With a bit of elbow grease, the parts came back to life and shined bright once again.

Check out more of Rider’s gear reviews

Then I moved on to the Corrosion Protectant. I enjoy rides along the Pacific Coast Highway, and over time the salty air corrodes metal surfaces. The instructions say to spray a fine mist over the surfaces you want to protect and then buff it off. The stuff is slick, so you’ll want to avoid things like brakes, tires, seats, and grips. The directions recommend using the protectant periodically throughout the year and before you put the bike away for the winter.

Last but not least was the Detail & Wax, which has an old-school waxy aroma. Unlike other watery spray waxes, it goes on kind of thick and you need to buff it off. It contains carnauba and beeswax, and the shine it left behind on the paint and chrome was primo.

The S100 kit contains everything you need to get your bike clean and looking sharp. The amount of time required to use the entire kit will depend on how dirty your bike is, or how much chrome you have, but everything is easier and faster with regular use. My two favorite items in the kit are the Total Cycle Cleaner and the Detail & Wax because they get regular use. The only problem now is that I no longer have an excuse to have a dirty bike.

You can find S100 products online, at dealerships, and in powersports shops. The Cycle Care Set retails for around $55.

For more information, visit s100.com.

The post S100 Cycle Care Kit | Gear Review first appeared on Rider Magazine.
Source: RiderMagazine.com

AltRider Skid Plate for Yamaha Ténéré 700 | Gear Review

AltRider Skid Plate for Yamaha Ténéré 700

When I look at protecting a motorcycle for multi-surface touring, my first priority is the soft aluminum underbelly, better known as the crankcase. Difficult to field repair and expensive to replace (over $1,400 from one online source), those intricate castings are the inner sanctum for the motor and tranny. Like most OEM skid plates, the Yamaha Ténéré 700’s 2mm-thick aluminum stock unit is adequate for mellow dirt-road travel, but it doesn’t provide enough protection against the serious rock impacts that can occur when the road deteriorates. For something more substantial, I turned to AltRider for its 4mm-thick aluminum plate, which is TIG welded by hand in the USA.

Read our Yamaha Ténéré 700 long-term review

It attaches to the same four mounting points as the stock piece with the included stainless-steel hardware, and to four rearward frame bolts, unitizing the undercarriage. AltRider’s compact design keeps the plate close to the engine to prevent rocks and debris from collecting; protects the header pipes, oil filter, and sidestand switch; and is vented in key areas to shed heat. The oil sight glass is still visible, just a tad harder to see.

Check out more of Rider’s gear reviews

To complete the armor package, I also sourced AltRider’s Linkage Guard, a 6mm high-density polyethylene piece that bolts to the tail of the plate. Riding just below the T7’s exposed rear suspension joints, the flexible guard helps the bike slide over obstacles while limiting impacts to vulnerable suspension components.

The skid plate installation video on AltRider’s website was a helpful guide during installation, to the point of showing how to keep the forward spacers in place with a dab of grease while lining up the screw holes. My 700 has the OEM centerstand fitted, which complicates matters somewhat, because the stand’s thick bracket shares the frame attachment points used by the rear of the plate. Having some visuals would have been helpful for aligning everything and getting the bolts threaded, but perseverance and some colorful language carried the day.

AltRider Skid Plate for Yamaha Ténéré 700

Testing began in the wilds of Nevada, with clunks and clanks ringing out from below as the T7 conquered rocky climbs and roadways-turned-creek beds. The extra-thick metal and stout welded structure gave me the confidence to plow through or smack aside anything in my path –good thing, since at times there was no option but to slam on ahead. The abuse continued into California, where the back way into Bodie State Historic Park dished up more rocks and rubble. Damage assessment: zero, to either bike or plate (not counting scratches), and no small rocks left rattling around between the crankcase and its armor.

Consider me satisfied. The skid plate runs $383.97, or $405.97 with the guard, in either powdercoated black or clear-finished silver.

For more information, visit altrider.com.

The post AltRider Skid Plate for Yamaha Ténéré 700 | Gear Review first appeared on Rider Magazine.
Source: RiderMagazine.com