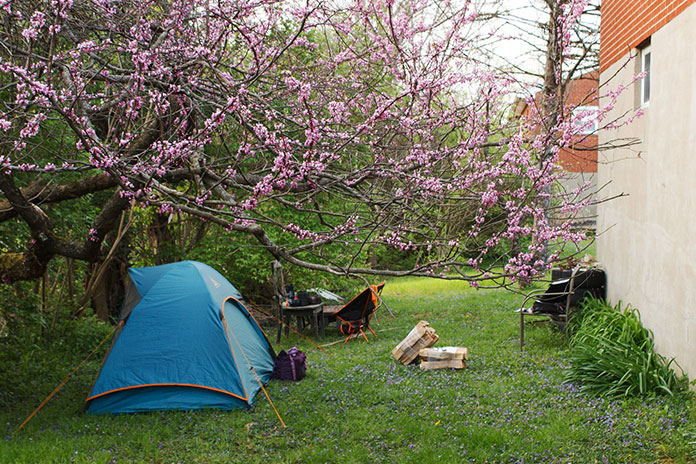
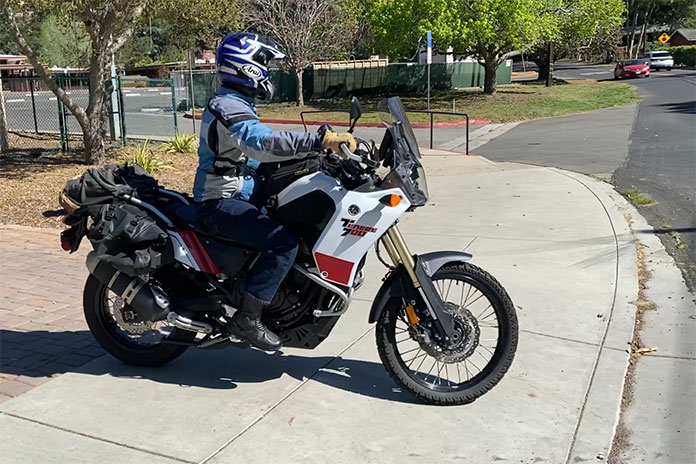
Setting up camp in your backyard first will make things easier once you get to the campsite.
You’ve packed your moto camping kit. You’ve loaded up your luggage. You zip up your moto jacket and step out into…your backyard? When it comes to motorcycle camping tips, this is perhaps the best place to start.
Regardless of whether you’re an experienced motorcyclist or a skillful camper, there’s something about combining the two that enhances the adventure – and the challenges. Your backyard might seem like an odd place to camp, but if you’re new to motorcycle camping or trying out equipment for the first time, there’s no better place to practice than at home.
Motorcycle Camping Tips 101: Checking Your Kit
Camping at home can be a fun mini “staycation.”
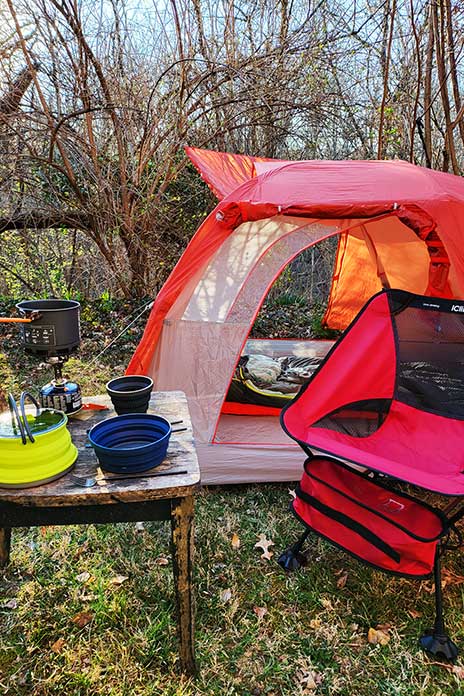
Unlike car camping, tossing everything in the back of your vehicle is not an option when traveling on a bike. Motorcycle camping requires more attention to organization and efficient packing. You not only have limited space, but often you need to unpack and set up camp when you’re worn out from a long day of riding. You then must pack everything back up again the next morning – and that tent never wants to go back in its stuff sack just right, does it?
It can take time to figure out how new equipment works. After upgrading to a larger tent, I embarked on a moto camping trip before trying it out first. When I arrived at my campsite in West Virginia, exhausted from riding since dawn, I realized the new tent’s guy lines were different than my usual setup. Without internet access, I had to guess how to tie them. I made it through the night, but the clear light of morning revealed I had tied them incorrectly. Had I tried to stake down those lines at home, I could have quickly determined the correct method by pulling up a video on my phone.
Testing your camping gear and learning the proper approach for set up and break down in your backyard saves headaches in the backcountry. Practice makes perfect. Can’t figure out a piece of gear? Read the instruction manual or find a tutorial on YouTube. Is something broken or missing? Find a replacement before you need it most, and get your packing list dialed in from the comfort of home.
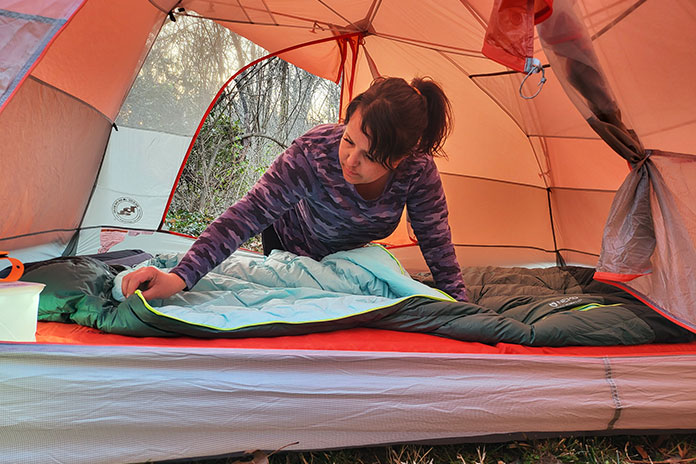
Lucky are those who can sleep through anything. For the rest of us, a sagging sleeping pad or too-puffy pillow can make for a miserable, sleepless night – and fatigue and soreness the next day, which affects your riding.
Try sleeping overnight in your backyard to test out the comfort of your sleeping bag and pad.
One night while camping in the early spring, I discovered that my idea of a comfortable sleeping temperature differed significantly from my sleeping bag manufacturer’s rating. After shivering for an hour in 35-degree temperatures inside my 30-degree bag, I donned every piece of clothing I had, including three pairs of socks and my motorcycle gloves, before I finally fell asleep. Had I tested the sleeping bag at home at that temperature, I could have simply gone inside – and opened a browser tab to order a thermal sleeping bag liner.
Waiting to Wander
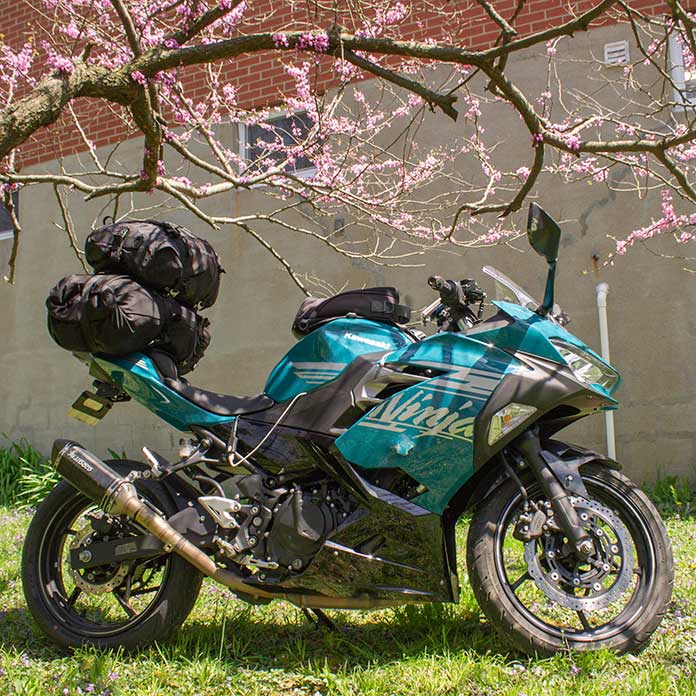
After testing out your gear, packing methods, and camping setup, you might be ready to head out on that long-distance motorcycle trip. While you would be better equipped than you were before the backyard practice, another of my motorcycle camping tips I might offer is that it’s still a good idea to do a shakedown run with your loaded motorcycle and perhaps spend a night at a campsite close to home, especially when trying out new gear or luggage.
It’s also a good idea to pack everything on your bike ahead of time to make sure everything fits and is secure.
I purchased a set of universal-fit Sedici saddlebags for my Kawasaki Ninja 400, and after loading them up, I hit the road. When I arrived at a campground a couple of hours later, I smelled something odd. After examining my bike, I discovered that hot exhaust gas from the muffler had burned a gaping hole in the corner of the saddlebag.
Molten sunscreen and soap were dripping out of the singed tarpaulin, and I knew I wasn’t going to be able to ride home like that – not without my stuff falling out of the hole or being melted or burned on the way. I called my husband and asked him to drive to the campsite so we could load my gear into our truck. Had I tried those saddlebags around town before heading out, I could have saved us both time and hassle.
Don’t think of setting up camp in your backyard as a chore or a waste of time. Have fun and use it as an opportunity to get excited about the adventures to come. Play with your gear, enjoy the outdoors, and if something goes wrong, you can always sleep in your own bed.
Photos by Kevin Wing | Illustrations by Hector Cademartori
As part of the Stayin’ Safe advanced rider training program – a method that leads a small group of experienced motorcyclists on road tours and delivers real-time, real-world coaching via in-helmet communications – I’m often asked by participants to address specific aspects of road riding unique to the region where a training tour is being conducted. As part of our Southern California training tours, I’ve been routinely asked if I would be teaching techniques for safe lane splitting.
Although it is intriguing to consider, I always decline. While I agree it would be a valuable teaching opportunity for that riding environment, I also realize it would be impractical with a group of riders since traffic dynamics change rapidly – as would recommended tactics depending on the bike and the circumstances. But perhaps the bigger challenge would be to get consensus among the riders to do it in the first place. Even if all participants are from California (and they rarely are), there are always distinct and deeply polarized views about lane splitting. Riders are adamantly for it or against it.
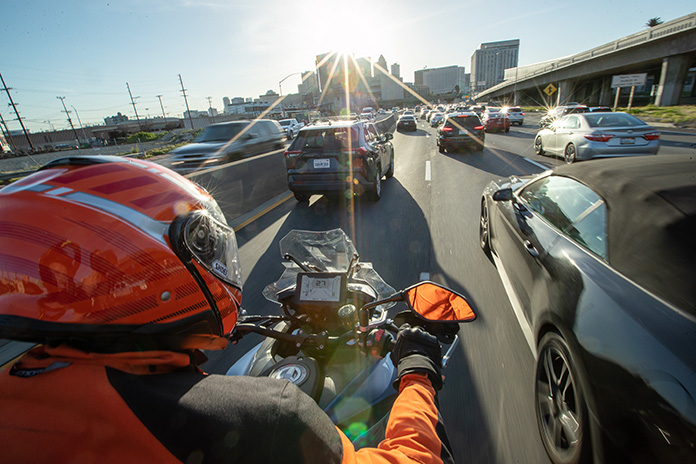
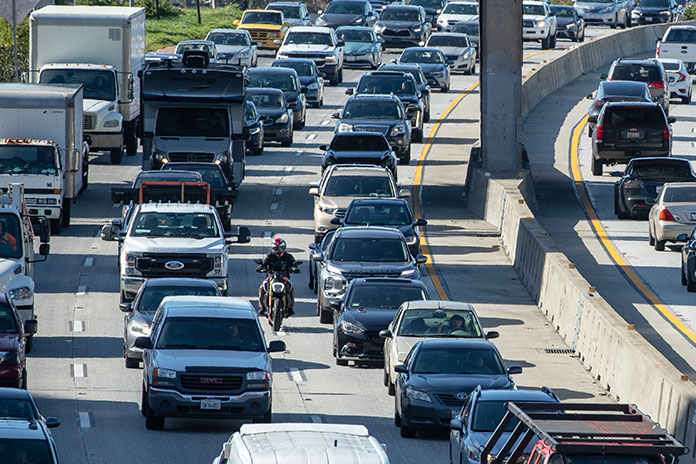
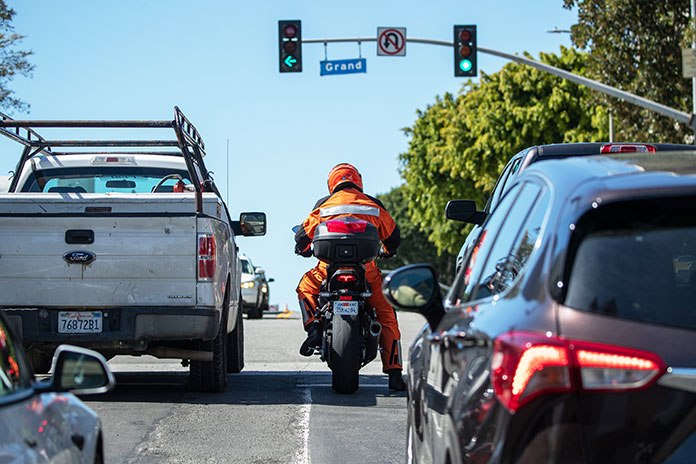
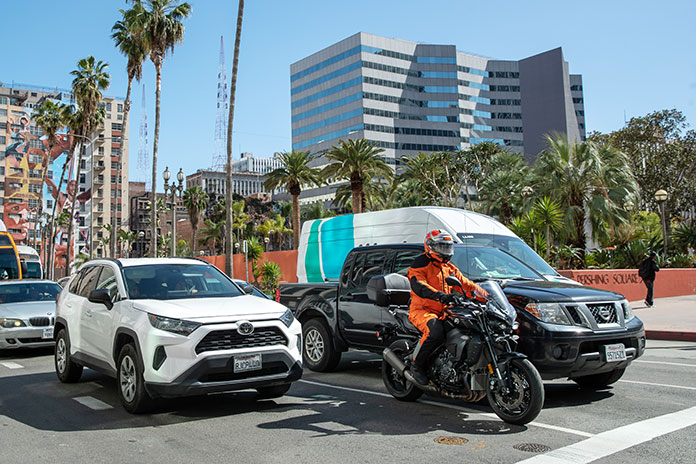
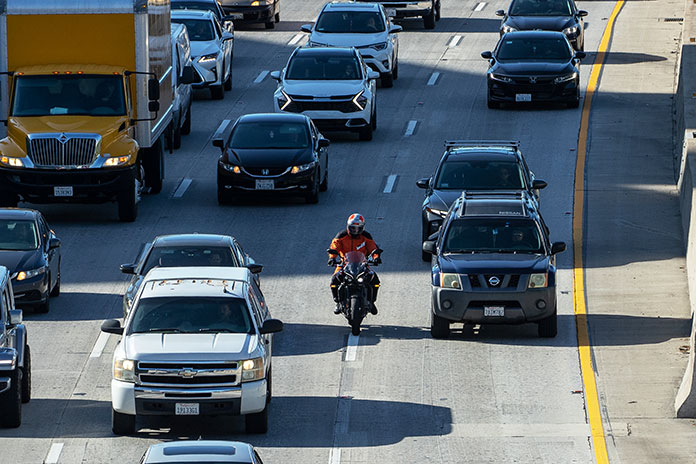
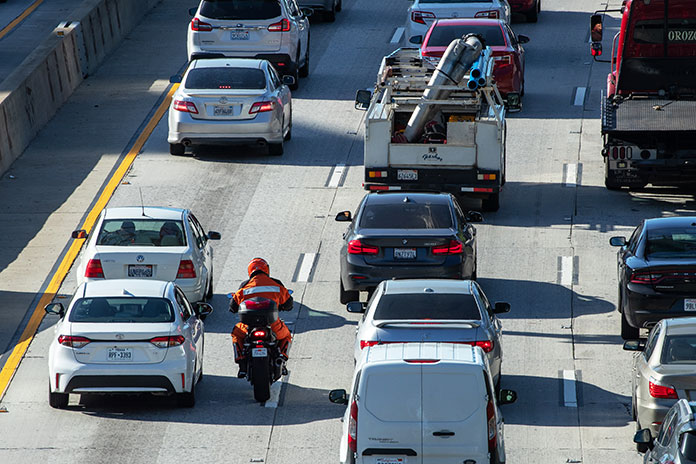
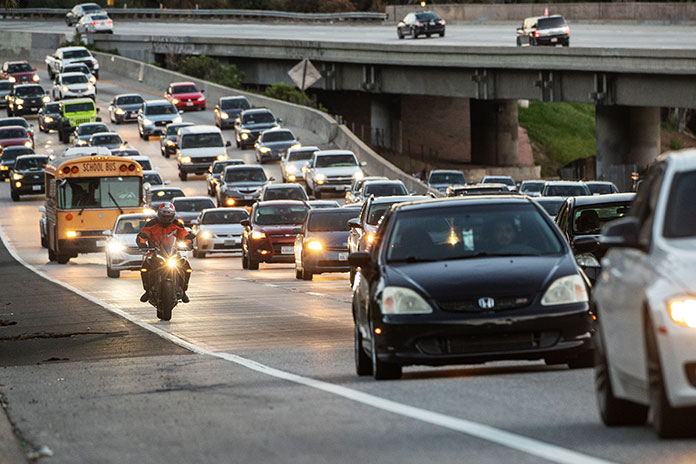
Lane splitting allows motorcyclists to move efficiently through grid-locked traffic while avoiding the risk of a rear-end collision.
The term “lane splitting” gets tossed around outside of California more often these days as several other states – including Utah, Montana, Arizona, and Hawaii – have legalized some form of the practice, while others are considering it. As lane splitting becomes more widespread, the volume of polarized opinions is expanding as well.
But maybe I’m getting ahead of myself. Let’s start by defining what lane splitting is. For starters, it’s not a universal term. “Splitting” is one type of lane sharing motorcyclists have been doing for years on California freeways, but there are other forms (and terms) we should know.
Riding within 10 mph of traffic flow and actively scanning the scene ahead for potential threats, the rider safely advances between lanes.
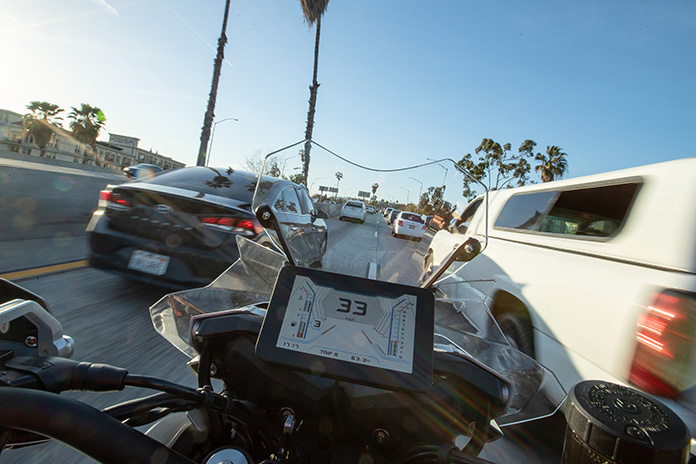
In the broadest sense, lane sharing, lane splitting, lane filtering, white lining, and a handful of other terms are used to describe the act of advancing a motorcycle through slow or stopped traffic on a multilane road (all heading the same direction, of course) by riding between lanes at a slightly higher speed than the flow of other vehicles. That’s it, in a congested traffic nutshell.
Are We Lane Splitting or Lane Filtering?
While “lane splitting” is a term used broadly to describe riding between lanes of traffic, there are distinctions between lane splitting and lane filtering.
When riding on a multilane highway such as a limited-access freeway, a motorcyclist might “split” the lanes and ride between two lines of vehicles if the traffic has slowed or come to a stop due to congestion. That’s what’s specifically referred to as lane splitting.
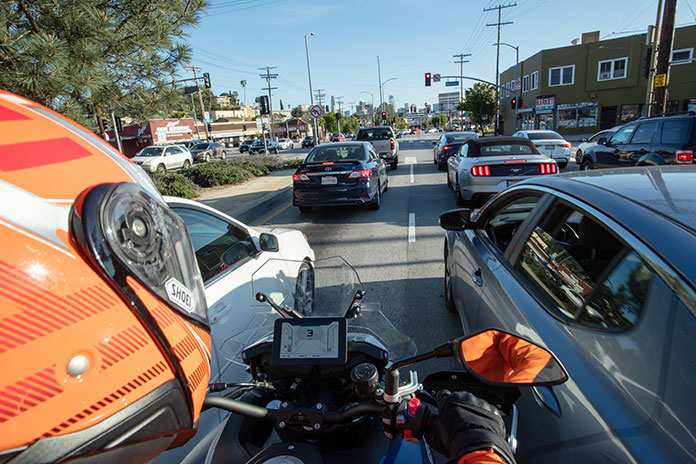
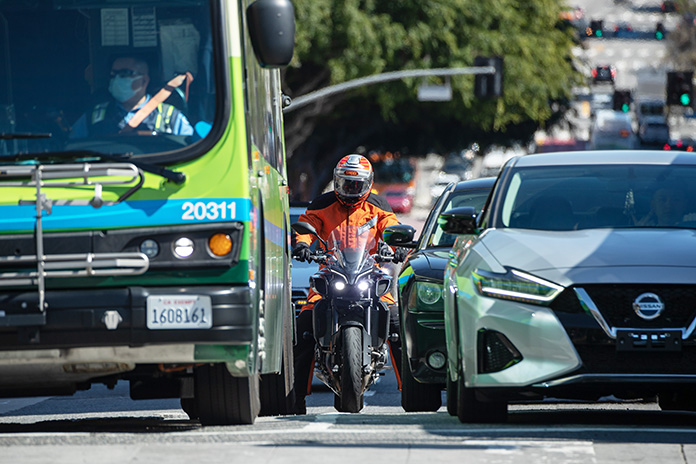
When riding in multiple lanes of traffic where there are intersections and traffic signals, a rider might move forward or “filter” between rows of vehicles stopped at a light, enabling the rider to move to the front of the line. This is lane filtering.
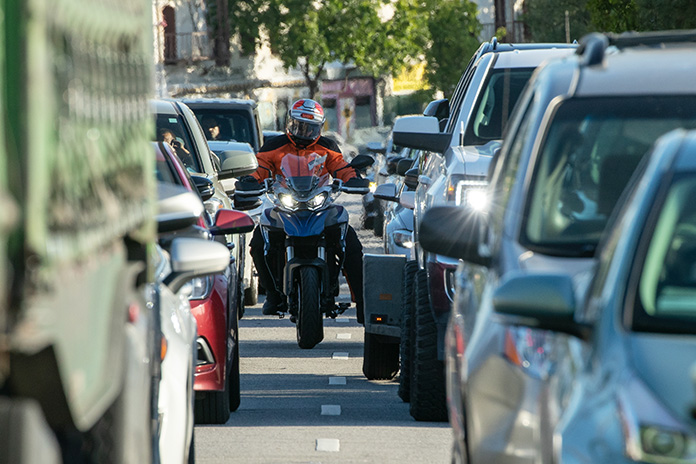
With traffic stopped for a red light, the rider slowly filters to the front of the line.
Why Do It?
The primary argument for lane splitting and lane filtering is that they are deemed safer practices that reduce opportunities for motorcyclists to be rear-ended in high-volume, stop-and-go traffic. Frankly, that’s a pretty strong argument since busy roadways are a high-risk environment for motorcyclists – perhaps even more so as increasingly distracted drivers are putting riders at higher risk.
Lane splitting is also claimed to give riders a better view through traffic as well as improved mobility. It’s contended that it allows riders to see farther ahead, actively separate themselves from threats, and strategically place their bikes in pockets of less congestion.
Lane splitting has been touted as helping to reduce fuel consumption and emissions by minimizing the time motorcycles sit in slow or stopped traffic. It also helps reduce traffic congestion because there are fewer vehicles sitting single-file in traffic lanes.
Does Lane Splitting Reduce Risk?
Yes and no. Motorcycle Lane-splitting and Safety in California, a 2015 study conducted by the Safe Transportation Research & Education Center at the University of California Berkeley, took a good long look into the matter to “increase our understanding of collisions involving lane-splitting motorcyclists and of how lane splitting impacts collision injuries.”
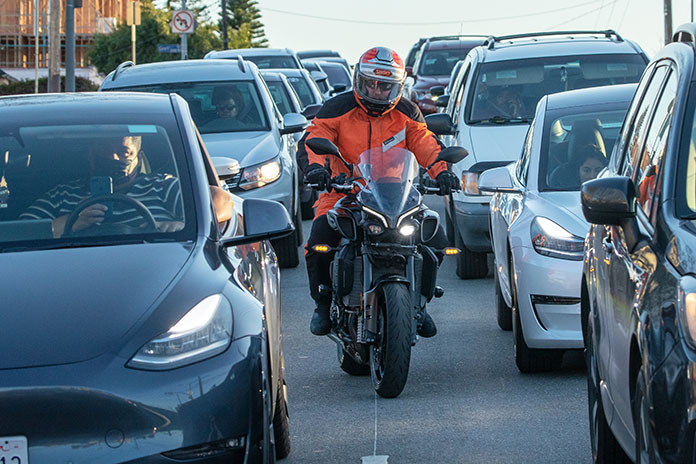
When the light turns green, the rider must quickly scan left and right before proceeding.
The study found that lane splitting appears to reduce certain types of crashes, specifically rear-end collisions. That’s great news. Lane-splitting riders were less than half as likely to be rear-ended than their non-lane-splitting brethren (2.6% vs. 4.6%). Those figures would look even better if some of those riders involved in a collision hadn’t been rear-ended by fellow riders who were following too closely (thanks, bud).
With fewer rear-end collisions, the analysis also showed that lane-splitting motorcyclists involved in a collision were injured less frequently than non-lane-splitters. They were half as likely to suffer a head injury (9% vs. 17%) and about a third less likely to sustain a torso injury (19% vs. 29%). Although fatalities are rare, even those were reduced by more than half (1.2% vs. 3.0%). Again, good news.
But with the good comes the bad (doesn’t it always?).
Lane splitting doesn’t eliminate crashes. Lane-sharing riders just crash differently and not as badly (provided speed is kept to a minimum).
While lane splitting and lane filtering can help a rider escape certain significant threats, it does introduce new ones. For example, there’s a smaller safety bubble. You’ll recall learning in your Motorcycle Safety Foundation or Total Control training course (you took one of those, right?) how important it is to maintain a safety cushion around your motorcycle. Riding between lanes puts motorcyclists significantly closer to other vehicles than they would be otherwise. That can make the rider more vulnerable from both sides (but less so front and rear) since there is less space to maneuver left or right – and therefore less time to react – if a driver makes a sudden move.
Wide handlebars, wide vehicles, and tightly spaced lanes can make filtering a challenge. Choose judgment over impatience when deciding whether to proceed.
The highest risk for any motorcyclist lane splitting in freeway traffic is other vehicles changing lanes. In suburban and city environments, lane filtering riders can find themselves among vehicles unexpectedly maneuvering into or out of traffic.
As a result, while lane splitting may reduce the likelihood of the rider being rear-ended, they are more than twice as likely to rear-end other vehicles (38% of lane-splitting riders vs. 16% of non-lane-splitting riders). That one’s on us.
Beyond the known hazards of riding too fast (surely you’ve heard, “speed kills”), the risk and severity of injury grows when there is an increase in the speed of the motorcycle compared to the pace of surrounding traffic – what’s known as “speed differential.” That speed difference between bike and traffic can play a significant role in causing a collision while lane splitting or filtering.
Perhaps the Greatest Challenge of All…
For the rider who is weighing the pros and cons of lane sharing, a serious consideration should be the low public awareness of lane splitting and the attitudes of other drivers.
Another U.C. Berkeley study from 2014 probed the minds of California drivers and motorcyclists. Even in California, where lane splitting and filtering have been common practices for decades, roughly half of all California drivers either believed that lane splitting was illegal (it wasn’t) or they were unsure about its legality. Such perceptions can contribute to negative attitudes about the practice. That study revealed 61% of non-motorcyclists in the Golden State disapproved of lane splitting.
Do drivers believe lane splitters are unwilling to play by the same rules others must adhere to, or that they are just acting as renegades?
The driver on his cell phone is hugging the center line and unaware of the approaching motorcycle, so the rider adjusts his position as he filters through.
I became particularly curious about the behavior of drivers and the potential impact (figuratively and literally) on motorcyclists as they consider the practice of lane sharing, especially in states where the concept has recently been introduced.
When it comes to driver behavior, I believe there are few better go-to resources than Tom Vanderbilt’s fantastic, well-researched book, Traffic: Why We Drive the Way We Do (and What It Says About Us). The author addresses the physical, psychological, and sociological aspects of traffic and how drivers, as human beings, interact with each other. I reached out to Vanderbilt to get his take on the potential challenges associated with introducing a practice like lane sharing into the general traffic environment.
“I am well aware of a dynamic that I am sure affects motorcyclists a lot, which I’ll call an ‘empathy imbalance,’” he said, defining the term as the phenomenon whereby people who drive cars may be unable to relate to motorcyclists since most car drivers don’t ride motorcycles and are unfamiliar with – and therefore unable to empathize with – the two-wheeled mode of transportation.
“So often drivers simply don’t understand the motives or behavior of the other mode,” Vanderbilt continued, “and they often translate their own confusion to some failing on the part of the other user. What might seem like rational or safe behavior on the part of a motorcyclist may seem reckless or like ‘cheating’ to a driver, who simply sees some ‘other’ they don’t fully understand.”
Vanderbilt’s advice? “Don’t think that your view of what is ‘commonsense behavior’ is shared by everyone around you.” In other words, until the practice is more common and drivers see enough people doing it – to a point where it no longer seems like strange and rebellious behavior – we should assume that lane splitting will be out of the norm for other motorists and may be viewed as unacceptable traffic behavior.
Stopped between lanes, the rider is in a tactical-ready stance, with the bike in gear and ready to go when the light changes.
The “empathy imbalance” is a compelling way to capture the mindset gap that exists out on the roadway and how that imbalance could be a chasm the size of the Grand Canyon in states where neither lane splitting nor lane filtering have ever been routine behavior. When it comes to lane sharing, especially where the practice is just being introduced, that empathy imbalance may be the greatest threat of all to motorcyclists.
Sidebar: What do Lane Splitters Look Like?
While some folks might expect lane splitters and filterers to be wild-haired outlaw rebels without causes, research paints a different picture. Contrary to the ruffian image, research reveals that lane splitters tend to be:
Regular commuters riding during weekday commuting hours
Wearing proper riding gear, including full-face helmets
Riding solo and riding sober
Splitting lanes only when traffic is at 30 mph or below
Can Lane Sharing Be Done Safely?
According to the U.C. Berkeley study, lane splitting and lane filtering appear to be relatively safe strategies and practices provided they are done in traffic traveling at 50 mph or less and motorcyclists stay within 15 mph of that traffic. Lower traffic speeds and a smaller speed differential between the bike and surrounding vehicles make it even safer.
The Motorcycle Industry Council (MIC), American Motorcyclist Association (AMA), National Highway Traffic Safety Administration (NHTSA), and Motorcycle Safety Foundation (MSF) all align in support of lane sharing as a safe strategy. The American Automobile Association (AAA), on the other hand, opposes the practice.
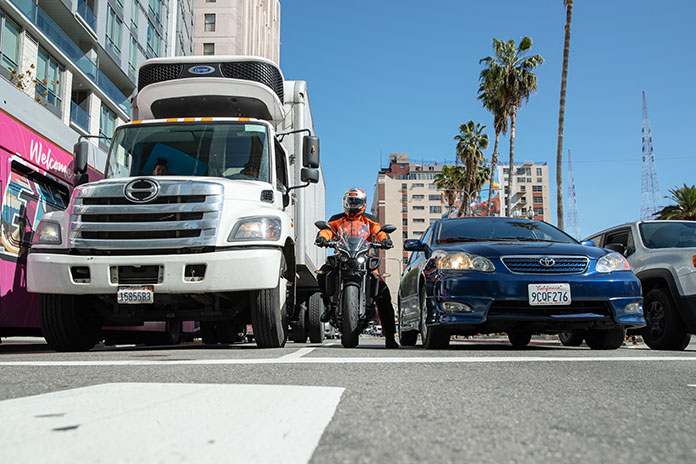
Avoid filtering beside large trucks and buses. This rider paused in a safer spot to avoid blind spots and the potential of the bus swinging wide.
Beyond these authorities, I turned to another trusted source in California, my friend and fellow motorcycle proficiency expert Lee Parks. Among his many credentials, Parks owns and operates Total Control Training Inc. and authored the best-selling book Total Control: High Performance Street Riding Techniques. He also runs the rider training program for California and several other states. I asked Parks for his take on lane splitting.
“Having moved here in 1992, I can’t imagine living in another state that didn’t have lane splitting,” he said. “It’s safer, saves time, reduces the chances of getting rear-ended by other road users, and reduces the travel time for everyone by taking riders out of the long lines of traffic.” Parks shared how, for him, a two-hour commute by car became a manageable 45-minute ride by motorcycle.
Is lane splitting for everyone? Parks and I share the same opinion, but he articulates it better: “It’s good for any experienced rider who has excellent situational awareness. Lane splitting is not for the faint of heart, nor those new to riding. It requires an extreme amount of focus and attention to be safe, and all riding functions must already be in your muscle memory so they don’t take away from your awareness.
“I’d add that lane splitting is only safely manageable for someone who is not impaired in any way. This includes drinking, drugs, fatigue, or being mentally distracted.”
Safer Splitting and Friendlier Filtering
Whether you’re new to the practice or have been lane splitting or filtering for years, here are things you can do to improve your odds while improving your position in traffic.
First, stick to these two speed factors when lane sharing:
1. Traffic speed is slow or stopped. The faster traffic is moving, the greater the risk of incident and injury. Choose to filter past other vehicles only when traffic is moving below 50 mph, and the slower the safer.
2. Your speed is within 10-15 mph of traffic. A small speed differential is safer. By keeping your own speed close to that of traffic, you buy critical time and space to respond to emerging threats. Work the physics in your favor!
Apply these techniques each time you move between lanes:
Look farther ahead, widen your view, and anticipate vehicles changing lanes.
Be “tactical ready,” poised to smoothly slow down or maneuver as necessary.
Stay to the left-most lanes on highways when lane splitting (between lanes #1 and #2).
Don’t linger in blind spots.
Beware of gaps that might invite other vehicles to change lanes just as you arrive.
Avoid splitting lanes near entrance and exit ramps (it’s illegal in California).
If riding with others, keep a safe distance between bikes to avoid rear-ending your buddy (or being rear-ended).
Lane-splitting riders must stay vigilant, especially when approaching gaps in traffic where a vehicle can suddenly change lanes.
Lane-splitting riders must stay vigilant, especially when approaching gaps in traffic where a vehicle can suddenly change lanes.
Of course, there is still the concern of other drivers and their response to lane-sharing motorcyclists, especially in states where the practice is not the norm. Until it is, riders should anticipate pushback from other motorists. Perhaps the best way to minimize that is to promote goodwill by being respectful, courteous, and empathetic to the other drivers who remain stuck in traffic (we’ve all been there).
Should You Do It?
It’s a personal choice – don’t ever let someone else force a lane-splitting decision for you. If you are still on the fence, here’s a little more filtering food for thought:
Not all motorcycles are created equal. While lane sharing is practiced by riders of all types, it is easier on a narrower, lighter machine. Remember, the wider your bike, the less space cushion you have as you filter between rows of cars, SUVs, trucks, and buses.
Not all riders are created equal. Experience riding in heavy traffic, ability to maneuver a motorcycle confidently at very slow speed, and maintaining a calm mind to avoid panic are important aspects of riding a motorcycle between lanes of congested traffic. Make an honest assessment of your own riding proficiency before attempting to split lanes.
Motivation matters. Lane sharing can be a valuable safety strategy to avoid rear-end collisions, and it can make commuting more efficient for all. But if your motivation is driven by impatience, resentment of other drivers who are holding up your progress, or simply because it seems that splitting might be an adrenaline rush, it may not be the best choice for you (it doesn’t do much to help driver attitudes toward the rest of us either).
Where is Lane Splitting and Lane Filtering Legal?
Even if you are willing, lane sharing is still only a legal practice in a handful of states – and to varying degrees. Lane splitting on multilane highways? That’s still only legal in California. Yep, that’s it. Lane filtering in stopped traffic can now be done to some extent in Arizona, Hawaii, Montana, and Utah, but each state has distinct restrictions (see sidebar below).
If you’re the gambling type, the states of Delaware and Arkansas don’t have legal language that expressly prohibits lane splitting and filtering, but they do have an abundance of law enforcement officers who are authorized to interpret what a “safe and legal” practice is on a case-by-case basis.
Lee Parks said he believes the challenge in new states will be educating the car drivers more so than the riders.
“It will require a lot of public service announcements and driver education to make it as accepted and ubiquitous as it is in California,” he said. “The successes and failures of those states will help drive policy for new ones to adopt one of my favorite benefits of riding in California.”
A summary of current state laws specific to lane splitting and lane filtering
California: The only state where lane splitting and lane filtering on multilane roadways are both legal practices.
Arizona: Motorcyclists may ride between lanes of stopped traffic at a red light on a multilane roadway where the speed limit is 45 mph or less and the rider is traveling no more than 15 mph. No passing on median or shoulder.
Hawaii: Riders are permitted to use the shoulder of the road to pass stopped traffic on roads with at least two lanes in each direction and a shoulder wide enough to accommodate the rider.
Montana: Riders may filter between lanes to overtake stopped or slow vehicles traveling no more than 10 mph provided that the motorcyclist stays within 10 mph of surrounding traffic and does not exceed 20 mph.
Utah: Motorcyclists may travel between lanes of stopped traffic (not slow-moving traffic) on a multilane road having a speed limit of 45 mph or less. Motorcyclists may not exceed 15 mph and may not use the shoulder or bike lanes.
My Take?
Beyond being asked by Stayin’ Safe training tour participants if I would be teaching real-world tips and techniques for safer lane splitting and lane filtering, I’m most often asked for my professional opinion on the practice. “It’s great,” I say, followed by, “and it’s not.” Practiced responsibly, it can be an effective way to avoid collisions and severe injury. When practiced irresponsibly, it can be perilous for the rider and, at a minimum, harmful to driver/rider relations.
Even after examining the data, hearing the opinions of experts, and weighing the significant pros and cons presented here, a consensus may remain elusive. When it comes to splitting lanes and filtering through traffic, it might always be a split decision among riders. Fortunately, we all have the personal option to do it or not do it. As for me, I split lanes where it is legal to do so, provided the environment, my equipment, and my state of mind are suited for it.
Now, if you’ll excuse me, I have an appointment and traffic is heavy, so I think I’d better split.
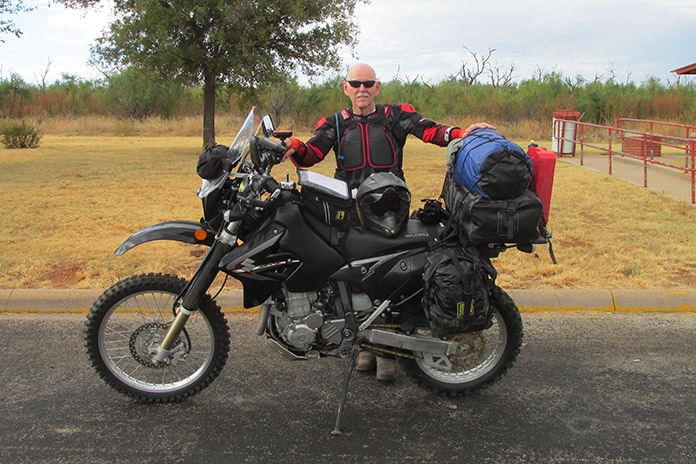
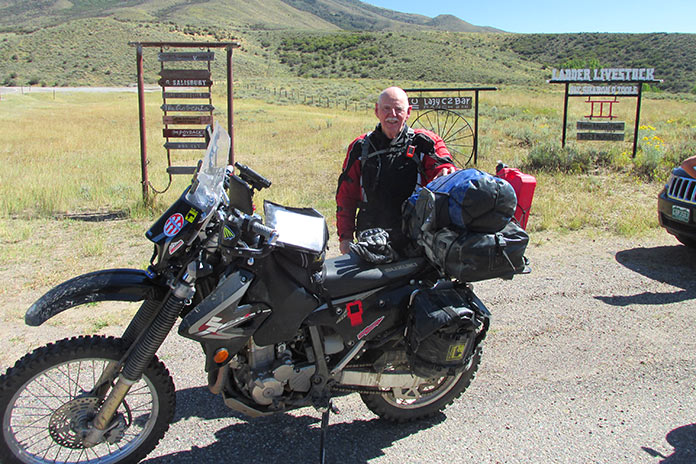
Call me crazy, but in the past decade I’ve ridden solo for half of the TransAmerica Trail, three Backcountry Discover Routes (Colorado, Idaho, and New Mexico), the Oklahoma Adventure Trail, and the Lone Star Loop.
Motorcycle forums often have threads debating the pros and cons of riding solo off-road. Some think it’s foolish; others think it’s the only way to ride. When you’re on your own in the backcountry, help may not be readily available if you need it. But there are also benefits to solo adventures – as long as you use some common sense.
Riding with like-minded friends is great, but the more riders, the more logistical complexity due to different schedules and preferences for meals, lodging, etc. Then there’s the ride itself – when to get started each day, how far to ride, and where and when to stop. One of the key advantages of a solo ride is its simplicity. You’re the boss. You’re the only one who makes decisions (and has to live with them). Take breaks, take more photos, stop and smell the roses – it’s up to you.
Another advantage for us older guys is that it beats not riding. For me, I either ride solo or I don’t ride at all. I’m 75, and most of my friends have quit riding off-road for various reasons. And younger guys with jobs and families often don’t have the flexibility to go for a ride on a Tuesday or to take a couple weeks off for a long trip.
Some would argue that you can’t share the adventure with anyone if you ride alone. My solution is to take lots of photos and record descriptive audio notes on my smartphone throughout the day. Once back home, I convert these into a printed ride report to share with family and friends.
Motorcycle Tips for Off-Road Riding Alone
Communicate: You should always let people know where you will be riding, but that’s not enough. You should also carry a Garmin inReach or SPOT satellite tracker/communicator that includes two-way text messaging. Carry it on your person at all times since it won’t do you any good if it’s on your bike 50 feet down a ravine. Establish a periodic check-in routine via your mobile phone or tracker with those aware of your ride. Ask someone to periodically check your tracker “share page” with the understanding that if your last track point hasn’t moved in a few hours and you haven’t messaged, you probably need help. In addition, they should have the appropriate number to reach search and rescue.
Plan Your Route: Choose routes that are within your skill set. GPS tracks are great, but paper maps are good as a backup and to familiarize yourself with “bail out” routes. In case of an urgent situation, such routes provide the shortest path to pavement or nearby towns. Paper maps also give you the big picture, so during your ride, stop occasionally and figure out exactly where you are.
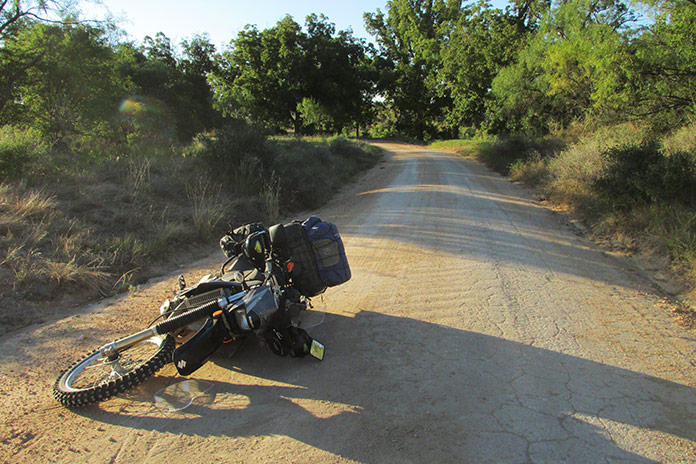
Ride the Right Bike: When riding solo off-road, it’s critical that you’re able to pick your bike up by yourself when (not if) you drop it. Most of us have seen demonstrations of 100-lb riders picking up 800-lb motorcycles by crouching down with their lower back against the seat, holding the handlebar and the rear fender, and “walking” the bike upright. It’s a valuable technique to know and practice. In off-road situations, you may be in sand, gravel, or some other challenging situation, so I also carry a strap that I can hook under the bike to adjust my lifting position. When you’re off-road, a lighter motorcycle is always better in terms of maneuverability and the ability to pick it up, which you may have to do multiple times.
The author and his Suzuki DR-Z400 dual-sport.
Your bike should also be well-maintained in terms of tires, chain, brakes, bolt tightness, lights, battery, fuel, cables, etc. Know your bike and how to troubleshoot common problems. Carry a comprehensive toolkit and be able to fix a flat. Even if you have a range of 200 miles, carry a RotoPax or other auxiliary fuel container.
Protect Yourself: Riding solo means ATGATT (All The Gear, All The Time). If you fall when you’re alone, quality safety gear may determine whether you ride the bike out or are flown out in a helicopter (with a costly bike recovery). A good helmet, armored apparel, durable gloves, and adventure/off-road boots are necessities. Carry a hydration pack, extra snacks, sunscreen, a first-aid kit, and basic emergency supplies.
Ride Smart: Everyone’s instinct for self-preservation has a different calibration, but when riding solo off-road it’s better to err on the side of caution. If you come to a section and hear a warning bell in your head, consider turning around for an alternate track. Get a “Ride Right” sticker from RideBDR.com and make it standard practice. Riding far right on dirt roads, over hills, and around blind curves has saved me many times. Cover the front brake lever with at least one finger and practice emergency stops. Keep your mind focused on your ride and your speed appropriate for visibility. Obey rules and laws, stay off private roads, and slow down around houses and livestock.
Stuff Happens: What should you do if you get hurt or stranded? Don’t panic! Assess and evaluate. Check for injuries, check the bike for rideability, consult your map, and weigh your options. Carefully consider: “Do I ride, do I walk, or do I wait?”
If you hanker for adventure and long to see what’s over the next hill, a solo off-road ride may be just what you need.
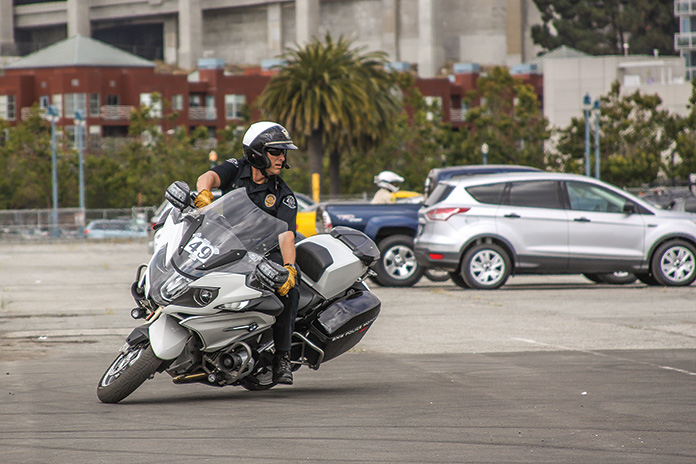
Motor officer Quinn Redeker is a master of rear brake control. Photo by Greg Drevenstedt.
Rear brakes aren’t a hot topic in today’s motoverse, nor are they necessarily among the most sought-after motorcycle tips. In fact, they’re kind of boring when the front binders on modern bikes provide so much stopping power, often with a single finger on the lever, but they’re still important.
According to the Motorcycle Safety Foundation, front brakes provide approximately 70% of a motorcycle’s maximal stopping power, leaving around 30% to the single rear brake. But many factors affect this ratio, such as speed, tire grip, road surface, road gradient, and type of motorcycle. Cruisers and touring bikes with long wheelbases benefit from rear braking to a greater degree than short-wheelbase motorcycles like sportbikes.
Hard braking at the front can lighten the rear end so much that it can be hard to take advantage of whatever percentage of braking is available back there. That’s a lesson I hadn’t learned yet when my ’83 Suzuki GS750ES, which had some serious stoppers, was new.
When used correctly, the rear brake improves control and stopping distance and also helps negotiate U-turns quickly and safely.
My enlightenment came later with my ’87 Kawasaki KLR650, a venerable dual-sport notable for its large gas tank and weak single-disc stoppers at both ends. Having to use both binders to effect a short stop was a (not quite) crash course in rear brake use. Only then did I realize that doing so also attenuated dive and recoil from the KLR’s long-travel front suspension, keeping the bike closer to level throughout the stop.
This “Aha!” moment was a breakthrough in both stopping and overall control. Riding my Honda VFR750F at CLASS, Reg Pridmore’s track-based safety course, only reinforced that lesson. I wasn’t the fastest or the smoothest student rider, but when it came to the braking exercise – which required using both brakes – 19 years aboard KLRs had me stopping like a pro.
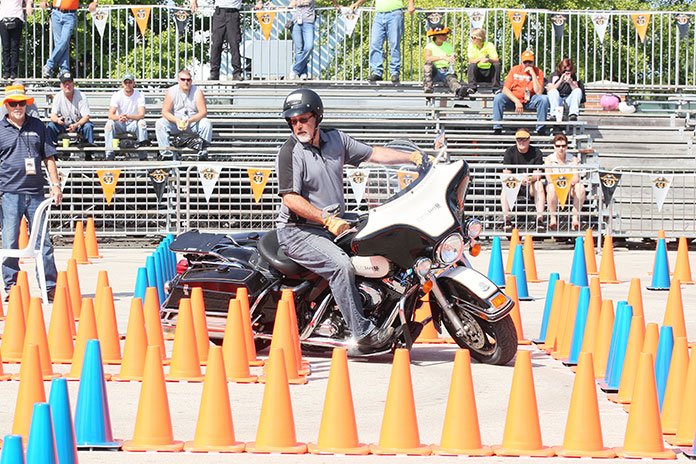
Skills expert (and regular Rider contributor) Eric Trow competing in a police-style precision riding competition. Precise rear braking technique is essen-tial for maintaining control and balance. Photo courtesy Harley-Davidson.
To prove the value of the rear brake to yourself, practice emergency stops (full braking power but without locking either wheel or engaging the ABS) with only the front brake, and then with both. When both brakes are applied, the bike should squat, pitching less at the front. The longer your front suspension travel, the bigger difference it makes. (On Telelever-equipped BMWs and other motorcycles with suspension systems that minimize front-end dive, the change in chassis pitch will be less noticeable.) The same technique but with a lighter touch on both brakes will give you more secure stops on loose or slippery surfaces.
Turn It Around
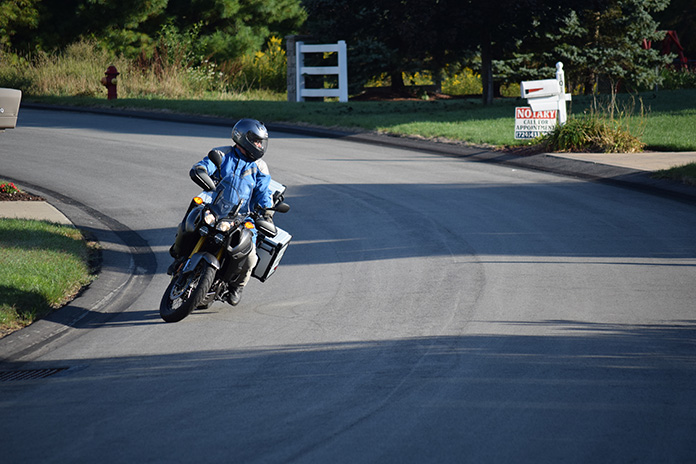
We’ve all missed a turnoff, forcing us to make a U-turn to get back on course. Performing one without putting a foot down – or worse, having to stop, back up, and take another stab at it – is a skill we should all master. I learned better technique doing test bike photoshoots for Rider, which require numerous U-turns, often on narrow roads, to get the right shot.
For U-turns, use light pressure on the rear brake, keep the clutch in the friction zone, and look where you want to go. Photo by Pete Tamblyn.
The key is to apply light pressure to the rear brake through the turn. The benefits are two-fold: shortening your bike’s turning radius and damping any unintended throttle inputs.
Practice in a parking lot, gradually reducing the number of parking spaces it takes to turn around. Just remember that it’s a light touch on the rear stopper; too much and you risk a fall. Keep your eyes up and look where you want to go, and keep the clutch in the friction zone for delicate power control. Also, keeping your feet on the pegs and weighting the outside peg yields the best results.
With practice, using the rear brake at slow speeds makes your U-turns steadier, faster, and safer.
Driveway Moments
You’re pulling out of a driveway, front wheel cocked, when a car appears from behind parked vehicles. While still on the driveway apron, you tap the front brake, which immediately pitches the bike in the direction of the turn. Quick thinking and a strong leg may keep it upright.
Using the rear brake when stopping before a turn keeps the bike from leaning unexpectedly on uneven surfaces. Photo by James Norris.
Next time, try using the rear brake as you reach the driveway apron. If you have to stop, use only the rear brake, which won’t make the bike pitch sideways since the rear wheel doesn’t affect steering or balance. The safest way to prove this to yourself is on a bicycle, where mistakes have milder consequences. Move up to a motorcycle when you’re confident with the technique.
By using these tips, the back brake may become your new best friend.
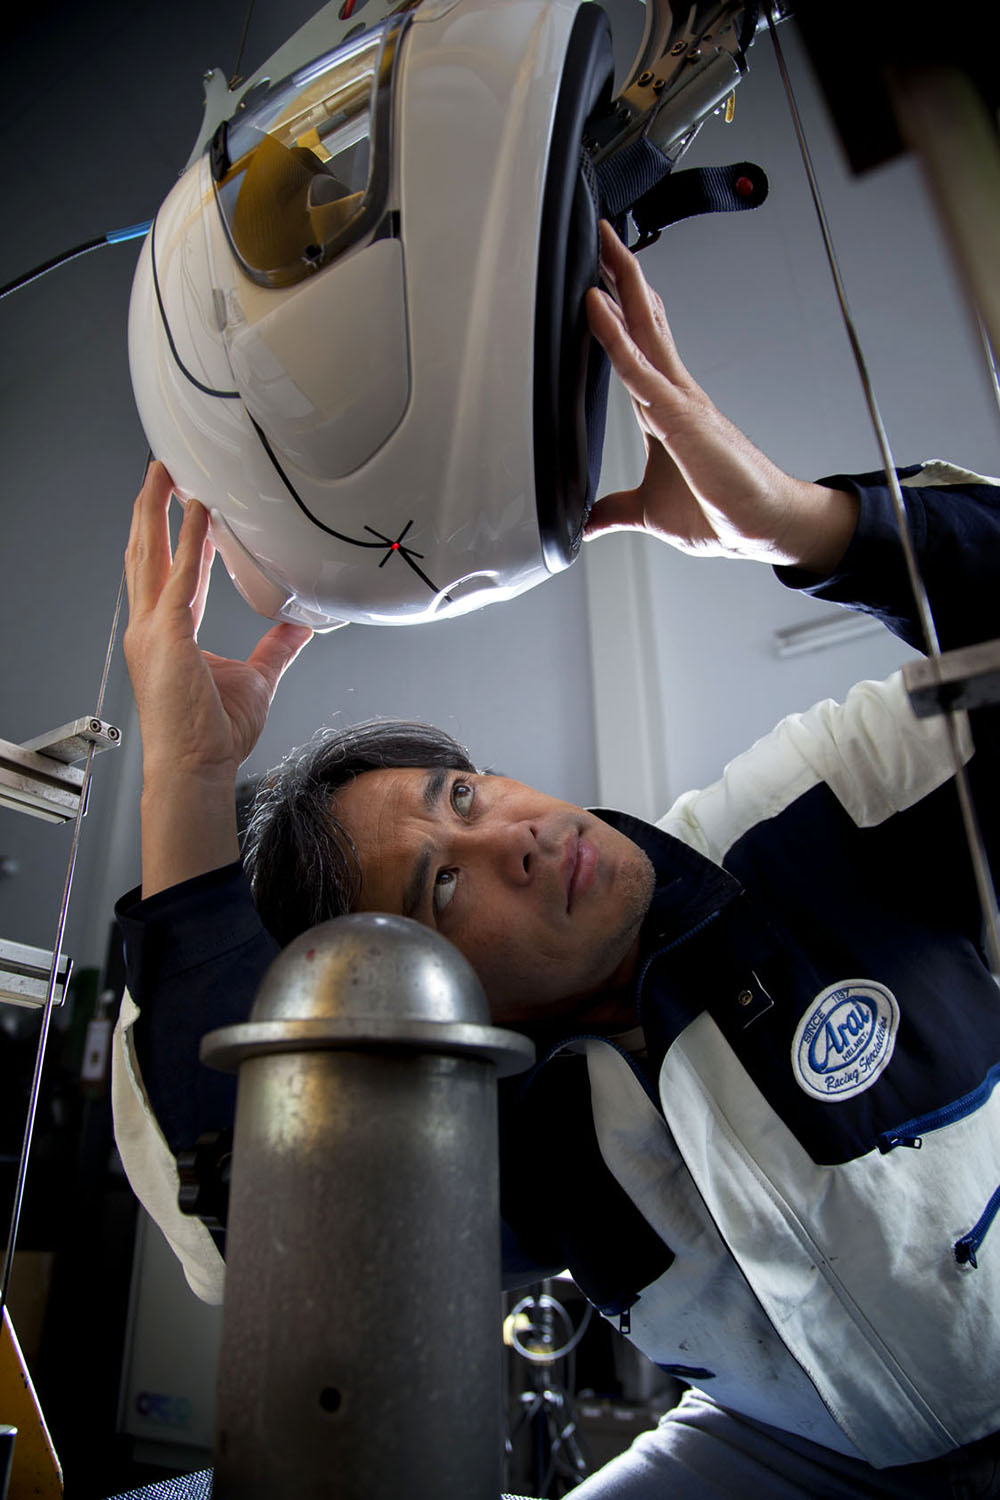
Akihito Arai pictured at the Arai factory in Japan.
In 1914, a doctor practicing near the Brooklands racetrack in England first correlated the relationship between motorcycle accidents and serious head injuries. Dr. Eric Gardner went on to invent the first purpose-built motorcycle helmet. It wasn’t until two decades later, when a head injury resulting from a motorcycle accident took the life of Thomas Lawrence, better known as Lawrence of Arabia, that the first serious studies were conducted into the efficacy of motorcycle helmets in reducing the severity of head injuries. Hugh Cairns, Lawrence’s attending doctor and a leading neurosurgeon, used his findings and influence to ensure that helmets would become obligatory equipment for British Army Signal Corps riders going forward.
Early helmets were mostly constructed from cork, leather, and sometimes wood, and remained so until post-war developments in synthetic materials lead innovators such as Hirotake Arai to develop an entirely new design. Arai, a keen motorcyclist, had retooled his family hat business to produce safety helmets for construction workers. Applying the same manufacturing techniques, he began making and selling the first Japanese motorcycle helmets in 1952. They were made from a fiberglass resin outer shell lined initially with cork, and later, expanded polystyrene (EPS).
Seven decades on, motorcycle helmets, along with a multitude of international standards, have evolved exponentially, as has our understanding of science. Nonetheless, the infinite number of variables existing in a real-world crash ensure that even the most sophisticated models used to gauge a helmet’s ability to absorb an impact will remain controversial. While tests aimed at appraising shell penetration, peripheral vision, and the strength of chin straps lend themselves more readily to laboratory observation, governing bodies are forced to compromise in the face of producing practical, repeatable tests that accurately simulate impact absorption.
An Arai factory engineer utilizing an ‘anvil test’ rig on a helmet shell.
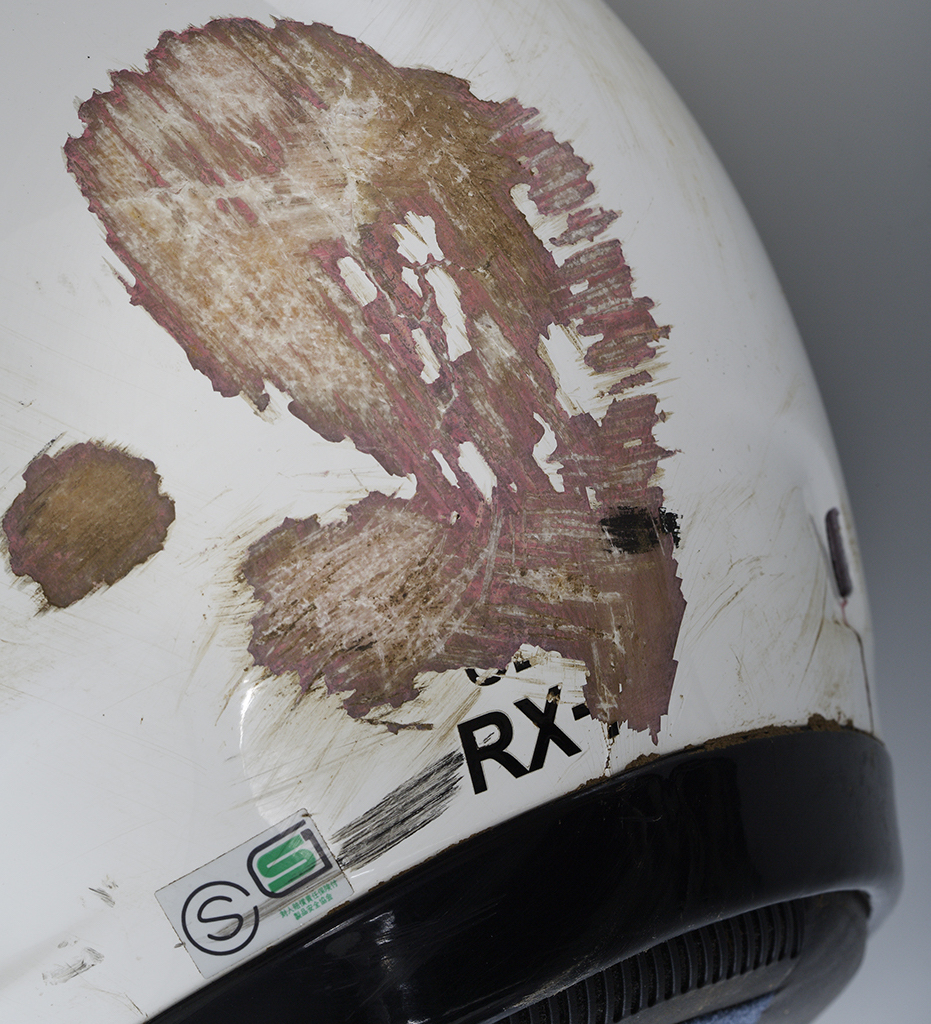
An effective helmet design aims to minimize the energy reaching the wearer in a crash, and since much of the testing involves dropping helmets from a given height onto an anvil, passing the resulting standards can be as simple as thickening the EPS layer in all the right places. Arai argues that the resulting helmet would no longer possess the overall strength and durability afforded by a sphere and ignores the role a helmet plays in redirecting and absorbing energy. In the same way a stone can be made to skim across a pond, a round, smooth helmet will glance off a surface, redirecting energy away from the wearer.
Arai’s design philosophy first accepts that practical limitations on a helmet’s size and weight restrict the volume of protective EPS foam it can contain. Inevitably, helmets can’t prevent all head injuries. But, with the understanding that safeguarding a rider’s head goes far beyond meeting the demands of governing bodies, Arai applies the “glancing off” philosophy to design helmets that reduce the effect of impacts on riders’ heads. Given that most impacts are likely to occur at an oblique angle because motorcyclists are moving at speed, Arai’s design aims to maximize the ability of a helmet to redirect energy by glancing off an object. The design is a function of shape, shell strength, and deformation characteristics that absorb energy along with EPS.
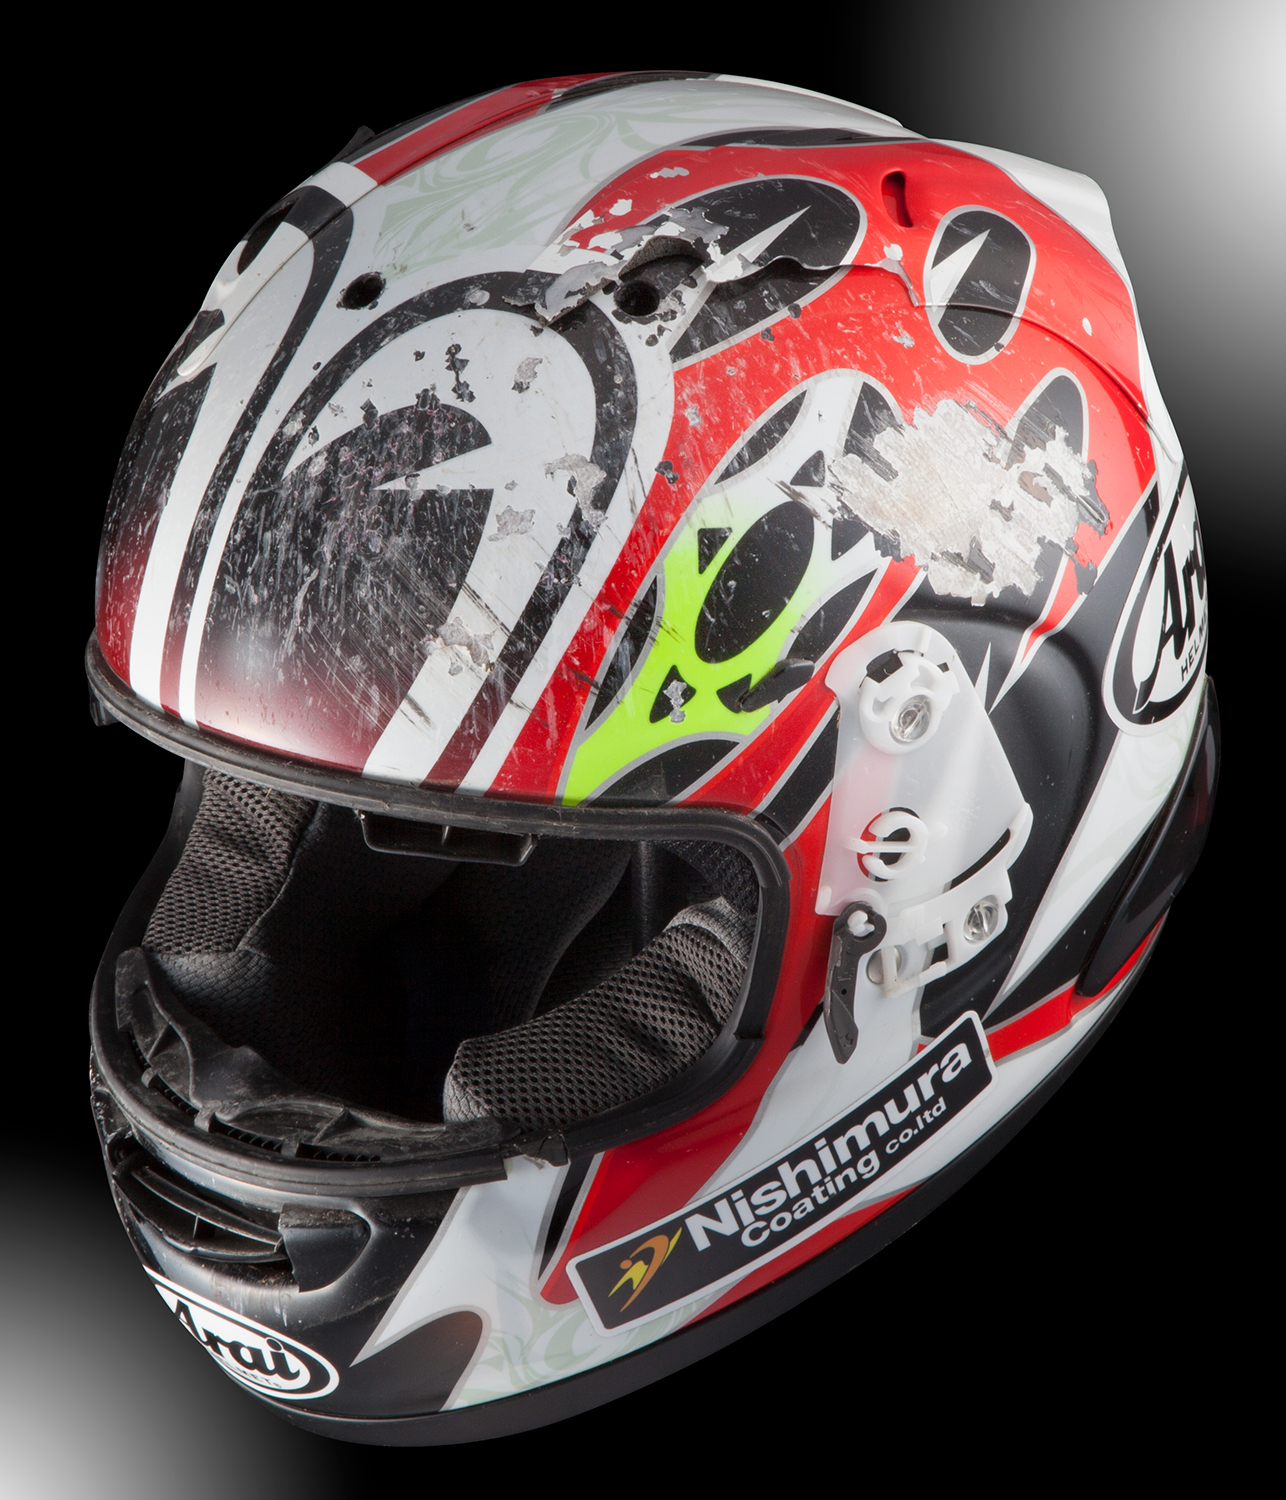
Arai collects crashed helmets for analysis and data collection, and uses the information to continually refine their helmet design.
Arai has developed and refined its approach through decades of evaluation and experimentation. Its helmets are round and smooth, and any protruding vents or airfoils are designed to detach on impact. The shell itself must be strong and flexible, but it must not deform too quickly or it will dig in rather than glance off. Arai uses multiple laminated layers combining glass and composite fiber to produce a very strong but lightweight material, and areas of potential weakness at the helmet’s edge and eyeport are reinforced with an additional belt of “super fiber.” Arai says its shells can withstand much higher abrasion than what is mandated by standards tests, and in doing so, can retain its energy absorption properties for a second or third impact.
Every Arai helmet is still made and inspected by hand at the family-owned factory in Japan
While glancing off can redirect energy from the impact, a high-velocity crash may also require a helmet to absorb and distribute impact energy. Arai’s proprietary one-piece, multi-density EPS liner is made up of different sections of varying densities corresponding to the adjacent shell surface. This helps maintain the helmet’s spherical form and enhances its ability to glance off. In the case of a crash involving a slide along the ground and into an object, such as a curb or barrier, Arai’s helmets are designed to deflect the initial impacts with the ground with minimal shell deformation, saving its absorption properties for the rapid deceleration caused by impacting the object.
While glancing off can redirect energy from the impact, a high-velocity crash may also require a helmet to absorb and distribute impact energy. Arai’s proprietary one-piece, multi-density EPS liner is made up of different sections of varying densities corresponding to the adjacent shell surface. This helps maintain the helmet’s spherical form and enhances its ability to glance off. In the case of a crash involving a slide along the ground and into an object, such as a curb or barrier, Arai’s helmets are designed to deflect the initial impacts with the ground with minimal shell deformation, saving its absorption properties for the rapid deceleration caused by impacting the object.
Each helmet shell undergoes a series of quality control checks before continuing through the production process.
Many other helmet manufacturers and philosophies exist, and riders must make their own conclusions in the knowledge that certification requirements mandated by bodies such as the DOT and ECE only guarantee a minimum standard. Every Arai helmet is still made and inspected by hand at the family-owned factory in Japan; the only automated process is the laser cutting of the eyeports. Over its history Arai has built an enviable reputation for quality and attention to detail. As the saying goes, it is expensive for a reason.
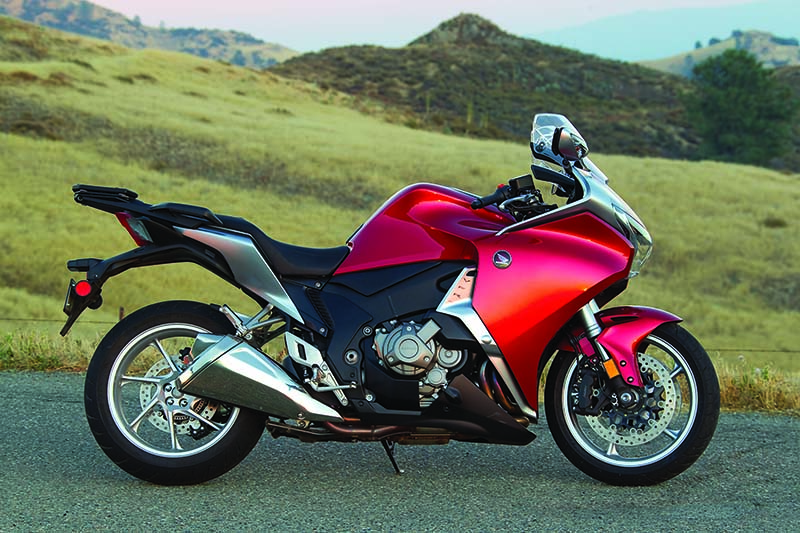
A cutaway of the Honda VFR1200F’s engine is color-coded to show the 1-3-5 gears, clutch pack and solenoid valves in red and the corresponding setup for gears 2-4-6 in blue. Dual clutches allow rapid-fire, nearly seamless gear changes. (Tech images/illustrations courtesy of American Honda)
The age of the Dual Clutch Transmission is not approaching, it’s already here. If you happen to be comparison shopping Ferraris, Lamborghinis, or McLarens to fill out your garage, you won’t find a stick shift in the bunch, just DCTs. But for now, Honda is the sole motorcycle manufacturer offering this option.
First introduced for 2010 on the VFR1200F, Honda’s 2021 lineup offers seven distinct models with an optional DCT: three versions of the Gold Wing, two versions of the Africa Twin, the NC750X, and the new Rebel 1100. For the 2019 and 2020 model years, across Gold Wing, Africa Twin, and NC750X models, half the units sold were equipped with DCTs. And when you include Fourtrax ATVs and Pioneer and Talon side-by-sides, Honda obviously has a whole lotta DCT goin’ on.
Honda’s Dual Clutch Transmission debuted as an option on the 2010 VFR1200F. (Photo by Kevin Wing)
In our road tests we’ve discussed the benefits of having a DCT along for the ride. Even if you absolutely insist on manual shift for your own machines, you gotta admit an automatic transmission opens the door to many new riders — and that’s always a good thing for our sport. Without clutch and shift levers, there are fewer controls to operate, allowing beginning riders to stay focused on throttle control, braking, leaning and staying out of harm’s way. They can also avoid the frustration of stalling or not finding neutral. Grizzled riders may scoff that such are the dues one must pay to learn to ride a motorcycle, but the fewer barriers to entry the better.
Illustration shows the shaft-in-shaft configuration of the dual clutches, as well as the odd (1-3-5) gears and clutch in red and even (2-4-6) gears and clutch in blue.
Since we’re only gonna find more DCT options down the pike, let’s learn more about how it works. First, understand that this system does indeed use two clutches rather than just one hanging off the end of the transmission input shaft. Honda’s DCT setup positions a pair of clutches in a shaft-in-shaft configuration: a hollow outer shaft and a second one that runs inside it (see illustration 1). One clutch carries odd-numbered gears (1, 3, 5, plus 7 on Gold Wing models) while the other carries even-numbered gears (2, 4, 6).
On the Gold Wing models, the DCT adds a 7th gear as well as a reverse chain and gear.
In the accompanying color illustrations and cutaway VFR1200 engine image, the red parts are the 1-3-5 clutch pack and gears, while the blue parts are the 2-4-6 clutch pack and gears. This allows two gears to be engaged at the same time, so while one gear is busy supplying power to the rear wheel, the DCT preselects the next gear and it stays ready for immediate engagement when the clutches pass the baton. This is accomplished through the use of linear solenoid valves that send hydraulic pressure to actuate the clutches as directed by the ECU.
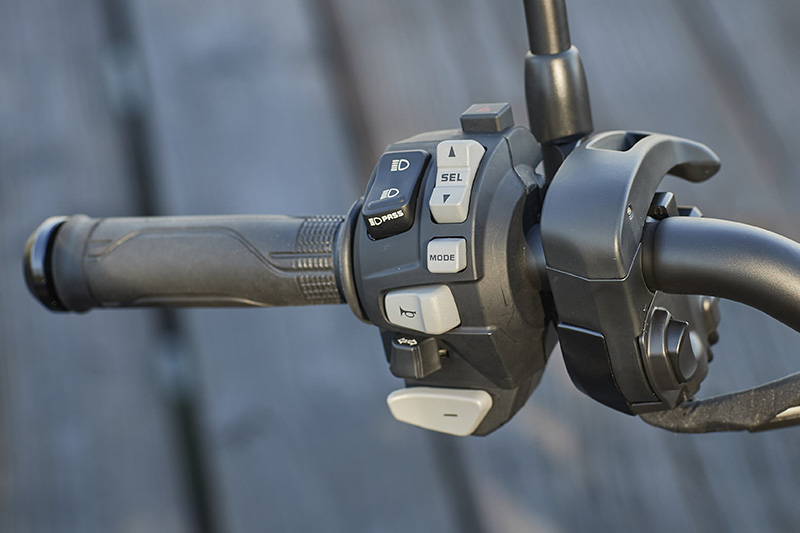
On the Honda Rebel 1100 DCT’s left handlebar are the manual downshift (-) and upshift (+, on front of switchgear) buttons and emergency brake. Note absence of clutch lever. (Photo by Drew Ruiz)
In practice, a DCT-equipped motorcycle with the ignition off or at idle will be in neutral, so all DCT bikes feature a parking brake (above). Once the bike has been started, to engage first gear the rider presses the “D” (Drive) button on the right switchgear (below). The “A/M” button switches between automatic and manual modes, and the “N” button shifts the transmission into neutral (this happens automatically when you come to a stop regardless of mode). When Drive has been engaged, to pull away from a stop all the rider has to do is roll on the throttle, just like the twist-and-go convenience of a scooter.
Right handlebar has the DCT mode buttons. (Photo by Drew Ruiz)
The default mode is Automatic, with shift points electronically programmed. For fuel economy, the DCT typically shifts into higher gears quickly, to keep engine speed low. On the Rebel 1100 tested in this issue, DCT shift points vary based on the riding mode: Standard mode has a middle-of-the-road shift schedule, Rain mode shifts earlier to keep revs low, and Sport mode shifts later to allow high revs. When the throttle is rolled on abruptly, such as to make a quick pass, the DCT quickly downshifts a gear or two so the engine can deliver power as needed. At any time, a rider can use the down (-) or up (+) buttons on the left switchgear to change gears as desired.
Honda has also tailored the DCT for different models. For example, Africa Twin DCT models have four automatic modes (Drive and three Sport modes with successively higher shift points), and Gold Wing DCT models have 7-speed transmissions with a reverse gear.
With more than a decade of proven performance in the books, the motorcycling Dual Clutch Transmission is clearly here to stay.
Sacre bleu! The discovery we all dread, usually right before a ride. Don’t attempt to repair a severe gash or cut, or a puncture in the sidewall of the tire. Once you get the hole plugged, it’s off to your dealer for a new tire.
Considering how bulletproof the rest of our motorcycles have become, it’s ironic that it only takes a little 1 ½-inch box nail in a tire to bring the whole show to a halt. We’re fortunate today that tubeless tire technology prevents intrusions by nails, screws and other foreign objects from becoming catastrophic blowouts. The object usually stays in the hole, the only place from which the tire can lose air, so it deflates more slowly than a puncture in a tire with a tube on an unsealed spoked wheel (which can lose air through all of the spoke nipples and even the tire bead). But even if that pointy thing does stay put and flush with the tread surface, as it flexes back and forth in the carcass the tire will eventually deflate enough to become a problem. Hopefully you will have noticed its presence or even received a low tire-pressure warning before that happens.
Of course, if it doesn’t stay put or is large enough to stick out of the tire (like a 6-inch gutter nail — don’t ask), the tire will probably deflate rapidly enough to strand you by the roadside. Unless you’re lucky enough to be next to a motorcycle shop at the time, you’re going to need either a good roadside assistance plan or a tubeless tire repair kit. (We’ll cover tube-type tire roadside repairs in another installment).
Once you’re sure your glue isn’t dried out and you have a way to re-inflate the tire, pull the offending object out. You may need pliers if it’s really in there.Use the reamer in the kit to enlarge and clean the hole—this is where large T-handles make the job a lot easier. Take some extra time if the tire has steel belts.Install a worm on the insertion tool — note that its tapered tip is split to allow the tool to pull free of the string once it’s well inside the hole.Put some rubber cement on the worm and a blob on the hole, too, and slowly insert the string in the hole about two-thirds of the way. If it falls inside the tire, just start over with a new string. Gently pull the insertion tool free, leaving the worm in the tire. Again, T-handles make this much easier.Use the knife in the plug kit or any sharp blade to cut the plug flush with the tread surface. Give it a few minutes to set up, inflate the tire and then spray some water or a soapy solution on the plug to make sure it’s holding air.
Here at Rider we’ve fixed enough tubeless punctures to appreciate that the most dependable tire repair kit you can carry uses rubber strings or “worms” for the plug that gets inserted into the tire, preferably the large red ones like those in the T-Handle Tubeless Tire Repair Kit from Stop & Go. There are more convenient plug types, but the strings rarely let us down. If you’ve had good luck with liquid sealers, installed either pre- or post-puncture, more power to you — we often carry Slime for tube-type tires on bikes that have tubes in the hope of avoiding a roadside tire dismount. But we change bikes too often to make using the pre-installed sealers practical, and prefer to avoid irritating the mechanic who has to change a tubeless tire on a wheel full of messy sealer.
Repair kits that use string plugs often come with rubber cement, which — depending on the string type — may not be necessary to complete the repair, but at a minimum it acts as a lubricant to ease inserting the plug, and seems to help vulcanize the plug to the tire. It’s important to keep your glue supply fresh (preferably unopened), or you may find that it has dried out when you need it.
Stop & Go’s T-Handle Kit has everything you need to affect a solid repair. Just add pliers and something with which to inflate the tire (CO2 cartridges or a compressor).Stop & Go also offers a plugging kit that uses special mushroom-shaped plugs that don’t require glue, and the pocket version doesn’t take up any more space than the T-Handle Kit, so we often carry both. A portable mini compressor beats the heck out of CO2 cartridges if you have the space. Stop & Go’s is small, inexpensive and has a built-in gauge.
No matter what sort you use, any plug inserted from the outside should be considered a very temporary repair used to get you and your bike to the nearest replacement tire. Limit your speed per the plug kit instructions, and replace the tire as soon as possible. Special patch plugs inserted from the inside of a tubeless tire are certainly safer, but even if you can find someone who will install one for you, every tire manufacturer (and even those who sell patch plugs) recommend replacing the tire instead since it has to come off anyway.
The photos in this article cover the basic plugging process with rubber strings. Depending on the size of the hole, you may need more than one — I once used three in an ATV tire and it got me back to camp.
This is what even relatively new carburetor float bowls can start to look like when left to sit with unstabilized fuel. Upon restarting that debris can loosen and clog jets, typically the pilot jet.
For better or worse, most of the gasoline you can buy at stations around the U.S. has been “oxygenated” with some kind of additive since a series of amendments were made to the Clean Air Act in the 1990s. The idea is to help the gasoline burn more completely, and thus cut down on harmful emissions. The latest additive is ethanol, which — without getting into the political and environmental debates about its efficacy — is fine for use in fuel-injected vehicles that are run regularly and designed to use up to 10% ethanol (85% in flex-fuel vehicles).
On the other hand, ethanol-oxygenated fuel is not so great for any vehicles that sit between uses, and/or carbureted engines, like the one in your dirt bike or older motorcycle. Ethanol is alcohol, and alcohol is corrosive to certain parts in older fuel systems. Alcohol is also “hygroscopic” and likes water, so when water gets into fuel during a fill-up or from condensation, it can mix with the ethanol, creating a chemical combo that causes rust, corrosion, acids and sticky varnish that wreak havoc in fuel systems, especially carburetors. Ethanol can even cause rubber parts and fuel lines to dry out, harden and deteriorate prematurely.
Alternatives are few — unless you’re lucky enough to have a fuel supplier or gas station near you that sells ethanol-free gasoline (see pure-gas.com or buyrealgas.com), or you’re OK paying $15-$18 per gallon for ethanol-free gas in cans from a dealer (see vpracingfuels.com), most of us are stuck buying gasoline oxygenated with 10% ethanol. Again, your modern fuel-injected vehicle that you store in a dry place and run at least twice a month is unlikely to suffer any ill effects, but what should someone do with their older carbureted bike (or boat, lawnmower, string trimmer, generator, etc.)?
The simplest, best advice I can offer is…don’t let them sit. The shelf life of unstabilized gasoline containing ethanol is about one month. Running your vehicles every week — or two maximum — until fully warm is the best way to prevent fuel delivery problems. When you can’t run them, here’s what I do to minimize (not eliminate!) problems with my small collection of bikes, and my generator, string trimmer and lawnmower, even spare fuel in cans.
Only a handful of states mandate the sale of 10% ethanol gasoline, and none we’re aware of specifically prohibit the use of non-ethanol fuel, like many of the blends you can buy from VP Racing and some gas stations.
Half Full, Half Empty
On carbureted bikes with steel gas tanks, half the fuel system should be drained, and the other half kept full. Carburetors and their tiny air passages and jets can become plugged with aged fuel that deteriorates into sticky varnish over time. Since carb internals are made of non-ferrous aluminum, brass, plastic and rubber that won’t rust, if it’s practical to drain them (shut off the gas manually first or look for a vacuum-operated-type petcock that is off whenever the bike is), this is your best bet for trouble-free operation when refilled. O-rings and seals have been known to dry out and leak when carbs are left dry for a very long time, but this is less likely than plugged jets or worse if they’re left wet.
Some carburetors have a drain bolt in the bottom of their float bowls, others have a drain screw. Don’t overtighten either one, and only drain carburetors (into something please, not just onto the bike and floor) when the bike is off and cold. Don’t run the bike until it dies to suck the rest out — this can draw dirt and debris from the bottom of the float bowl into the carburetor. I once bought a Honda multi that had been stored in a basement for 15 years with the carbs drained and stabilized fuel kept in the tank, and it was rust-free and fired right up without carb service. If you’re careful, there’s no reason you can’t return newer, clean drained fuel to the tank.
Steel tanks on carbureted or fuel-injected bikes can rust inside, so it’s best to leave them at least ¾ full of fuel to which you have added stabilizer (more on this later). Some newer models have plastic-shrouded aluminum or plastic tanks, in which case it’s up to you, but make sure you stabilize it if you leave fuel in the tank. In really humid environments I would still keep an aluminum tank full.
Fuel injection systems seem much less susceptible to the ravages of stale fuel, and once full of stabilized fuel are almost carefree. In fact, some manufacturers warn against running their EFI bikes entirely out of fuel.
If you can’t drain carbs, after adding stabilizer to the fuel in the tank run the bike long enough to insure stabilized fuel has filled them, then shut off the bike and petcock. I carry a small bottle of stabilizer with me when I take out one of my less frequently ridden bikes, and add it at the gas station before riding home. Err on the side of adding more stabilizer; you can’t overdose (within reason) with the products mentioned below. Stabilized fuel in the carbs does not guarantee that they won’t suffer from plugged passages or jets, however, and you should still run bikes kept this way at least every three weeks. More often is simple insurance that you won’t need an expensive service — compare the cost of non-ethanol race gas and/or stabilizer to that of a carburetor rebuild and the former start to make economic sense. Just make sure you run the engine until it’s fully warm (to burn off water and contaminants in the oil and exhaust). While you’re at it, pump the fork and shocks and work the brakes, clutch and shifter to keep seals flexible and lubricated.
Fuel treatments and stabilizers are not a panacea for ethanol, but they can help in conjunction with regular engine running.
A Stable Relationship
A good ally in the fight against bad gas and fuel delivery issues is fuel stabilizer. They’re not foolproof, but three we’ve found to provide consistent results with motorcycles are Star Tron Enzyme Fuel Treatment, Spectro FC Premium Fuel Conditioner & Stabilizer and Bel Ray All-in-One Fuel Treatment. There are others, but we lean toward these simply because they include motorcycles in their literature and FAQs and that gives us a warm, fuzzy feeling. All make lots of claims about their effectiveness that we have no way of proving or disproving, so just buy some and use it, or spend hours online researching them before you just buy some and use it. All of them offer smaller bottles and/or containers with measuring devices built-in to make carrying and using it while out on the bike easier.
The instructions for each will tell you how much to use, how long the fuel is usable when treated, etc. There are some consistent rules of thumb. You generally only need to stabilize fuel if you won’t use it all up within two months (but carbureted bikes should still be run every couple of weeks as described above). Adding a little new gas or stabilizer to old gas won’t renew it, nor will adding more stabilizer to old stabilized gas extend its usable life. Overdosing is not an issue (unless you drink it, duh), and in my experience none of them will cure a plugged-up carb no matter how much you add to the fuel. Your best bet is to avoid plugging it in the first place.
Good luck, and please write me with any questions, comments or dissimilar experiences! [email protected]
Your motorcycle’s brakes are one of the most important components, and routine maintenance is essential to keeping the braking system operating at its best. There are also a few easy hacks to improve braking performance, like replacing stock pads with aftermarket sintered pads and swapping rubber OE lines with stainless steel. Photos by Spenser Robert.
We all like to talk about our motorcycle’s acceleration and handling capabilities, but when you really think about it, being able to stop efficiently is probably the most important thing your motorcycle has to do. Your brakes are critical, but unfortunately brake componentry is often where manufacturers skimp on quality to help keep a motorcycle’s MSRP down. The result can be a soft lever, poor initial bite, crummy modulation, fading under hard use or just plain lack of stopping power.
Not all issues are caused by less-than-ideal componentry, however, which is why the first suggestion for addressing underwhelming brake performance is to bleed the system.
Bleeding your brakes is actually just regular maintenance that your owner’s manual will probably suggest doing every 24 months, and if you ignore it then brake performance may suffer as a result. That’s because over time, brake fluid will absorb moisture out of the atmosphere and air can creep past the seals, making the fluid more compressible and lowering its boiling point. Both of those are bad things for your brakes and can lead to a brake lever or pedal that feels squishy or cause the brakes to fade as they get hot.
So if you’re not satisfied with your bike’s brakes, it might just be time to bleed the system. Make sure you’re using the appropriate DOT fluid — it’ll be printed on the master cylinder lid — lay down plenty of paper towels to protect your paint, and keep pumping that lever until every last bubble is pushed out and you see fresh, clean brake fluid.
If bleeding the brake doesn’t do the trick, the next step is to start replacing parts. And the easiest components to upgrade are your brake pads. Many stock pads are of the semi-metallic variety and designed for general use with a gentle bite for a friendlier feel. That’s fine if you’re primarily commuting or touring, but if you ride your bike hard on twisty roads and want more bite and power when you pull the lever, upgrading to sintered pads is going to increase the friction rating which will net a strong initial bite, more stopping power and better resistance to fading. For more in-depth info on sintered pads, check out DP Brakes’ website. It specializes in sintered pads and has a robust FAQ section online.
Many motorcycles come stock with semi-metallic brake pads (bottom). These pads offer a gentle bite, quiet operation and a progressive feel. They’re good all-around pads, but don’t have as strong an initial bite or as much stopping power as sintered brake pads (top).
Sintered pads will likely be a little pricier than OEM replacement pads, but they’re a simple upgrade and easy to rationalize if your stock pads are worn out. It’s always a good idea to scrub your rotors with 400-grit sandpaper or Scotch-Brite pads before installing new brake pads so the friction material has a fresh surface to bed into. Also keep in mind that new brake pads will need to be broken in with a series of progressively harder stops over the course of 50 to 100 miles.
It’s important to clean your rotors any time you install new brake pads. A pulsing brake lever — often caused by material buildup on the discs but frequently misdiagnosed as a warped rotor — can also be easily remedied with a quick scrub-down with 400-grit paper.
Another potentially beneficial mod is installing adjustable brake levers. The more the piston in the front brake master cylinder strokes, the more pressure is applied to the back of the brake pads. Installing an adjustable-reach front brake lever can enable you to reposition the lever for increased lever stroke as well as a more comfortable reach. Installing a matching set (brake and clutch levers) boosts your bike’s aesthetic as well as your comfort on the controls.
More lever stroke means more brake pressure, so an adjustable lever with greater reach can net you better braking. Adjustable levers also offer more comfort than non-adjustable stock units, as well as a lot more style and refinement.
After bleeding your brakes, swapping pads and upgrading your levers, things start to get increasingly expensive and complicated. One popular modification is to replace OEM rubber brake lines with braided stainless steel hoses, but you’re not likely to notice any improvement unless you regularly brake in the 90th percentile. Riders that say stainless lines made a big difference are usually just experiencing the benefits of having fresh, bubble-free fluid in the brake system. Additionally, brake lines can be a pain to install, especially on bikes with ABS which often have complicated hose routing.
Stainless-steel brake lines (bottom) don’t flex under pressure and are impervious to heat. However, you’re not likely to benefit from a set unless you are seriously aggressive on the brakes. Replacing the hoses on modern bikes — especially those with ABS — can be a pain.
Likewise, you can upgrade your master cylinder to one with a larger, radial piston or slap on some full-floating rotors, but those are pricey parts, and probably not a good investment for most street riders.
One final — and free — recommendation for squeezing more performance out of your brakes is to practice squeezing the lever — hard! The fact is, lots of people don’t know the limits of their bike’s current brakes, which — even if the lever feels squishy or there’s crummy feedback — are likely pretty powerful if you really bear down on them. So go find a clean, dry parking lot and practice some hard braking. It’s great training and a good way to learn what your brakes are actually capable of.
Riding in a group, especially in busy urban areas, can be either fun and empowering or stressful and even dangerous. Follow the guidelines in this story, and hopefully your next group ride will be an enjoyable and safe experience.
For some, group riding is a quintessential part of the motorcycling experience, a rolling social gathering that happens as naturally as a family party. It’s a fun way to keep a group together when traveling, and modern communication technology has only made it easier. Yet even seasoned riders, if they spend most of their time solo or don’t know the others in the group well, can feel a bit unsure about the rules, expectations and etiquette of group riding. So to help you navigate the dos and don’ts of riding in a group and become the person everyone likes to ride with, we’ve put together this handy primer.
The Basics
Staggered formation. You’ve probably noticed how groups of riders space themselves out within their lane; we call this “staggered formation.” The purpose is pretty simple: it allows each rider a clear view ahead, along with space to the side for any quick or sudden maneuvering in the case of road hazards like potholes, rocks, critters, debris, etc. The leader is typically in the left portion of the lane, rider No. 2 is in the right portion, rider No. 3 in the left and so on. The Motorcycle Safety Foundation recommends spacing yourself so that there is a two-second gap between you and the rider directly in front of you (see graphic below). As speeds increase, that means a longer distance, and at slow speeds (especially in heavy traffic areas) that means closing ranks and tightening up the formation.
Who rides where? Put an experienced, responsible rider in the lead position. The leader should obviously know the route you’re taking. The least experienced rider in the group goes next, in the No. 2 position behind and to the right of the leader. The last position, also called the “sweep,” should be another highly experienced rider. The sweeper should carry a first aid kit and tools, and should also know the route in case the group gets separated.
Staggered formation is fundamental to group riding. The Motorcycle Safety Foundation recommends maintaining a two-second gap between you and the rider directly in front of you, and roughly a one-second gap between you and the next rider in the formation. At slower speeds, that means tightening the ranks. Graphic courtesy the Motorcycle Safety Foundation.
Group size. Try to keep your group manageable — between five and seven riders is a good size. If necessary, break up large groups into smaller ones.
Lane changes. Good leaders will be watching their mirrors, and will wait until there is a large enough space for the whole group to move over. Sometimes that’s just not possible, in which case the riders make individual lane changes, returning to their positions within the new lane. Maintain your speed when changing lanes! Remember that there are riders behind you who need to move over as well.
Communication. This is especially important in a group. The leader will often activate his or her turn signals early; following riders should also use their signals, essentially passing the message back. Some groups also like to use hand signals for upcoming turns: left arm straight out to the side for a left turn, left arm raised at a 90-degree angle for a right turn. There are a few other “universal” hand signals in the moto world: extending a hand down and opening and closing your fist tells another rider their turn signal is still on, and sticking a foot or hand out indicates a hazard in the road on either the left or right side. Below is a chart from the Motorcycle Safety Foundation showing some other common hand signals. Each group has their own way of communicating, so don’t be afraid to ask before you leave!
This chart from the Motorcycle Safety Foundation shows common hand signals used in group riding. Still, you should always check with your group to see if they use any special signals or ways of communicating.
Curves. When the road gets twisty, throw the staggered formation out the window. Forming a single file line gives you the space you need to lean and adjust your line if necessary. Remember this might also mean giving the rider ahead of you some extra space.
Passing. Never blindly follow riders ahead of you when they pull out to pass a car. Move over to the left portion of the lane and wait until you have a clear view of the road ahead. That may mean waiting until the rider in front of you is safely back in the lane ahead of the vehicle you’re passing. Then check your mirror to make sure another speed demon isn’t trying to make the pass from behind you.
Being passed. Being passed by a single vehicle is easy: just let them go. There may be times when the vehicle doesn’t have the room to get around the whole group in one go. Don’t take offense, even if they’re obviously just being impatient. Open up a space and let them back in. There’s no sense in riding too close and putting yourself and the rest of your group in danger.
But what if it’s another group of riders passing yours? Well, first off get in the habit of watching your mirrors (see Advanced Course below). That way you won’t be startled when riders start blasting past you. As the sweep rider, if you see another group approaching from behind, move to the right and wave them past. This lets them know that a) you see them, and b) you’re going to maintain your position to the right to safely allow them to pass. As a mid-pack or lead rider, keep an eye on your mirrors. If the headlight of the bike behind you moves to the right, look for passing riders and move right as well, waving them by. This can take time as the second group filters past, but just hold your right-side line and give your fellow riders a wave as they move on.
Staying together and on-track. Each group has its own procedure for this, and it’s something that should be discussed before you leave. Some groups prefer to stay in a pack at all times, with the leader pulling over immediately if you get separated, for example at a red light. Others, especially on long trips or when riding off-road, use the buddy system or back-marker technique. When approaching a turn or confusing intersection, check your mirrors. If you don’t see the rider behind you, pull over and wait. Basically you’re making sure that each turn is marked, and the sweep rider can pick up any stragglers.
Advanced Course
Now that you’ve got the basics down, let’s talk about being a better group rider. Instead of blindly following the tail of the rider in front of you like a bored packhorse, being aware and proactive will make you a more proficient, safer rider with whom others want to ride!
Awareness. This is something you should be practicing anytime you’re on the bike, not just in a group. You’re always scanning ahead, checking your mirrors and watching the patterns of other drivers, right? Don’t get lazy just because you’re surrounded by your “pack!” Watch your leader. If your group is stuck behind a slow-moving vehicle and the leader starts to peer around them, you can guess that a pass is imminent. Be ready to change lanes or pass quickly, safely and efficiently, keeping the whole group moving. If you’re on a multi-lane highway, the sweep rider could move over early and “set a pick” for the riders ahead, keeping the lane open for them to easily slide over.
Look farther than 20 feet ahead of you. See that “stale” green traffic light that could be getting ready to turn yellow? Be prepared for the rider in front of you to hit the brakes if the light changes. See the guy in the SUV in the next lane over, slowing down and looking over his shoulder? He likely wants to change lanes — keep an eye on him, and consider slowing to let him in, especially if your group is a large one.
Go with the flow. Group riding rules are not always black and white. For example, on long highway stretches it’s common for the group to spread out as everyone finds their own pace. Just be sure that you follow your group’s established procedure for back marking at turns. In areas of heavy traffic and slow speeds, try to keep your formation tight. Don’t be “that rider,” who dawdles and allows large gaps to form between you and the rider(s) ahead, then bolts through yellow lights at the last second, leaving those behind high and dry or forced to attempt to make the light. If your group hits some twisties and you find that you can’t keep up, don’t worry, just ride at your own pace. Wave the rider(s) behind you past if they want to go faster; at minimum, the sweep rider will stay with you and the rest of the group will wait for you to catch up ahead. This is part of the fun of group riding: you know your “pack” will take care of you.
Try to be consistent. It’s a lot easier to ride with people who are predictable. Hold your line, be smooth and steady with your speed and pay attention to your surroundings. Your fellow riders will thank you!
Final Exam
No, there isn’t actually a final exam, but I do want to leave you with this parting advice, and it’s the most important: ride your own ride.
Ultimately, we are all responsible for ourselves and only ourselves. Even though you’re in a group of other riders, you alone are in control of your bike and are therefore on a solo ride. If the group is doing stuff that makes you uncomfortable, don’t do it. Ride your own pace, don’t run the red light even though the two riders ahead of you did, and if you need to take a break, signal to your group and pull over. And don’t attempt an unsafe pass — your group won’t leave you behind.