Tag Archives: Tips and Tricks

How eBikes (& PEVs in General) Are Changing Personal Transportation

Over the last few years, we’ve seen a monumental transformation in the personal transportation space. Automobile and powersport manufacturers have made significant strides in making electric vehicles their top priority, with some even announcing that they will cease producing internal combustion engines soon. Certain European countries have also decided to stop the sales of non-zero emission vehicles by 2030.

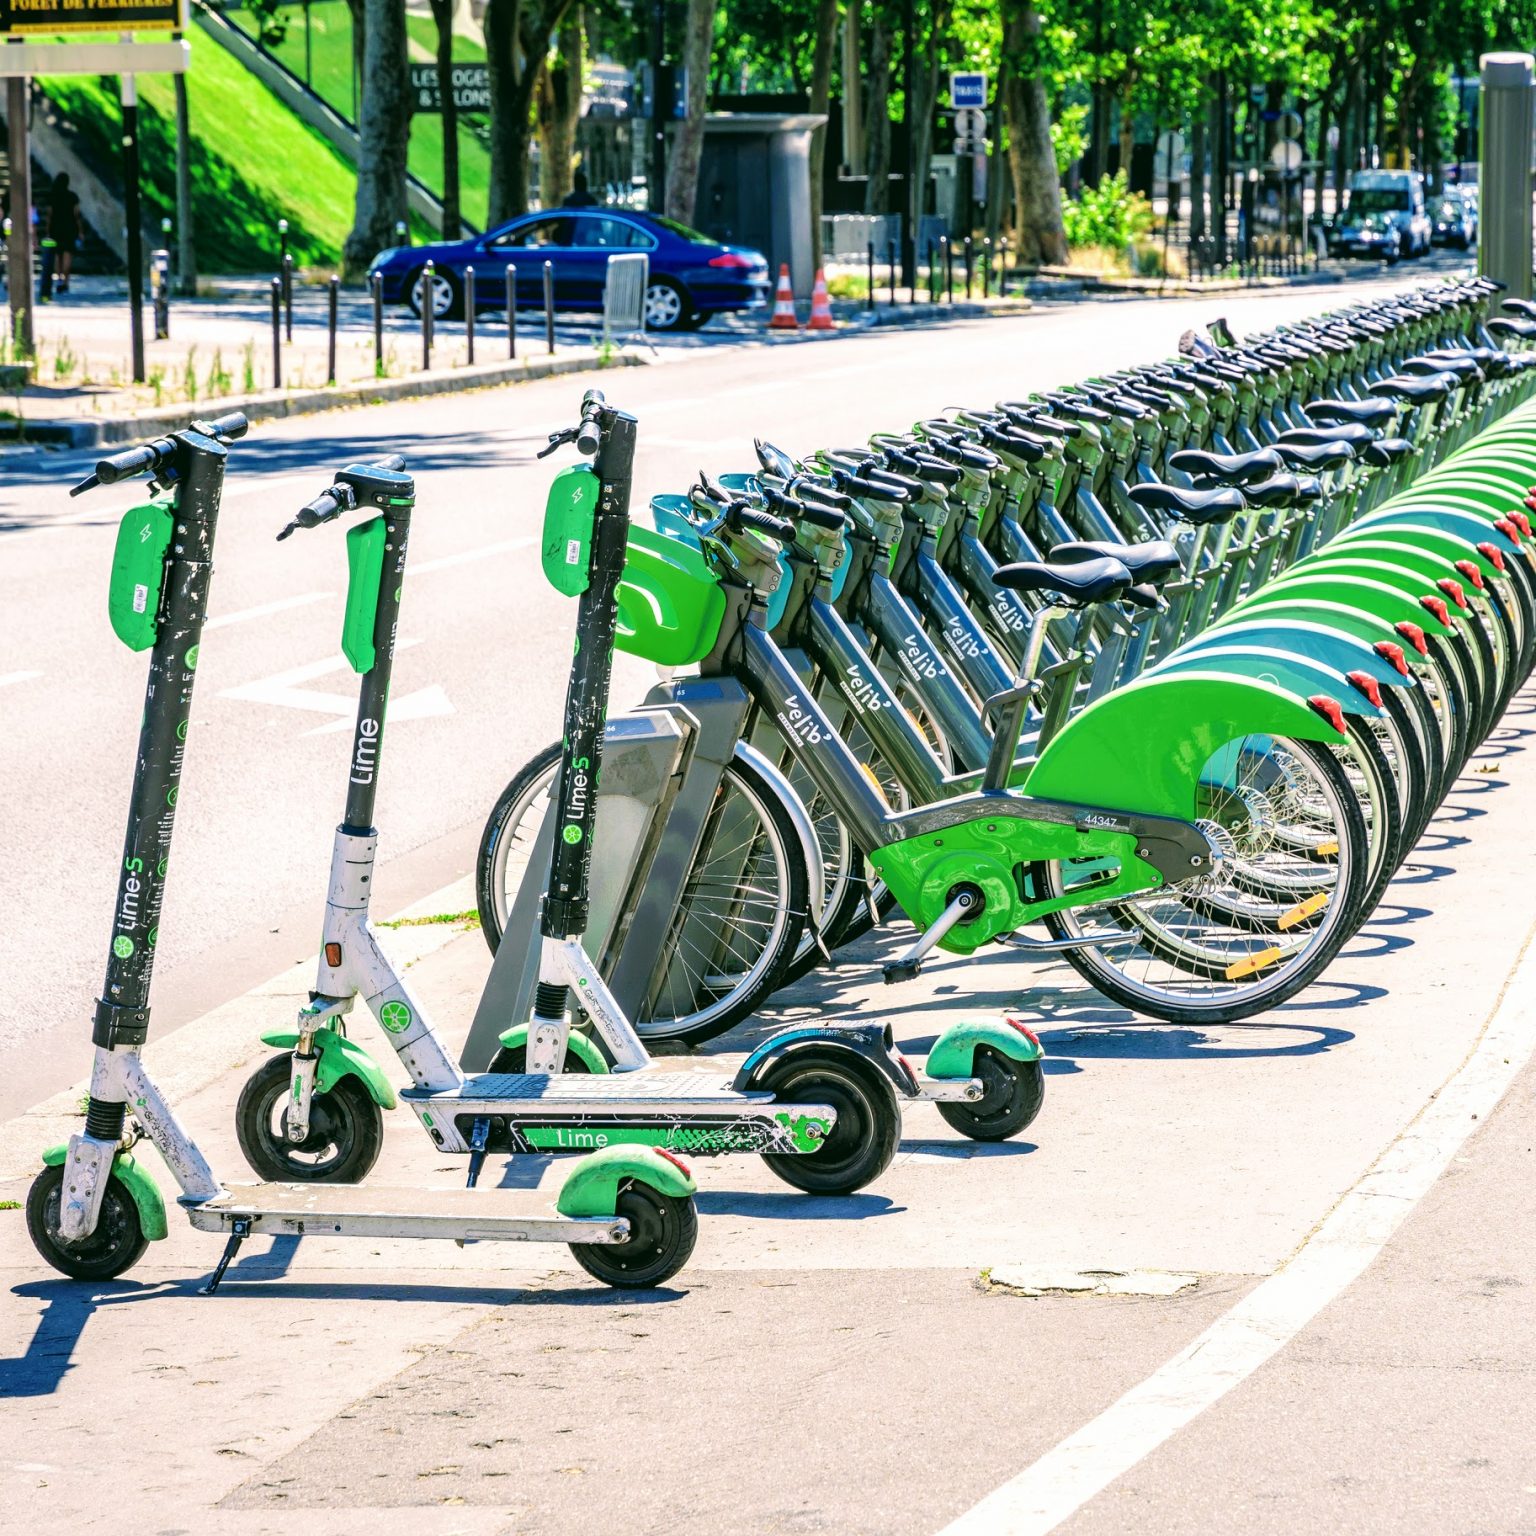
As this transition occurs, another supporting aspect of personal transportation has also seen tremendous growth — last-mile transportation. These include electric bikes, scooters, and mopeds, that plug the voids that a larger electric vehicle can’t fill. 

What Is Micromobility?

Micromobility is commonly referred to as using small PEVs (personal electric vehicles) such as eBikes, electric scooters, or electric skateboards — to commute in an urban environment. While size is more of a deciding factor in whether a particular mode of transport falls into the ‘micromobility’ category, it’s generally agreed upon that these vehicles have a top speed under 15-20 mph.

An image of multiple electric bikes and electric scooters parked side by side.
Source: DrivingChange.org

Using a compact eBike or scooter instead of an electric motorcycle or car is a much quicker mode of getting around a congested city. A report published by McKinsey & Company in 2019 revealed that stakeholders had invested over $5.7 billion dollars in micromobility start-ups since 2015, with 85% of that targeting China. This isn’t surprising considering that the people of the world’s most densely populated country rely heavily on micromobility to commute daily. A report by the World Economic Forum revealed that a substantial 73% of China’s population uses micromobility in their daily commute.

Are PEVs Getting More Popular?

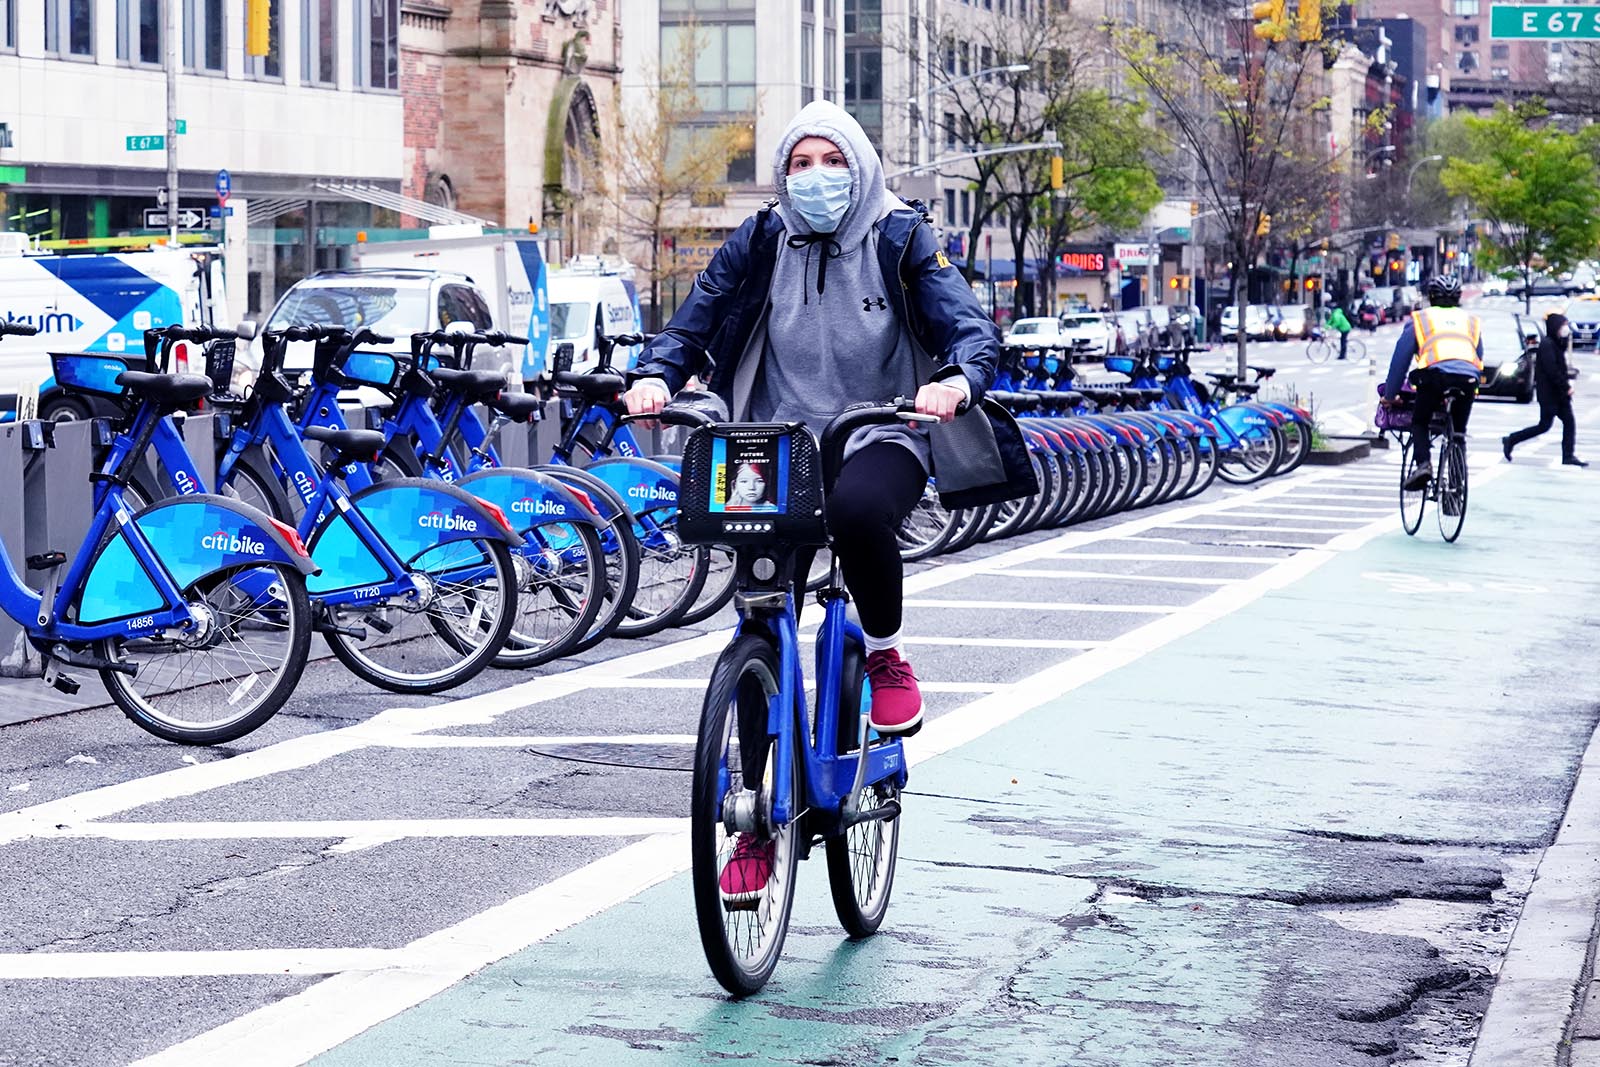
There’s no question that Personal Electrical Vehicles (PEVs) are becoming increasingly popular. In July 2021, the McKinsey Center for Future Mobility conducted a study that found that 70% of its participants were open to using micromobility vehicles for commuting. The pandemic was a key factor contributing to this rise in interest in micromobility. When the initial restrictions were lifted, people were still quite apprehensive about using public transport, and the only workaround was to invest in a mode of personal transportation. 

A man and a woman on electric scooters share the bike lane with a woman on a normal bicycle.
Source: Digi.com

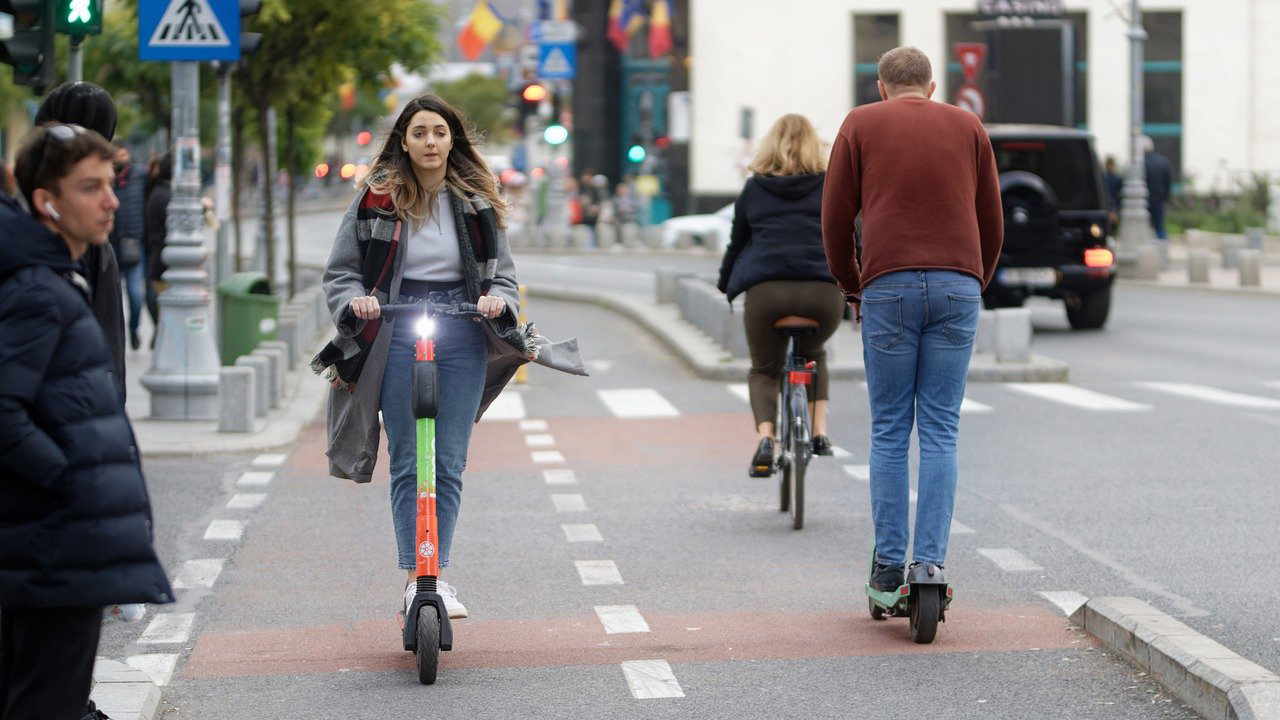
A car or motorcycle makes more sense if you’re traveling long distances. Still, an electric bike will be significantly easier to use for a shorter commute. Bike-sharing companies that allow you to lease a PEV for short durations saw a sharp rise in usage post the easing of the pandmeic restrictions.

A PEV is also quieter, less cumbersome, and emits zero emissions, so it’s not surprising that the environmentally conscious are enthusiastically adopting it. 

What Changes Are PEVs Bringing to Transportation Trends?

PEVs and other forms of transportation that can be considered micromobility are changing the way we think about car or motorcycle ownership. The McKinsey & Company study from 2019 also found that all passenger trips of less than 5 miles account for 50-60% of total passenger miles traveled in China, Europe, and the United States. Think about it, and you’ll probably find that most of your travel falls under this category, too; your commute to work or your weekly grocery run likely comprises just a few miles, for which a PEV would be perfect. 

A woman rides a CitiBike in New York city while several other eBikes are parked in the background.
Source: GreenBiz.com

A Stanford study predicts that private car ownership will drop by a whopping 80% by 2030 in the United States. As a result, the number of passenger vehicles on American roads is expected to drop from 247 million in 2020 to 44 million in 2030. However, people will still have to get around, and that’s where PEVs and micromobility come in. Ride-sharing apps will make it easier and much more affordable to commute when compared to owning a car. 

Are PEVs the Future of Personal Transportation?

It’s hard to say if PEVs will be the future of personal transportation, as they can’t completely replace the long-distance connectivity that more conventional modes of transportation currently provide. A solution to counteract this would be to find a balance between the two. For example, using a PEV to commute a short distance to somewhere, you can use a mode of public transportation, like a bus stop.

Micromobility is no longer a “buzzword,” and micromobility trends suggest the continued adoption of PEVs as a replacement for “last mile” transportation options. As cities get more populated, it will fall upon PEVs to reduce traffic congestion and keep things in order. A projected two-thirds of the world’s population will live in cities by 2050, so reducing transportation’s impact on the environment will be crucial. 

Electric scooters from a ride-sharing company are parked in a spot that's designated for micromobility vehicles.
Source: Stan Parkford / Twitter

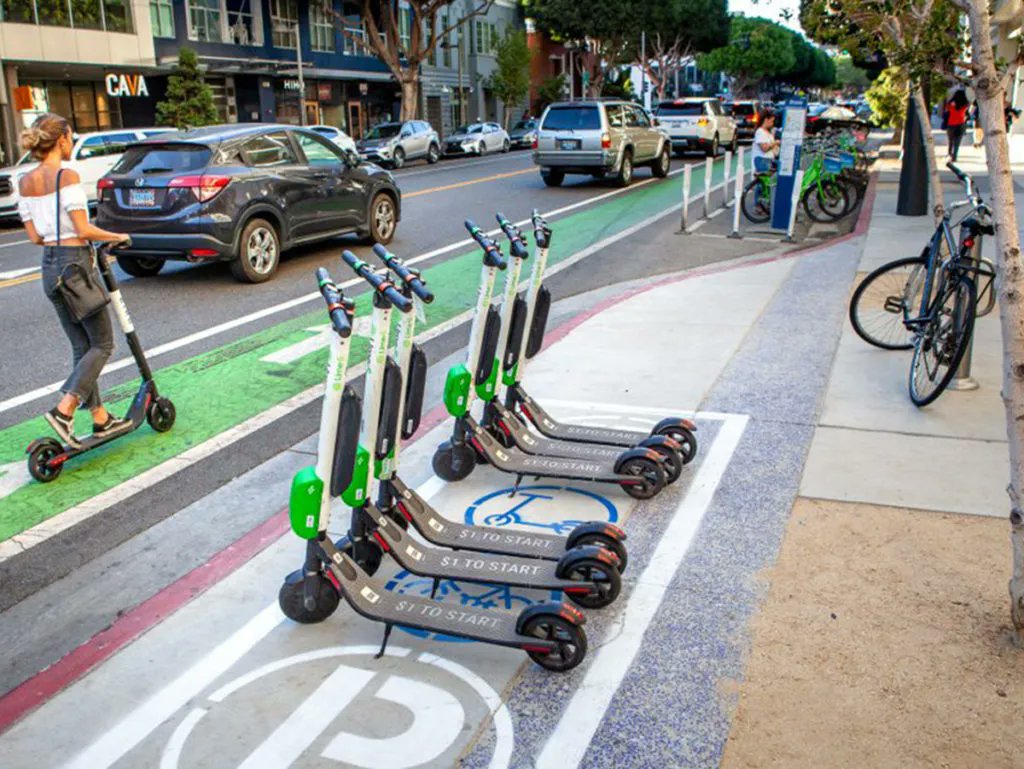
That said, there is still a lot of work that has to be done before micromobility is a more sustainable mode of transportation. For instance, ride-sharing aggregators will need the space to park their eBikes or eScooters, with the ability to charge them or their batteries. Plus, countries across the globe will have to accommodate PEVs with dedicated bike lanes and secure parking solutions. 

Source: MotorbikeWriter.com

Motorcycle Dash Cams: Do You Use Them?

A motorcycle dash cam may be an unfamiliar concept to many motorcyclists, but it’s one that you should know about if you spend considerable time on one.

Dash cams are relatively recent, although they are not new. Riders have been able to buy a decent one online since at least 2010. Among the many benefits of dash cams, perhaps the most important one is the additional evidence and insurance it provides in a collision or dispute.

As the famous saying goes, “There are two types of riders; those who have crashed and those who will.” In the unfortunate scenario that you do end up in an accident, having dash cam footage of the incident will make it easier to claim insurance or settle a dispute in court. At the moment, there are multiple ways you can use a dash cam on your motorcycle, and this article aims to inform you about just that.

What Is a Dash Cam?

Dash cams get their name from the automotive world, where they are typically mounted on the dashboard of a car to continuously record what’s happening outside the vehicle. While most owners attach one just to the front of their vehicle, having one at the rear is a good idea.

A dash cam can come with various features depending on how much you spend on it. For instance, some will also record metrics like g-force, speed, and location.

A helmet mounted camera shot of a rider riding on a unpaved road with trees on either side.
Source: RevZilla

How Can a Dash Cam Protect You and Your Bike?

We’re well aware of the fact that motorcycling can be a dangerous hobby. With the many thrills it returns, there’s an undeniable element of risk that accompanies it. A study in 2020 by the National Highway Traffic Safety Administration (NHTSA) found that motorcyclists were nearly 28 times more likely to die and 4 times more likely to be injured in an accident than someone in a passenger vehicle.

Unfortunately, these accidents can be from no fault of your own. And without solid evidence, you could find yourself in a lengthy legal battle over whose fault it was, costing you time, money, and other resources. This is where a dash cam comes in.

An image of two crashed motorcycles laying on tarmac, surrounded by debris.

Most modern-day dash cams are capable of continuously recording hours of footage. If the onboard memory does fill up, it will proceed to rewrite footage, ensuring that the latest activities are always captured. This way, in the event of an accident that may not be your fault, you can turn in the recorded footage as video evidence and legally protect yourself.

Recording footage of your ride may come in handy in less severe instances as well, such as avoiding a parking violation or a speeding ticket — given that you didn’t, in fact, break the rules.

What Are the Different Types of Dash Cams?

Generally speaking, there are two ways in which you can record footage of your rides. You can either mount the camera onto your helmet, so your footage is from your POV, or you can mount it somewhere on the motorcycle. Both these choices have advantages and disadvantages, so if you have to choose between them, it’ll come down to what you’re willing to compromise.

Helmet-Mounted Dash Cam

A helmet-mounted dash cam is the more popular choice among riders. One of the advantages of having a helmet-mounted setup is that you can record exactly what you’re looking at. So, if an incident occurs on your side, you can change the frame of recording by simply looking in that direction. This isn’t possible with a motorcycle-mounted dash cam that is usually set up to point in just one direction.

Helmet-mounted cameras, like GoPros, also benefit from being battery-powered and are easier to set up. You simply have to mount the camera onto the helmet and hit record.

The downside to using a helmet camera is that very few options are capable of recording both the front and rear. Plus, a camera like that will have to be mounted on top of your helmet, and this can cause wind resistance and be quite bothersome when you start picking up speed.

Remember that while there are no legal restrictions against mounting a camera to your helmet, it isn’t always the most advisable method. Adding a protruding object to your helmet may cause injury in an accident. In fact, certain countries outside the United States are cracking down on helmet cameras and making them illegal.

Innovv K5 mounted underneath motorcycle headlights
Source: Canyon Chasers

Motorcycle-Mounted Dash Cam

If you want to avoid the risk of injury, you should consider mounting your camera on the motorcycle. With a wide-angle unit at either end, you should be able to record as much as your surroundings at all times. Still, this will leave some blind spots, especially if something happens right next to you.

A motorcycle-mounted system will also require wiring that must be attached to the battery and tucked away under the seat. While this is usually a straightforward process, it isn’t as plug-and-play as a helmet-mounted camera. On the plus side, this continuous supply of power from the motorcycle means you won’t have to worry about changing batteries.

An image of the INNOVV K5 mounted in between the headlights of the Triumph Speed Triple.

What Should You Consider While Buying a Dash Cam?

Video quality is one of the most important factors to consider when getting a dash cam. There are several low-cost options out there, but most of them record substandard videos. Think about it — there’s no point in the footage if it’s so grainy you can’t identify another vehicle’s license plate. Ultimately, you’ll have to spend a little money if you want a dash cam that does what it’s supposed to. But keep in mind that this is an investment worth making and could potentially save you thousands of dollars in the future.

If you decide to go down the helmet-mounted route, cameras like the insta360 ONE X2 feature two 180-degree lenses on opposing sides of the same body, recording everything that happens around you.

On the other hand, if you’re looking for a dedicated motorcycle camera, the INNOVV K3 is an excellent option explicitly designed for powersport applications. The unit has two cameras that can record a 120-degree field of view in full HD. It’s fully waterproof, features an external mic, and automatically starts and stops recording along with the motorcycle’s ignition. This way, you can focus on what matters most — riding.

Source: MotorbikeWriter.com

The Paint Shop or Your Garage: What Paint Repairs Can You Do at Home?

Touching up the paint on your motorbike is occasionally vital if you want to keep it looking its best—but many bike owners make the mistake of thinking this always needs to be a professional job. Don’t get me wrong; some things are better left to experienced professionals, and we don’t blame you if you’re too scared of maiming your motorcycle to try painting it yourself. But there are actually plenty of small paint repairs you can learn to do on your own that aren’t too difficult.

Below, we’ll cover the main types of paintwork motorcycles need most often, along with advice on which ones you can try yourself (and which ones you definitely shouldn’t attempt without help or significant experience). We’ll also give you a quick list of what you’ll need if you’re planning to paint your bike in any way, so that you can properly prepare beforehand.

Ready? Then it’s time to bring the paint.

Common Types of Motorcycle Paintwork

There are a few different situations that might warrant a touch-up of your bike’s paint job. Here are some of the most common:

Dings & Scratches

Your bike is pretty much guaranteed to pick up a few scratches and scrapes over time. It doesn’t matter how carefully you ride—pebbles and other debris are going to get kicked up by the tires while you’re on the road, and some of them will inevitably leave marks in your bike’s paint.

Can you fix it? Yes, you can! Make sure you buy paint that matches the colour of your bike, then test it in a small area that most people won’t see easily. Then clean the area, apply a degreaser, smooth out the scratch with sandpaper and apply the new paint (according to the manufacturer’s instructions). Use a sanding block wrapped in 1500 or 2000 grit sandpaper to smooth the area out, and finish up with some polish. Done!

Closeup of honda motorcycle fuel tank

Courtesy: CBR250.net.

Chipped Paint

Paint chips typically happen when the painted surfaces of your bike come into contact with larger debris—stones, etc.—or when you (gasp) drop your bike. Repairing chipped paint quickly is vital if you want to restore your motorcycle’s appearance and prevent the affected area from rusting.

Can you fix it? Yes, you can! This is trickier than repairing a simple scratch, but the process isn’t that different. Some riders take the “easy” route and cover the chipped area up with a shade of nail polish that approximately matches the surrounding paint—but that’s cutting corners, and it’s pretty obvious when anyone looks closely. Instead, mask up the rest of the tank and follow the same steps you’d take to repair a scratch.

The difference is that you’ll need to use a primer on any metal that’s been exposed by the chipping. Make sure you’re only putting primer on the exposed metal, then cover a slightly wider area with the base coat and an even larger one with the clear coat. If you’re not feeling confident about this one, take it to a pro.

Cracking Paint

A motorcycle that’s been painted properly probably won’t experience cracking paint. Cracking typically occurs as the result of a lousy paint job—low quality paints, painting in hot or humid conditions, mixing the paint badly, or failing to prepare the bike’s surface beforehand can all lead to this undesirable effect. Your paint might also crack if you put on too much of it, or put it on too quickly.

fuel tank with cracked paint

Courtesy: Jockey Journal

Can you fix it? Hard to say. If the paint on your bike is cracking, it’s likely because you didn’t paint it properly the first time—which means you might not have the skills to do any better the second time around. A better route is to prevent your paint from cracking in the first place by using high-quality paints designed for motorcycles and following the manufacturer’s instructions properly whenever you’re giving your bike a custom paint job.

Peeling Paint

Peeling paint is another indication that something’s wrong with your bike’s current paint job. It generally occurs when the surface of the bike has a blemish that prevents the dry paint on top from sticking properly to it, but it can also happen when the coat of paint on a bike is too thin. Additionally, the paint on your bike can peel if you don’t sand your undercoats properly before putting on your top coat (since the top coat will have trouble sticking to an undercoat that isn’t smooth).

Can you fix it? It depends on the size of the area that’s peeling. If the paint on your bike is only peeling in a small zone, you can strip paint from that area and touch it up the same way you would if you were repairing a scratch. But if the paint is peeling all over your bike? Fuhgeddaboutit. Take your bike to a professional as soon as possible and have them take care of the issue properly.

What Do You Need for Motorbike Paint Repairs?

automotive paint spraying kit

Courtesy: Stardust Colors UK

If you’re touching up the paint job on your bike, you’ll need to be armed with the right equipment. Here’s a quick list of the essentials:

  • Two paint guns. It might seem like overkill, but trust us. One gun’s for your primer, while the other is for your base and clear coats. This will save you a lot of time.
  • An air compressor. You’ll need to hook this up to your paint guns via an air hose to make them function. For best results, purchase a compressor with enough volume for you to do one complete coat of the largest part of your bike that you’ll be painting.
  • An air hose. Pretty straightforward. The trick here is to make sure your hose goes through an air regulator with a water trap, which will ensure a smooth delivery of air (and paint) during your work.
  • Sandpaper. You’ll need this for removing paint from any areas you’re touching up before you begin, and for sanding down any new coats to make them smooth afterward. Stock up on sandpaper with grit levels of 80, 400, 600, 1500, and 2000.
  • Polishing tools. Once your final clear coat is applied, you’ll have to buff the body of your bike out. Use a variable-speed polisher with a buffing pad for this task.

Fixing Your Paint Job Isn’t Rocket Science

Lots of people are intimidated by the prospect of touching their bike’s precious paint job, but most minor repairs aren’t that hard. While we advise against giving your bike a complete custom paint job without plenty of experience and the proper kind of paint, fixing the paint in certain spots is nothing to fear.

Source: MotorbikeWriter.com

Excuses for being the slow rider

Every group of riders has someone who is slower than the others which can be embarrassing if it’s you …l unless you have a good excuse!

When I ride with other motorcycle journos on a press launch for a new model, I’m usually the last in because I’m slower than most others.

It should be noted that many of them are ex-racers.

So when I roll into a scheduled stop several minutes after the others, I’m usually prepared with a good excuse for being slow.

My favoured excuse is: “I stopped to take a photo of the bike at that spectacular lookout about 5km back.”

The other journos often nod as if that’s a plausible reason. But it wears thin after a while, so I’ve come up with a few others over the years.

When I ride with my mates, I’m usually one of the fastest and it’s someone else coming up with excuses for being the last to then scheduled stop.

So I’ve given and heard my fair share of good and bad excuses for being the slow rider.Group riding

You may recognise some of the excuses in this list and you are welcome to use them:

I had to make a comfort stop.

That’s a plausible excuse, especially for men who can relieve themselves just about anywhere.

I thought I was supposed to be tail-end Charlie.

Dubious excuse unless the ride has been badly organised.

I had some sort of electrical fault and the engine kept cutting out.

The trouble with this one is that the backyard mechanics in your group will try to solve the problem or even worse, they will offer to ride your bike to sort it out. You can back it up with “It seems to have come good again.” However, you now have no excuses left.

I was enjoying the scenery so much, I had to slow down and absorb it.

Only a good excuse if the scenery really is spectacular.

Did any of you guys run into that mob of (insert wildlife or livestock here)?

This is a great excuse as the other riders will then launch into anecdotes about their own misadventures with stray livestock or wildlife and forget just how lame your excuse is.

Sorry guys, I copped a speeding fine last week and I’m down to one point, so I’m taking it easy for a while.

An acceptable and oft-used excuse, but it has its time limitations and eventually you will have to pick up the pace again.

Do you have any other excuses you’d like to share? Leave your comments below.

If you eventually run out of excuses, then it’s either time to get some rider training or find another group of riders!

Source: MotorbikeWriter.com

The Best Locations for Motorcycle Photography

So, the word on the street is that you want to take some sweet, sweet photos of your precious wheels. Think you’re a bloody professional photographer or something, do you? You don’t? Well, I do. And as one, I’m here to tell you a few little secrets about where to shoot your precious noise-maker so that the results look a little more ‘rad’ and a little less ‘sad’.  

So join me as we rummage through my database of cool locations and listen while I tell you what makes them so damn good. Also, keep your eyes peeled for bonus ‘hot tips’ that will make you photos suck even less. No, no. It’s OK. You can thank me later.

Location 1: Nowhere

Custom BMW R100 motorcycle at an airport

The biggest mistake I see with most moto photos is overly interesting locations. Think about it like this; when you take a photo of an amazing motorcycle, do you want viewers to be looking at the random thing just behind the bike, or the bike itself?

If you’re new to all this stuff and you want the bike to look its best, just find a big, open, empty piece of nothing to shoot. That way, you’ll be sure that people are looking at what they should be, and not what they shouldn’t.

Hot Tip: See those little numbers on the camera that say things like ‘f2.8’, ‘f8’, and ‘f16’. Set them at as low as possible. This reduces your depth of field and makes everything in front and behind the bike go blurry. This is a good thing. If your camera doesn’t do this, get one that does.

Location 2: A Quiet Country Lane

A custom KTM flat tracker on a country lane

No buildings. No onlookers asking lame technical questions about the bike or the camera. No cars passing by. That’s right, the countryside is your best friend when it comes to bike photos. Again, it’s usually open, empty and neutral, too. Maybe try a spot with some hills in the distance. Long grass, or a line of trees. They can add a little interest without overwhelming things.

And if there are some nice clouds around, get them in the shot too. Now that you know about depth of field, they’ll be all out of focus and soft. But if there are cows about, definitely do not include them. Cows are weird and funny.

Hot Tip: Shoot at golden hour. It’s that time in the hour after sunrise or before sunset where the light is low, yellow golden, and bloody beautiful. If the sun is in your shot washing everything out, just hold your hand or finger in the top of the shot to block or control the glare; you can always remove it in post.

Location 3: The Beach

A Royal Enfield Himalayan at Bondi Beach, Sydney

The best thing the beach has going for it – apart from the space – is that amazing horizon line that will cut like a knife right through the back of all your photos. In photos, lines are good. They give your eye something to follow and they’re fun to play with when you’re composing shots.

Also, off road bikes can be shot on the sand but note that the footprints you make while positioning the bike can look weird, so be prepared for some Photoshopping.

Hot Tip: Get down low. Shooting at eye level makes for boring photos because that’s the same angle you always see bikes from. Try shooting from the same height as the bike’s tank. The angle is much cooler and the bike will look clean and balanced.

Location 4: Underground Car Parks

A Royal Enfield Interceptor in an underground carpark with owner

They are dark, minimal and they look cinematic. Shooting bikes here is one of the easiest ways to get cool shots fast. Some of my first decent bike shots were done like this. Try and keep the space behind clear of cars and use the traffic markings to your advantage, as above.

Another benefit is that you can shoot at any time, day or night. Golden hour is cool, but sometimes you just can’t wait or the weather may be rubbish. In these instances, a garage is like a personal studio. You can set it up however you like without conditions changing.

Hot Tip: If the garage has fluorescent lights, you can twist them off by turning the strip tubes slightly – even the caged ones. But keep one on directly above the bike. This way you get a pool of light that the bike will sit in and the rest of the garage will be all cool and dark. Use a tripod if the shutter speed gets below 1/30th of a second to avoid shake.

Location 5: Rooftop Car Parks

A Harley-Davidson flat tracker on an airport rooftop at dusk

Detecting a theme? Once again. It’s about open space and just the right amount of nothing but something backgrounds. Some rooftops might have sky behind them. Some might even have cool city views. These are all fine; just find out when they are empty. Even better; try airport car parks during a global pandemic…

After dark, you can also experiment with pole lights and dark backgrounds. Just be aware that some of this lighting can create weird colours in photos. Set your white balance to ‘auto’ in these cases.

Hot Tip: Wet the surface under the bike for that always cool Blade Runner look. Or see if you can shoot at sunset just after some rain. It’s a big ask from Mother Nature, but you’ll get silly cool shots.

Location 6: Industrial Areas

A restomod Vincent Black Shadow racer at sunset in an industrial area in Sydney

The great thing about bikes and locations is that you can mix and match them. Got a 1950s British bike? Shoot it at an old factory with chimneys and arches to give it that ‘Industrial Age’ feel. Or mix it up and shoot a brand new V4 Ducati there. Contrast can make for great shots, too.

But always be wary of my number one pet hate: bikes photographed in front of graffiti. Brightly-coloured walls full of eye-catching shapes and wacky words are the exact opposite of what you’re after. Show me a bike that can outshine 10 foot high psychedelic artwork and I’ll eat my hat.

Hot Tip: Always grade your shots after shooting. None of the shots you see here are straight from the camera; all of them have been adjusted to look more awesome. Check out Adobe’s Lightroom app on your phone – it’s free and it comes with filters.

Location 7: Anywhere in the Desert

MV Agusta Brutale at Sunset on a road

There’s a reason why so many cool auto and moto photographers come from L.A. and that’s because L.A. is basically half desert and half ocean. It’s a photographer’s paradise. Close your eyes, spin in a circle and press the camera’s shutter release; you’ll probably capture an incredible image here. Bonus points if you also get a movie star in it.

Deserts also have truckloads of dust and haze, making the atmosphere really heavy and the sunlight incredibly vivid. Position the bike directly between the camera and the setting sun. Wait until the sun is just below the horizon and go nuts.

Hot Tip: Off road bike? Sunset? Heaps of dust? Get someone on that damn bike to ride past you and kick up some dust! Or hang out of a car window and get them to ride alongside while you shoot them. Haven’t you heard? Action shots rule.

Location 8: The Ones That Suck

BMW R100 Custom Bobber at sunset in Sydney

Sometimes you just won’t have the luxury of choosing a killer location at an amazing time to get the best shots possible. Take the above photo. Yes, it was taken at golden hour, but the rest of the scene was completely meh. The bike wasn’t registered, so it couldn’t be ridden anywhere and the builder’s shop was surrounded by fugly industrial units and overflowing dumpsters.

So I grabbed a stepladder and shot the bike at an interesting angle while making sure there was nothing else in view. And for any other shots, I made sure the sun was in the background to overexpose all the ugliness. Why yes, I am pretty resourceful. Thanks for noticing.

Hot Tip: Take time to think about the location. There’s nothing worse than realising after a shoot that all the photos look like ass. If you can make a call and shoot to accommodate the negatives, you’ll always end up with better shots than just ‘spraying and praying’.

You can see more of Andrew’s work here.

*All photos courtesy of Andrew Jones

Source: MotorbikeWriter.com