Tag Archives: Motorcycle Maintenance

How I Learned to Stop Worrying and Love to Wrench

How I Learned to Stop Worrying and Love to Wrench Riding Around
The author happily wrenching in her 10-x 16-foot shop space in Vallejo, California. Photo by Paul Smith Jr.

“There is no perfectly shaped part of the motorcycle and never will be, but when you come as close as these instruments take you, remarkable things happen, and you go flying across the countryside under a power that would be called magic if it were not so completely rational in every way.” – Robert M. Pirsig, Zen and the Art of Motorcycle Maintenance

Motorcycle mechanics. An unquestionably intimidating subject. As a 21-year-old college student, I never fathomed I’d become completely fascinated by the sensation of turning a wrench. I didn’t think I was “mechanically minded.” Whenever issues arose with the old vehicles I drove, my first instinct was to call my dad, see if he could guess how bad the issue really was, and help me figure out if I could keep driving on borrowed time, or if a trip to the hole-in-the-wall mechanic shop was necessary.

That was the case until I was forced into the realm of wrenching on my own machines during the early days of the pandemic. I had purchased a 1986 Kawasaki 600 Eliminator for $850. It was the first streetbike I’d ever owned, and certainly the most raw power I’d ever experienced. I loved that bike. It was shiny, loud, and fast enough to rip on I-80 through the Bay Area.

How I Learned to Stop Worrying and Love to Wrench Riding Around
The author and her 1986 Kawasaki 600 Eliminator, the bike that started her mechanical journey. Photo by Christine Busby.

So, what was the cause of the Eliminator’s sad demise? A boy’s advice, of course. This friend of mine was under the impression that Sea Foam motor treatment could not be overdone. That’s how a full quart of it ended up in my half-full 3-gallon tank. I knew nothing of the impending consequences.

Pretty soon, coolant started leaking out of the water-pump drain, white smoke was blowing from the tailpipe, and eventually, the bike quit altogether. I felt backed into a corner. I had no idea where to begin, and I was afraid of making the problem worse. After two weeks of countless phone calls to friends, seeking help on social media, reading Xeroxed manuals, and digging through forums, I concluded that I could not fix the problem myself. In the interim, I changed the plugs, tried to clean the carbs, and drained and cleaned the fuel tank. But the blown head gasket was way beyond my skill set. At the time.

During those heart-breaking struggles, I came to realize three important things about wrenching on older bikes: 1) Everything you need to know about how to fix, replace, or tune up just about anything is available to you online. 2) The few tools you need to get started are cheap and easy to acquire. 3) You don’t need a background in wrenching to become proficient at it. Your family didn’t have to raise you doing this activity every Sunday afternoon. Anyone can fix up an old bike as long as you’re willing to face – head on – the mental challenges that come with it.

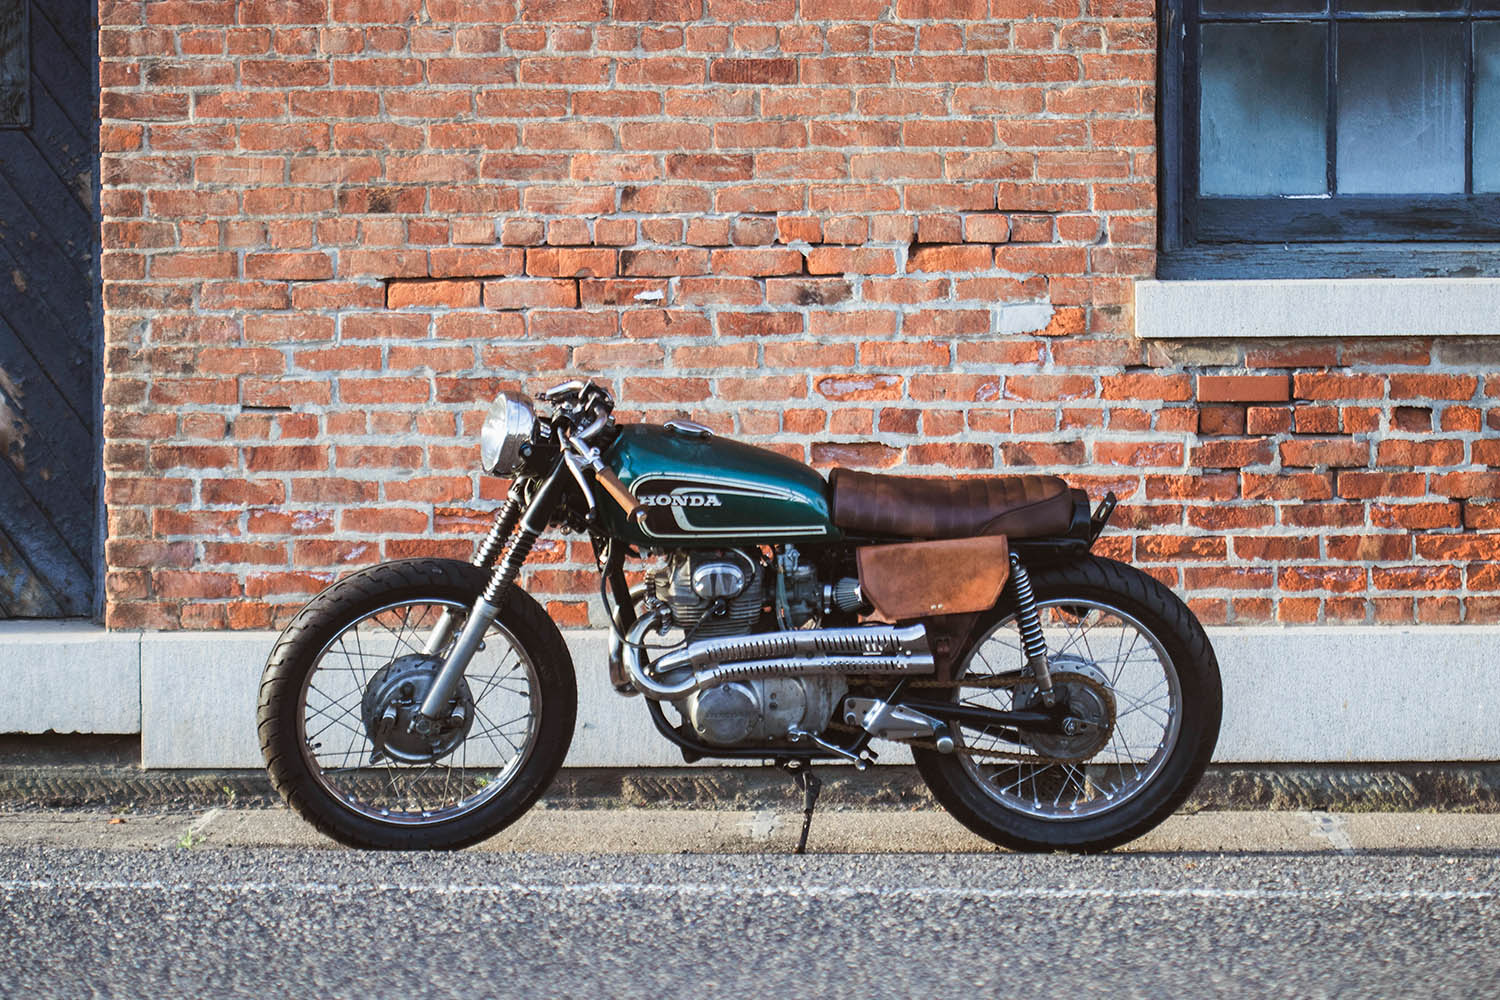
Why had no one told me this before? Why was I always so intimidated by the notion of mechanics? Why is there such an intense gatekeeping attitude surrounding these skills? Well, if a broke college student like me can take a basket-case 1971 Honda CL350 from completely disassembled to a running head-turner in just eight months, then anyone can. If wrenching has always been something you’ve shied away from for fear that you’re not competent enough, or you might do more harm than good, then take heart.

How I Learned to Stop Worrying and Love to Wrench Riding Around
The author turned a basket-case 1971 Honda CL350 into this fetching cafe racer in just eight months. Photo by Sophie Scopazzi.

What does it take to begin the journey of wrenching on an old bike? Start with a set of basic mechanic’s tools and a clean work area. Hopefully your bike has a centerstand, and if not, you can buy an inexpensive jack or lift from Harbor Freight. Have plenty of WD-40, Windex, grease, and clean rags at the ready. Invest in the factory service manual for your bike, as well as a Clymer or Haynes manual. (There is a tangible quality difference between older Clymer manuals and freshly written ones. The closer the publication date gets to the birth year of the motorcycle, the better.) Accept the fact that you’ll make mistakes and bust a few knuckles. The learning process is rarely linear.

The most burning question I had when I started my journey was, “How difficult is this really going to be?” The honest truth, which few people are willing to share, is that it’s not difficult. Not really. Most of it comes down to lefty loosey, righty tighty. Even the more complicated stuff, such as rewiring your bike, comes down to following a diagram that’s no more complicated than the instructions to put together an Ikea bookcase.

Motorcycles, especially old ones, are put together in a way that is meant to make sense. The physical aspect of motorcycle mechanics is not difficult to grasp. The difficult part is confronting your own mindset and staying calm when the machine makes you feel like the world is against you. You need to have enough commitment to yourself and your learning journey to finish what you started.

Like many before me, Robert M. Pirsig’s masterpiece Zen and the Art of Motorcycle Maintenance has had a direct and lasting impact on the way I approach wrenching. As he wrote, “It’s so hard when contemplated in advance, and so easy when you do it.” Keep that in mind. Simply trying is the most powerful move you can make.

Get started on your mechanical journey with simple, hard-to-mess-up routine maintenance tasks, such as an oil change and changing the spark plugs. They’re cheap, and both can be done in about an hour or two by someone who’s never held a wrench before. They’ll require you to do a little research and make at least one trip to the parts store. Get comfortable speaking with the humans working behind the counter and asking for what you need. Get into the groove of following instructions, whether that’s from a shop manual, a YouTube video, or a friend. Savor the satisfaction of knowing you’re making an effort to take care of the machine that takes care of you.

When I asked Armon Ebrahimian, the founder of Save Classic Cars (saveclassiccars.net), a website “dedicated to keeping classics alive” that also lists vintage cars and motorcycles for sale, what advice he would give an aspiring backyard mechanic, he said: “One project at a time. It’s tempting to blow apart an entire bike or car, but this is how people get in over their heads. Start small. Take something small apart and put it back together. Don’t take something else apart until you’ve successfully put that first project back together.”

How I Learned to Stop Worrying and Love to Wrench Riding Around
Armon Ebrahimian and the 1969 Honda CL450 that he rebuilt and restored. His advice to newbie mechanics is to start small. Photo by Curtis Boudinot.

What happens when your bike breaks down? Pause. Breathe. Think about what you know and what you don’t know. Then get curious about what you don’t know. Use the tools of observation you learned in middle school: Take note of what you see, hear, smell, and feel. (Please don’t taste any part of your motorcycle.) Use those observations to make a hypothesis, and then search for answers in your manuals, in online forums, and on YouTube. Whatever issue you’re having, it has already been diagnosed, fixed, and written or talked about by someone somewhere, so keep digging. Go through this process even if you end up deciding to take your bike to a mechanic’s shop. At least you’ll know more about what went wrong and why, and you’ll be better prepared the next time a similar issue occurs.

It’s helpful to eliminate time limits. If your motorcycle is your primary means of transportation, then a timely fix is important. But if not, removing the pressure of time reduces stress, which frees up mental bandwidth and helps keep things moving forward. Then an extra trip to the parts store becomes just another step in the process rather than a frustration. Just don’t confuse a lack of time pressure with procrastination.

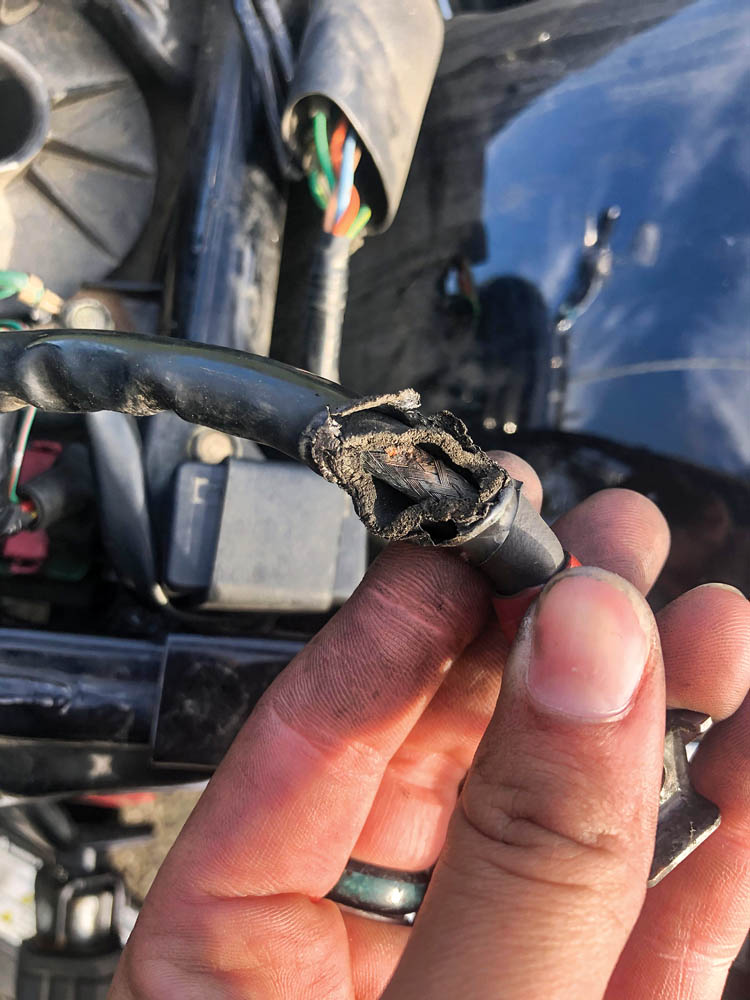
Once, a sharp part of the frame on my 1998 Honda Shadow ACE 1100 wore through the insulation of one of the battery cables, which grounded out and caught fire. My bike sat for two weeks before I mustered the courage to deal with it. When I finally took the seat off, it took about five minutes for me to diagnose the problem and another five for me to solve it. I could have been riding that whole time, but instead I wallowed in my anxiety about the issue.

How I Learned to Stop Worrying and Love to Wrench Riding Around
Worn insulation on the battery cable of the author’s Honda Shadow ACE 1100. She avoided dealing with it for two weeks, but it was easy to diagnose and fix.

This experience taught me two things. One, effort is essential, and any amount of it will be fruitful in some way. Two, effort becomes knowledge. Every time I pick up a wrench, I learn something new, and the process becomes more familiar and less daunting.

Pirsig nailed it: “I’ve heard it said that the only real learning results from hang-ups, where instead of expanding branches of what you already know, you have to stop and drift laterally for a while until you come across something that allows you to expand the roots of what you always know.”

When gathering clues and deducing what the issue may be with your motorcycle, sometimes the answer won’t come easily. These things can be very stubborn. You just have to be a little more stubborn. Relating a story by Pirsig, Matthew B. Crawford writes in his book, Shop Class as Soulcraft: An Inquiry Into the Value of Work, “This is the Truth, and it is the same for everyone. But finding this truth requires a certain disposition in the individual: attentiveness, enlivened by a sense of responsibility to the motorcycle. He [She] has to internalize the well working of the motorcycle as an object of passionate concern. The truth does not reveal itself to idle spectators.”

When I asked Mike Dubnicki, co-founder of Mazi Moto (mazimoto.com), a restoration shop in San Francisco, what advice he would give an aspiring backyard mechanic, his response was similar to Armon’s: Start small and keep it simple. He also said, “have fun and be safe.” Take that to heart. We’re here – in the garage or on the sidewalk, with tools out and fingers greasy – because it challenges us. Because it fills us with a certain wholeness that’s all too rare in today’s world.

So, go ahead. Pick up a wrench, dive in, and enjoy getting a little dirt under your fingernails.

Hannah Hill is a student at California State University Maritime Academy in Vallejo. She aims to create a community space someday where riders of all types have a place to wrench and connect with other like-minded humans. You can find her on Instagram: @rollinghillmotos.

The post How I Learned to Stop Worrying and Love to Wrench first appeared on Rider Magazine.
Source: RiderMagazine.com

Midwest Motorcycle Mechanic School Launches

Midwest Motorcycle Mechanic School

Midwest Motorcycle Mechanic School, a joint effort between Windy City Motorcycle Company and McHenry County College, launched with its inaugural class on January 10, 2022.

The School offers a 12-week class taught by Certified Master Mechanics at a state of the art facility in Woodstock, Illinois. With 360 hours of instruction blending hands on training, classroom sessions, and job shadow opportunities, successful completion of the course will prepare the students to start their career in this in-demand and growing field.

“I highly recommend this class to anyone looking towards motorcycle mechanics as a career,” said Randy, a member of the inaugural Midwest Motorcycle Mechanic School class. “Great instructors. Modern motorcycles to learn on. You’ll be turning wrenches on the second day.”

“This class is perfect for learning the ins and outs,” said Amber, another member of the class. “I learn something every day and the environment is very supportive.”

The information I’ve learned in a few short weeks has been more beneficial than I could have ever thought possible,” said Dustin, who is also taking the class. “Taking this course was the best possible decision I made for my career.”

Midwest Motorcycle Mechanic School

This has been a dream of mine for some time now,” said Doug Jackson, 40-plus-year industry veteran, Woodstock Harley-Davidson/KTM/Triumph General Manager, and Midwest Motorcycle Mechanic School Leader.  “Service is the foundation of a dealership, and to have a strong foundation you need to have highly skilled technicians.  This school provides an affordable, local option for people interested in this exciting career.”

Through McHenry County College, students can access financial aid opportunities to assist with class enrollment for Midwest Motorcycle Mechanic School. If you need financial support for your training, please visit mchenry.edu/ncscholarships.

For more information on the Midwest Motorcycle Mechanic School, please visit mchenry.edu/motorcycletech.

For more information on Windy City Motorcycle Company and the dealerships within the group, please visit windycitymc.com.

The post Midwest Motorcycle Mechanic School Launches first appeared on Rider Magazine.
Source: RiderMagazine.com

How to Plug and Repair a Tubeless Motorcycle Tire

plug repair a motorcycle tire
Sacre bleu! The discovery we all dread, usually right before a ride. Don’t attempt to repair a severe gash or cut, or a puncture in the sidewall of the tire. Once you get the hole plugged, it’s off to your dealer for a new tire.

Considering how bulletproof the rest of our motorcycles have become, it’s ironic that it only takes a little 1 ½-inch box nail in a tire to bring the whole show to a halt. We’re fortunate today that tubeless tire technology prevents intrusions by nails, screws and other foreign objects from becoming catastrophic blowouts. The object usually stays in the hole, the only place from which the tire can lose air, so it deflates more slowly than a puncture in a tire with a tube on an unsealed spoked wheel (which can lose air through all of the spoke nipples and even the tire bead). But even if that pointy thing does stay put and flush with the tread surface, as it flexes back and forth in the carcass the tire will eventually deflate enough to become a problem. Hopefully you will have noticed its presence or even received a low tire-pressure warning before that happens.

Of course, if it doesn’t stay put or is large enough to stick out of the tire (like a 6-inch gutter nail — don’t ask), the tire will probably deflate rapidly enough to strand you by the roadside. Unless you’re lucky enough to be next to a motorcycle shop at the time, you’re going to need either a good roadside assistance plan or a tubeless tire repair kit. (We’ll cover tube-type tire roadside repairs in another installment).

plug repair a motorcycle tire
Once you’re sure your glue isn’t dried out and you have a way to re-inflate the tire, pull the offending object out. You may need pliers if it’s really in there.
plug repair a motorcycle tire
Use the reamer in the kit to enlarge and clean the hole—this is where large T-handles make the job a lot easier. Take some extra time if the tire has steel belts.
plug repair a motorcycle tire
Install a worm on the insertion tool — note that its tapered tip is split to allow the tool to pull free of the string once it’s well inside the hole.
plug repair a motorcycle tire
Put some rubber cement on the worm and a blob on the hole, too, and slowly insert the string in the hole about two-thirds of the way. If it falls inside the tire, just start over with a new string. Gently pull the insertion tool free, leaving the worm in the tire. Again, T-handles make this much easier.
plug repair a motorcycle tire
Use the knife in the plug kit or any sharp blade to cut the plug flush with the tread surface. Give it a few minutes to set up, inflate the tire and then spray some water or a soapy solution on the plug to make sure it’s holding air.

Here at Rider we’ve fixed enough tubeless punctures to appreciate that the most dependable tire repair kit you can carry uses rubber strings or “worms” for the plug that gets inserted into the tire, preferably the large red ones like those in the T-Handle Tubeless Tire Repair Kit from Stop & Go. There are more convenient plug types, but the strings rarely let us down. If you’ve had good luck with liquid sealers, installed either pre- or post-puncture, more power to you — we often carry Slime for tube-type tires on bikes that have tubes in the hope of avoiding a roadside tire dismount. But we change bikes too often to make using the pre-installed sealers practical, and prefer to avoid irritating the mechanic who has to change a tubeless tire on a wheel full of messy sealer.

Repair kits that use string plugs often come with rubber cement, which — depending on the string type — may not be necessary to complete the repair, but at a minimum it acts as a lubricant to ease inserting the plug, and seems to help vulcanize the plug to the tire. It’s important to keep your glue supply fresh (preferably unopened), or you may find that it has dried out when you need it.

plug repair a motorcycle tire
Stop & Go’s T-Handle Kit has everything you need to affect a solid repair. Just add pliers and something with which to inflate the tire (CO2 cartridges or a compressor).
plug repair a motorcycle tire
Stop & Go also offers a plugging kit that uses special mushroom-shaped plugs that don’t require glue, and the pocket version doesn’t take up any more space than the T-Handle Kit, so we often carry both.
plug repair a motorcycle tire
A portable mini compressor beats the heck out of CO2 cartridges if you have the space. Stop & Go’s is small, inexpensive and has a built-in gauge.

No matter what sort you use, any plug inserted from the outside should be considered a very temporary repair used to get you and your bike to the nearest replacement tire. Limit your speed per the plug kit instructions, and replace the tire as soon as possible. Special patch plugs inserted from the inside of a tubeless tire are certainly safer, but even if you can find someone who will install one for you, every tire manufacturer (and even those who sell patch plugs) recommend replacing the tire instead since it has to come off anyway.

The photos in this article cover the basic plugging process with rubber strings. Depending on the size of the hole, you may need more than one — I once used three in an ATV tire and it got me back to camp.

Source: RiderMagazine.com

DIY advice for self-isolating riders

If you’ve responsibly chosen to park your bike during the pandemic, then you may be considering using the time to do some valuable DIY maintenance.

We love a bit of DIY bike maintenance, but there are a few pitfalls that can trap the unwary home mechanic, warns RACQ technical officer and self-confessed mechanical “trainspotter” Steve Spalding.

“I like to know where, how, why things work on my bikes, how the models differ and spec changes, oil specs, servicing schedules, workshop tools to do DIY maintenance etc,” says Steve.

Steve Spalding RACQ voidSteve Spalding RACQ

However, he says there can sometimes be variances between recommended replacement parts and what actually fits your bike.

He recalls replacing his chain and sprockets on his Bandit in a working bee with some friends: “I probably drove them nuts when I spent around 30 minutes using Vernier callipers to measure the right amount of ‘crush’ on the joining link so as to not damage the ‘O’ ring seals.”

“The sprocket sizes quoted by the bike shop for my bike were wrong. They didn’t believe me at first.”

He says he has also found the online and in-store manuals listed different oil filter fitments. He now uses a different model and brand from what is recommended in the manual.

“You’ll find there is a necessary close working relationship between parts people and mechanics. It comes down to the part number versus the application,” he says.

“The spare parts staff rely on manuals and part numbers to supply a part. However, the mechanic determines if the part will actually fit correctly. And the buck stops with the mechanic if they get it wrong.

“Therein sometimes lies the tension as both are experienced at what they do.” 

Identifying the correct part

Steve says motorcycle manufacturers change or modify parts or specifications during model runs. That can make it difficult to identify the correct part.

He advises a VIN number is necessary with original parts. 

“I think most mechanics rightfully rely on, and respect, parts people for getting them the right parts when needed,” he says.mechanic tools maintenance servicing lemon laws diy

“So the message to DIYers is do take advice from the parts suppliers. However, it’s always good practice to make careful observations when removing old parts or preparing to do a job. That will reduce the risk of getting the wrong part.

“And, most importantly, be absolutely satisfied the supplied part is correct before attempting to force-fit. 

“The other advice is use quality parts and oils, and only do repairs and servicing you are competent at doing.

“Mechanics have years of experience, access to manufacturer training, workshop special tools and technical data that most home DIYers don’t have.

“With experience, it’s better to spend more time researching and learning before taking on a new repair task. Then you will spend less time becoming frustrated with a job that goes from difficult to disastrous.” 

Steve says there is a lot of helpful advice online, but he also warns about owner forums and YouTube “how-to” videos.

Online DIY tips:

  • Be careful in where you source motoring advice. It is usually well-intended but not necessarily accurate;
  • Manufacturers, dealerships and local repairers are credible sources of advice, forums and social media less so;
  • Be extra careful about seeking or accepting  ‘legal advice’ such as for traffic infringements, crashes etc from forums and social media;
  • Just because a thought keeps appearing on blogs or social media, doesn’t mean it accurate. It could be that it’s just being repeated from one incorrect source; and
  • If you take advice from unreliable sources and causes damage to your bike or makes things worse, there’s not much chance of recourse. You wear the cost of incorrect advice.

Source: MotorbikeWriter.com

Carburetors and Ethanol

carburetor float bowl
This is what even relatively new carburetor float bowls can start to look like when left to sit with unstabilized fuel. Upon restarting that debris can loosen and clog jets, typically the pilot jet.

For better or worse, most of the gasoline you can buy at stations around the U.S. has been “oxygenated” with some kind of additive since a series of amendments were made to the Clean Air Act in the 1990s. The idea is to help the gasoline burn more completely, and thus cut down on harmful emissions. The latest additive is ethanol, which — without getting into the political and environmental debates about its efficacy — is fine for use in fuel-injected vehicles that are run regularly and designed to use up to 10% ethanol (85% in flex-fuel vehicles).

On the other hand, ethanol-oxygenated fuel is not so great for any vehicles that sit between uses, and/or carbureted engines, like the one in your dirt bike or older motorcycle. Ethanol is alcohol, and alcohol is corrosive to certain parts in older fuel systems. Alcohol is also “hygroscopic” and likes water, so when water gets into fuel during a fill-up or from condensation, it can mix with the ethanol, creating a chemical combo that causes rust, corrosion, acids and sticky varnish that wreak havoc in fuel systems, especially carburetors. Ethanol can even cause rubber parts and fuel lines to dry out, harden and deteriorate prematurely.

Alternatives are few — unless you’re lucky enough to have a fuel supplier or gas station near you that sells ethanol-free gasoline (see pure-gas.com or buyrealgas.com), or you’re OK paying $15-$18 per gallon for ethanol-free gas in cans from a dealer (see vpracingfuels.com), most of us are stuck buying gasoline oxygenated with 10% ethanol. Again, your modern fuel-injected vehicle that you store in a dry place and run at least twice a month is unlikely to suffer any ill effects, but what should someone do with their older carbureted bike (or boat, lawnmower, string trimmer, generator, etc.)?

The simplest, best advice I can offer is…don’t let them sit. The shelf life of unstabilized gasoline containing ethanol is about one month. Running your vehicles every week — or two maximum — until fully warm is the best way to prevent fuel delivery problems. When you can’t run them, here’s what I do to minimize (not eliminate!) problems with my small collection of bikes, and my generator, string trimmer and lawnmower, even spare fuel in cans.

VP Racing
Only a handful of states mandate the sale of 10% ethanol gasoline, and none we’re aware of specifically prohibit the use of non-ethanol fuel, like many of the blends you can buy from VP Racing and some gas stations.

Half Full, Half Empty

On carbureted bikes with steel gas tanks, half the fuel system should be drained, and the other half kept full. Carburetors and their tiny air passages and jets can become plugged with aged fuel that deteriorates into sticky varnish over time. Since carb internals are made of non-ferrous aluminum, brass, plastic and rubber that won’t rust, if it’s practical to drain them (shut off the gas manually first or look for a vacuum-operated-type petcock that is off whenever the bike is), this is your best bet for trouble-free operation when refilled. O-rings and seals have been known to dry out and leak when carbs are left dry for a very long time, but this is less likely than plugged jets or worse if they’re left wet.

Some carburetors have a drain bolt in the bottom of their float bowls, others have a drain screw. Don’t overtighten either one, and only drain carburetors (into something please, not just onto the bike and floor) when the bike is off and cold. Don’t run the bike until it dies to suck the rest out — this can draw dirt and debris from the bottom of the float bowl into the carburetor. I once bought a Honda multi that had been stored in a basement for 15 years with the carbs drained and stabilized fuel kept in the tank, and it was rust-free and fired right up without carb service. If you’re careful, there’s no reason you can’t return newer, clean drained fuel to the tank.

Steel tanks on carbureted or fuel-injected bikes can rust inside, so it’s best to leave them at least ¾ full of fuel to which you have added stabilizer (more on this later). Some newer models have plastic-shrouded aluminum or plastic tanks, in which case it’s up to you, but make sure you stabilize it if you leave fuel in the tank. In really humid environments I would still keep an aluminum tank full.

Fuel injection systems seem much less susceptible to the ravages of stale fuel, and once full of stabilized fuel are almost carefree. In fact, some manufacturers warn against running their EFI bikes entirely out of fuel.

If you can’t drain carbs, after adding stabilizer to the fuel in the tank run the bike long enough to insure stabilized fuel has filled them, then shut off the bike and petcock. I carry a small bottle of stabilizer with me when I take out one of my less frequently ridden bikes, and add it at the gas station before riding home. Err on the side of adding more stabilizer; you can’t overdose (within reason) with the products mentioned below. Stabilized fuel in the carbs does not guarantee that they won’t suffer from plugged passages or jets, however, and you should still run bikes kept this way at least every three weeks. More often is simple insurance that you won’t need an expensive service — compare the cost of non-ethanol race gas and/or stabilizer to that of a carburetor rebuild and the former start to make economic sense. Just make sure you run the engine until it’s fully warm (to burn off water and contaminants in the oil and exhaust). While you’re at it, pump the fork and shocks and work the brakes, clutch and shifter to keep seals flexible and lubricated.

fuel stabilizer
Fuel treatments and stabilizers are not a panacea for ethanol, but they can help in conjunction with regular engine running.

A Stable Relationship

A good ally in the fight against bad gas and fuel delivery issues is fuel stabilizer. They’re not foolproof, but three we’ve found to provide consistent results with motorcycles are Star Tron Enzyme Fuel Treatment, Spectro FC Premium Fuel Conditioner & Stabilizer and Bel Ray All-in-One Fuel Treatment. There are others, but we lean toward these simply because they include motorcycles in their literature and FAQs and that gives us a warm, fuzzy feeling. All make lots of claims about their effectiveness that we have no way of proving or disproving, so just buy some and use it, or spend hours online researching them before you just buy some and use it. All of them offer smaller bottles and/or containers with measuring devices built-in to make carrying and using it while out on the bike easier.

The instructions for each will tell you how much to use, how long the fuel is usable when treated, etc. There are some consistent rules of thumb. You generally only need to stabilize fuel if you won’t use it all up within two months (but carbureted bikes should still be run every couple of weeks as described above). Adding a little new gas or stabilizer to old gas won’t renew it, nor will adding more stabilizer to old stabilized gas extend its usable life. Overdosing is not an issue (unless you drink it, duh), and in my experience none of them will cure a plugged-up carb no matter how much you add to the fuel. Your best bet is to avoid plugging it in the first place.

Good luck, and please write me with any questions, comments or dissimilar experiences! [email protected]

Source: RiderMagazine.com

How to hibernate your bike during pandemic

If you haven’t already decided to self isolate, you may soon be forced off the road by government bans, so you should think about how to hibernate your bike for the months ahead.

Various sources are telling us the lockdown measures will be in place for anything up to six months!

In that time, your bike can deteriorate just sitting in the garage.

The tyres can go flat and out of shape, the fuel can spoil in the tank and the battery will run flat.

Riders in climates where they have to hibernate their bike during the winter will already know the drill.

But for the rest of us, it’s all new territory.

So, we have put together this guide to help you hibernate your bike safely.

At the end of the lockdown, click here to find out how to get your bike ready for riding again.

How to hibernate your bike

SERVICE

Even if you are a few thousand kilometres short of the next service, it is advisable to have your bike serviced before laying it up. Some bikes require an annual service, even if you haven’t done the required kilometres, and that service may fall due during the lockdown. As a minimum, you should think about changing the oil and filters. The Federal Chamber of Automotive Industries advises that automotive brands and networks will remain open to provide sales and service support to customers.  In fact, TeamMoto stores and MCA stores at Penrith, Caringbah and Campbelltown are actually offering free pick-up and delivery when you get your bike serviced so you don’t even have to leave home isolation. (Restrictions on distance apply.)

BATTERY

If you don’t have one of the new-age lithium or anti-gravity batteries, you should put your motorcycle battery on a trickle charger. Others prefer to take the battery out and jump-start it later on. If you do, you will then need to ride the bike for at least half an hour on constant throttle to re-charge the battery.

FUEL

Don’t drain the fuel out. If moisture gets into a metal tank, it can cause corrosion. Instead, leave some fuel in the tank, but add fuel additives (often called preservatives or conditioner) such as Motorex’s Fuel Stabiliser. It can save you the heartache of the fuel degrading and blocking up the injectors or carburettor jets.

TYRES

Leaving your bike sitting in the one spot for several months can ruin your tyres. As they gradually lose pressure, the sidewalls distort where they touch the garage floor. If you leave them that way, it can cause permanent damage. First thing to do is pump your tyres up high and check them every few weeks. However, it is better of you put the bike on a centre stand or a paddock stand which will take most or all of the pressure off the tyres. We like the Dynamoto stand. If not, move it around every few weeks.

Dynamoto Motorcycle StandDynamoto motorcycle stands

RUST NEVER SLEEPS

Had to use that heading, courtesy of Neil Young! Corrosion can get into your bike over the damp winter months unless you keep it dry. Rather than using a bike rain cover, try an old sheet or blanket which is more likely to soak up moisture. Before covering your bike, give the metal parts a liberal spray with a corrosion inhibitor such as Scottoiler’s FS365 or WD40 which repels water. Try to store your bike in a warm and dry spot such as next to a hot water system.

RIDING GEAR

Don’t forget about your riding gear as well. Never put your riding gear away dirty. Give it a good clean and store it in a dry cupboard to prevent mould. Put your helmet in its helmet bag, perhaps with some naphthalene to repel moisture. Store your boots with some newspaper inside to soak up any moisture and prevent them collapsing and going out of shape.

Source: MotorbikeWriter.com

Winter Motorbike Maintenance – The How-To Guide

(Contributed Post for our Northern hemisphere readers)

There is no way to sugarcoat it – winter can be very tough on your motorbike. This does not mean, however, that you can’t get it out for a ride every once in a while. That, of course, with the right maintenance, to make sure your bike can stand any challenge that winter may throw its way.

Depending on how though winter gets in your area, you can either park your bike away and protect it from the cold, or if you want to still enjoy a good ride from time to time, ensure you are keeping your bike in prime condition.

No matter if you decide to keep using your bike for the winter, or store it away until Spring is approaching, this article is meant to help you take proper care of your ride, to ensure winter will come and go in a breeze. 

Consider storing it away

Many bikers decide to store their bike away during winter, either because the roads become sort of dangerous when they get all snowy and frozen, or because they don’t want the shine to wear off. If you chose to park your bike away until the weather gets brighter, do keep in mind that there are some things you need to take care of before.

First of all, you need a good place to store it. You definitely don’t want kids or someone else in the family knocking it over or turning it into a storage shelve. If you have a big garage, then you can safely store it away there and put some protective sheets over it, or even build a cover. If you don’t have a garage, you need to find a good parking spot. A good option would be to rent a spot in covered parking. Just like this San Francisco monthly parking service, you can find such options in almost every city.

Once you decided on a place, you need to prepare your ride for the long hiatus. Make sure you plug and cover your pipes, to protect them from corrosion during winter. By spraying a little light oil into the pipe ends and covering them with some plastic bags, you should be able to keep moisture from getting in and give yourself some peace of mind.

If you, do however, decide you want to keep using your motorbike during the winter season, here’s what you need to do:

Check battery health

When the temperature starts to drop, there will be even more strain put on your battery life. Cold starts, lights turned on more often, bar warmers, they all drain your battery life more than they did before. Make sure to periodically check the power, to avoid unfortunate situations, such as being left with 0 life in your battery in the middle of nowhere.

A healthy battery such be above 12.6 v, but cold temperatures can make it drop significantly lower. Especially before a long ride, make sure to charge your battery and check the voltage periodically, to ensure you can enjoy a risk-free ride. Also, if you find your battery draining way too fast, you may want to consider replacing it before you take the bike for another ride.

Check tires before every ride

Tires tend to lose pressure from time to time, especially during the winter, when the air inside gets cold. If you didn’t already, you should get into the habit of checking your tires before every ride, to ensure there is no damage from previous rides, as well as to verify that the pressure is optimal.

Also, you need to make sure you change your tires with winter-ready ones when roads start to get icy so that you don’t encounter grip problems. On snowy or icy roads, summer tires may be too slippery or prevent you from breaking on time. Changing your tires will ensure you don’t run the chance of accidents.

Use a good antifreeze

Liquid-cooled machines need water in their radiator to keep it cool, but we all know what happens with water in cold temperatures – it freezes. This is why you also need to add anti-freeze to the cooling system, to ensure the radiator does not overheat, but to also avoid frozen water in your pipes.

Ideally, you need to use antifreeze or coolant that has a low freezing point, usually down to -68 °F, so you don’t risk it freezing if the motorbike is parked outside. Also, make sure to check the antifreeze level periodically, to ensure it does not go beyond the lower limit.

Don’t forget lubrication

During the winter, ice on the roads is usually melted with salt. The combination of water and salt can get to the chains and make them rusty. This is why you need to make sure you clean and lubricate the chains periodically, to prevent salt or dirt from accumulating and damaging them.

Other moving parts, such as the controls (brake, pedals, and throttle) can also get damaged from ice or salt, so make sure to lubricate them as well.

What’s more, you should also consider changing the engine oil, as it can get dirty over time, which again, creates the perfect environment for corrosion.

Protect from corrosion

Over time, but especially during winter, the metal on your bike tends to accumulate moist. The problem with moist is that it creates the perfect environment for corrosion to damage your motorbike when you least expect it. Washing, drying and waxing your bike periodically will protect it from damage and ensure it keeps its shine even in freezing temperatures.

You can also apply anti-rust spray to the areas you consider vulnerable, to protect them. For better protection, make sure you apply it regularly, after cleaning your bike, so you don’t seal in the dirt.

Also, keep in mind that corrosion can happen if your bike is stored away as well, you remember to take it out for a cleaning session from time to time.

Source: MotorbikeWriter.com

Brighter future for backyard mechanics?

The future for backyard, independent and even multi-brand motorcycle mechanics may be a little brighter if the coming mandatory data sharing law is widened to include motorcycles.

The law will allow owners the freedom to choose their mechanic as well as provide the backyard or independent mechanic access to service and repair information at a fair price.

Currently, manufacturers charge exorbitant annual prices for such information.

They also partially lock their ECUs which, for example, prevents independents mechanics turning off the “service light”.

It is a move to not only tie down owners to their approved dealer network, but also to prevent owners tampering with LAMS bikes that have ECU power restrictions.

Owners should note that LAMS bikes that have been de-restricted by any method may have their warranty cancelled and could void their insurance.

Data sharing lawbackyard mechanic

This week the Australian Government announced it will introduce a mandatory data sharing law for all passenger cars.

Australian Automotive Aftermarket Association spokesman Jos Roder says this legislation “may pave the way for the motorcycle industry as well potentially”.

Meanwhile, some motorcycle companies intimidate owners with threats to cancel their warranty if they have their bikes serviced at non-approved dealers.

However, The Australian Competition and Consumer Act 2010 prevents automotive dealers from tying you into servicing or voiding your warranty if you service it yourself or have it done by an independent mechanic.

Similar laws protecting consumers against restrictive trade practices, such as this, exist in many countries.

However, your warranty can still be voided if you or your mechanic use inferior consumables (such as oils) or parts; if the servicing isn’t as regular as prescribed in the manual; or if you don’t follow proper servicing procedures.

Source: MotorbikeWriter.com

Best Tips to Customize Your Motorcycle

(CONTRIBUTED POST FOR NORTH AMERICAN READERS)

If you like to customize motorcycles, you should know how to do it properly. Modifications come in many different forms, but you may have to understand a few important basics before you can even start planning a major refinement.

Whether it’s adding small details or doing a major makeover, customizing your motorcycle takes time and money to pull off. That said, here are a few tips to make the most out of giving your bike an upgrade:

  1. Change the seats

Over time, the leather of the seat can wear out with cracks appearing on the surface. You can always by replacing the seat altogether and choosing a more comfortable alternative that firmly supports you. The new seat should have the right amount of softness so you can avoid straining your back during a long drive.

  1. Pick heavy duty tires

Performance-wise, your tires would make all the difference in keeping your motorcycle on the road and preventing it from slipping. If you want tires that are perfect for any road condition, look along the lines of all-weather tires for optimum stability on both dry and wet roads.

  1. Create a laser engraving

Nothing says you’re the sole owner of your bike quite like a custom engraving. An emblem or a coat of arms could be added to your bike to give it a touch of added coolness. You can always create engravings by hand, but this usually takes a lot of time to pull off. To save time and create intricate patterns and designs to add to your motorcycle, you can use a laser that’s capable of engraving different metals accurately.

  1. Add some lights

If you’re looking to be more creative when it comes to customizing your motorcycle, you might as well add some LED lights like those from XK Glow, especially on the bottom. Not only will this make your motorcycle look cool, but it also enhances your visibility at night. Don’t overdo it though as too much unnecessary lighting can actually distract you, other motorists, and pedestrians.

  1. Add some custom stickers

Stickers are like tattoos to your motorbike. Each one tells a different story. So, if you’re feeling adventurous, start by adding stickers that could give your bike a boost in appeal. If you don’t have a thing for stickers, you may want to overhaul your color palette and update the paint job.

  1. Look for hi-tech gadgets and features

There are a lot of gadgets you can attach to your motorbike. You just have to choose which ones to install. A GPS tracker, for one, is a good gadget to have, especially when it comes to traveling unfamiliar roads. You might also consider adding a GoPro mount to prepare your motorcycle for an adventure. 

Conquer the road by riding a bike that’s fully equipped for any journey. 

Use these motorcycle customization tips to finally give your ride the upgrade it deserves and impress anyone who might be dying to take it for a test drive!

Source: MotorbikeWriter.com

Motorcycle Chains 101: The Sealed Deal

motorcycle chains
Chains are not only cheap and reliable, they’re the most efficient form of final drive for a motorcycle. When you boil it down, chains come in two varieties: standard (or unsealed), and O-ring (or sealed). Photos by the author.

Take a look around any dealership floor, bike night parking lot or race paddock, and the vast majority of motorcycles will be wearing a chain and sprockets for their final drive. Belts and driveshafts have their perks, but chains are the dominant drivetrain thanks to their low production cost, efficient power transmission and easy gearing changes and component replacement.

Chains basically come in two categories: unsealed or standard roller chain, and sealed or O-ring chain. Unsealed chains are commonly found on vintage bikes, small-displacement economy rides and off-road motorcycles. They’re what you see on bicycles and conveyor belts, and even the treads on a bulldozer are a type of unsealed chain. Standard chain is just a series of plain bearings made of metal links and nothing else. That means it’s up to you to apply lubricant to keep the parts from grinding themselves into dust, and you have to do it every few hundred miles. Even then, reducing friction between high-wear components like the link pins and bushings is difficult, and as a result unsealed chains wear quickly, necessitating frequent slack adjustments and replacement.

Sealed chains, as the name suggests, have rubber seals sandwiched between the side plates and inner links, sealing in grease that’s sucked in around the pins via vacuum when the chain is manufactured. The O-rings seal the grease in and keep dirt and water out, ensuring the pins and bushings are bathed in lube, which greatly reduces wear and extends the life of the chain. This arrangement also means less frequent and lighter applications of chain lube, since all you’re doing with that can of aerosol is keeping the O-rings moist and pliable and preventing the metal links from corroding.

sealed chain diagram
Having trouble visualizing the layout of a sealed chain? This oughta clear things up. By retaining grease right where it’s needed, a sealed chain’s most vulnerable components are always properly lubricated.

Sealed chains were introduced in the late 1970s and revolutionized chain maintenance by greatly reducing the need for lubrication while simultaneously increasing the life of the chain by up to tens of thousands of miles. More recently, other seal styles have been developed, most notably the X-ring. Here’s the idea: When that chubby little O-ring gets squeezed between the plates, it creates a fair amount of surface area that results in a small amount of drag every time the chain link pivots. That drag saps power getting to the rear wheel. With an X-ring chain, the sealing ring’s profile resembles an “X”” The X-ring is more readily compressed between the plates, and its shape provides four sealing surfaces around each link pin (instead of two), but with less total surface area, resulting in less drag.

If evaluating the drag on your chain seems like the kind of obsessive minutia only a racer would think about, you’re right. X-ring technology was developed for the track and adapted for the street, where the better sealing of the X-ring helped increase chain life even more. As a track-bred product, X-ring chains are typically made from harder, stronger metals and may have weight-reducing features like hollow link pins and thinner side plates. With all those virtues, however, comes a higher price.

how to tell if you have a sealed chain
Not sure if your bike is running a sealed chain? Odds are it is, but if in doubt just take a close look. If you see some rubber bulging out between the plates, you’re riding with permanently lubricated links.

Generally speaking, the better sealing (and thus service life) a chain offers, the more expensive it’s going to be. That being said you may be tempted to slap a standard unsealed chain on your bike because it’s cheap, but the upfront savings simply isn’t worth the cost of increased maintenance and more frequent replacement. Unsealed chains still make sense on smaller, less powerful machines that will log fewer miles, but for regular road use a sealed chain–whether it’s an O-ring type or some other variety–is definitely the way to go.

Sealing lube in around the critical wear components of the chain has taken what was already a practical, reliable and efficient drivetrain and made it even better. No wonder the majority of motorcycles rely on links and sprockets to get down the road.

Source: RiderMagazine.com