Tag Archives: Learning To Ride

Motor School with Quinn Redeker: Motor Cop Ride Along

Motor School with Quinn Redeker Motor Cop Ride Along
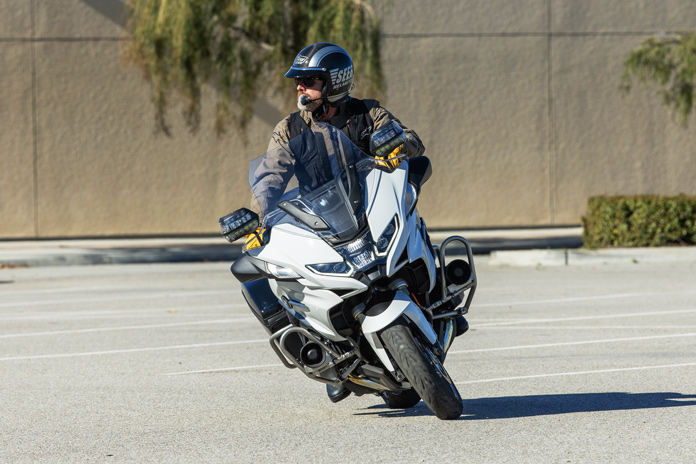
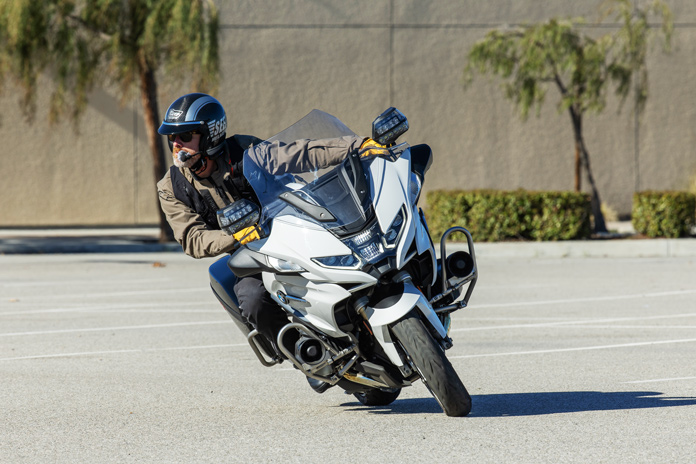
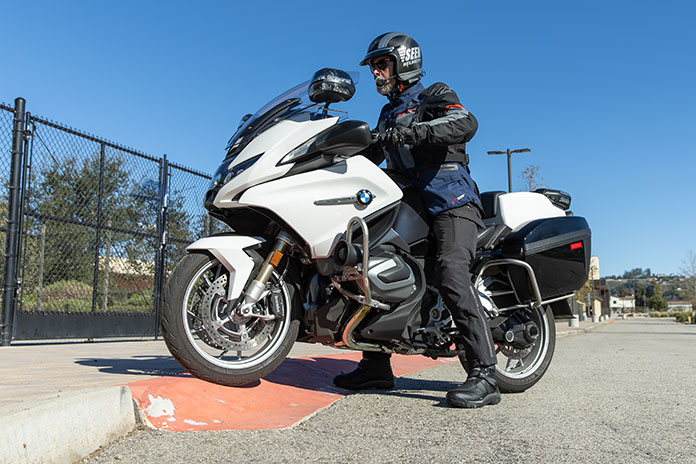
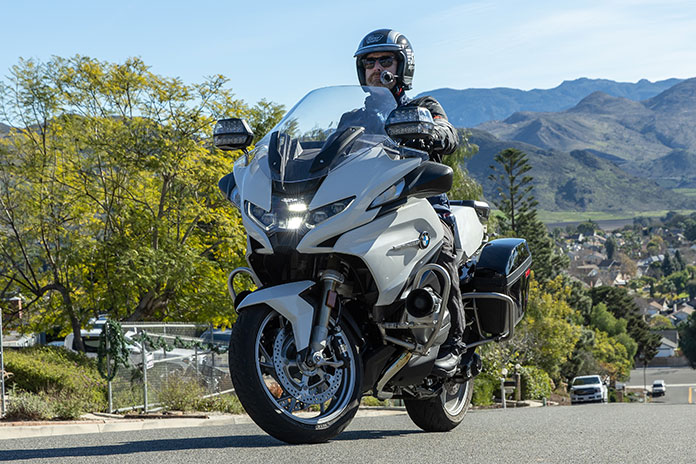
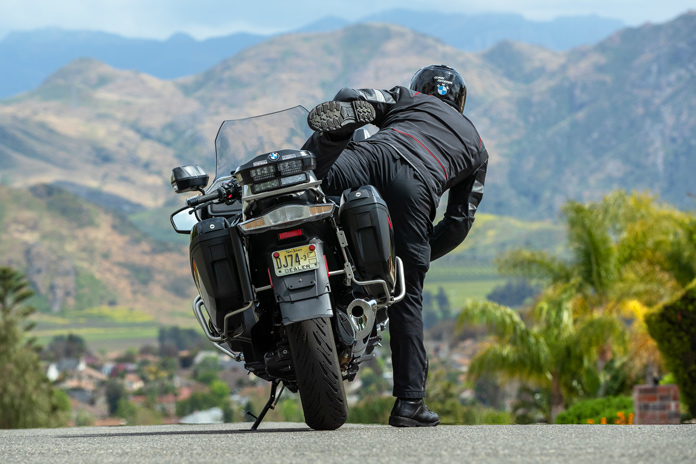
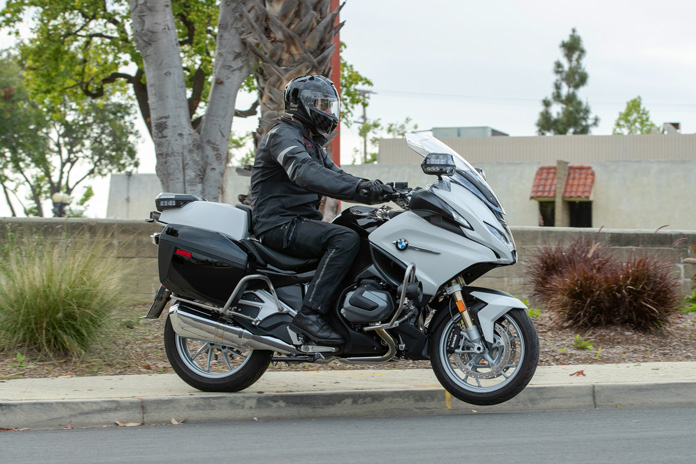
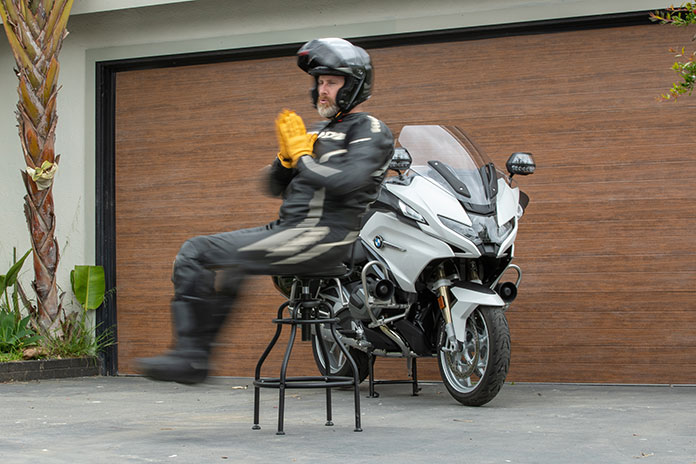
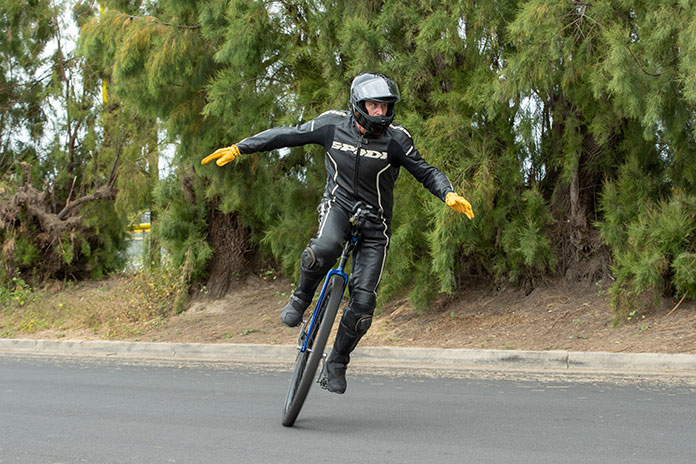
It was scientifically proven in the ’70s that cops like donuts. Rolling Pin’s are among the best. (Photos by Kevin Wing)

We all have our own rituals and processes when it comes to preparing for a motorcycle ride. We play with bike setup, gear selection, maintenance duties, maybe glance at a road map or two. As a motor cop, I too have a process as I prepare for a tour out on the beat. But rather than pontificate on all the finer points of my program, I thought it might be fun if, in this Motor School installment, I walked you through some prep so that next weekend you could come on a ride-along with me. The good news? I already handled the heavy lifting by getting the motor unit to promise to keep wisecracks to a minimum, so now all we need to do is get you ready. Plus, you might find some of this stuff helpful when you plan your next big ride. You in? Great!

First, the nitty gritty. We’re going to be working a 3 p.m. to 3 a.m. special detail next Saturday and Sunday because it’s a fall-break weekend and command staff, in anticipation of things getting a little wild out there, has “voluntold” the motor unit to contribute a few bodies to bolster deployment, so that means us too. But before I go any further, I brought donuts to help keep us razor sharp, so grab a napkin.

Now, from a mental standpoint, next weekend will be different than a typical motorcycle outing in and around town that you normally experience. What I mean is that our regular outings usually find us hovering somewhere around a 4th-grade intellect but with far less focus and clarity. But today our role is that of public servant, sworn to protect and serve. In other words, the title of “police officer” comes first, and that of “motorcycle rider” falls a very distant second. That means we will be looking, watching, listening, and interacting with our environment in ways you were never asked or required to as a rider. Don’t get me wrong; it won’t be so hyper-intense that we’re anywhere close to graduating 4th grade. Maybe think of it as a mid-week math class with a pop quiz on the docket. You know, show up on time, sit down, and stop horsing around. What, the bear claw? Check the yellow bag with the little bears on it…

Okay, some logistics: Dress for the crash, but also be able to run, jump, fight, and swim. And make sure you have plenty of layers at the ready, because its gonna be hot mid-afternoon and cold by midnight. Pack a balaclava and rain gloves too, along with a clear shield. Also pack sunblock and water. Sometimes we have time to grab a bite but sometimes not, so bring food. I’ll have a trauma kit, but bring a first aid kit with you, along with your tools and battery jump-pack. Bring your emergency medical and contact info in your helmet and wallet too. In short, we are preparing for the apocalypse, but with minimal snacks or potty breaks.

Motor School with Quinn Redeker Motor Cop Ride Along
Hope for the best, plan for the worst. If you have the tools, bring ’em.

We’ll be riding lots of unpredictable roadway: dirt, wet, old pavement, gravel, beach sand, steep hills. Since it’s all city stuff, I like a little more compliance and grip, so I air down just a smidge, maybe 3-5 psi below normal. Still, make sure to bring a tire plug kit, tire gauge, and inflator so we have options. And you’re an AMA member, right? They have great roadside assistance if we need it.

While motor cops typically ride next to each other, side-by-side when traveling from one place to another, you and me will be riding staggered at the back of the stack. I’ll stay in the forward position in the left wheel track of the lane, you stay in the right track a few bike lengths behind me. This just gives us more options if we need to take evasive measures, and that side-by-side stuff is really tricky unless you practice it a lot. And no matter what, do not put your left foot down in the middle portion of the lane at intersections when we come to a stop. That’s what we call “dirty foot,” because it’s the portion of the lane where all the grease and dirt accumulates. Trust me, the motors will give us a substantial verbal lashing if they see you do it.

Hmmm, what else. Let’s go over some safety stuff. If I initiate a traffic stop and pull a vehicle over, I’ll need you to lay back and wait somewhere safe. That said, if you see that I’m clearly in physical distress and you’re pretty sure I need help, feel free to mosey on over and lend a hand. I’m not saying you have to get involved, and I wouldn’t want you to get a cramp from all those donuts, but I think it’s safe to say most cops wouldn’t wave off life-saving assistance from a well-intentioned citizen.

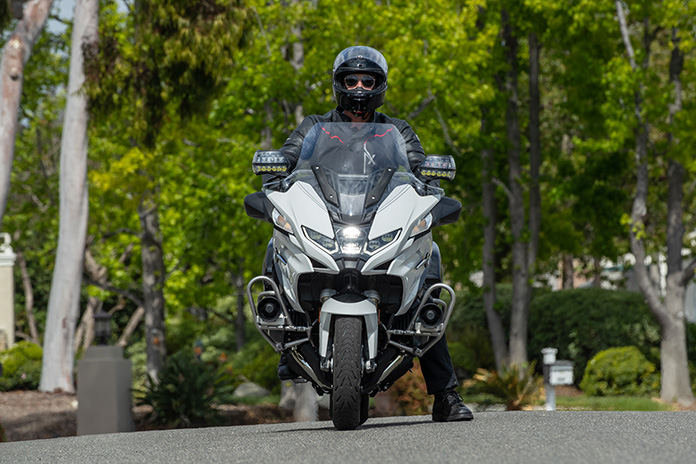
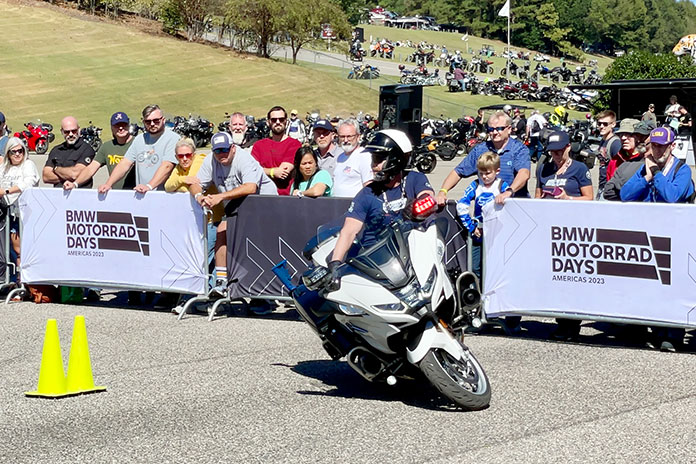
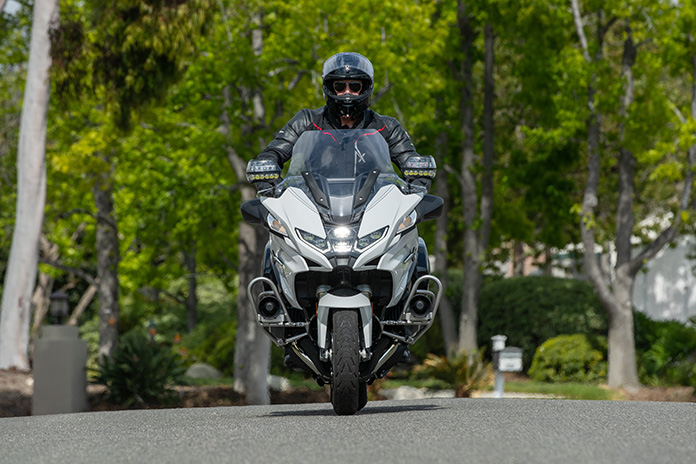
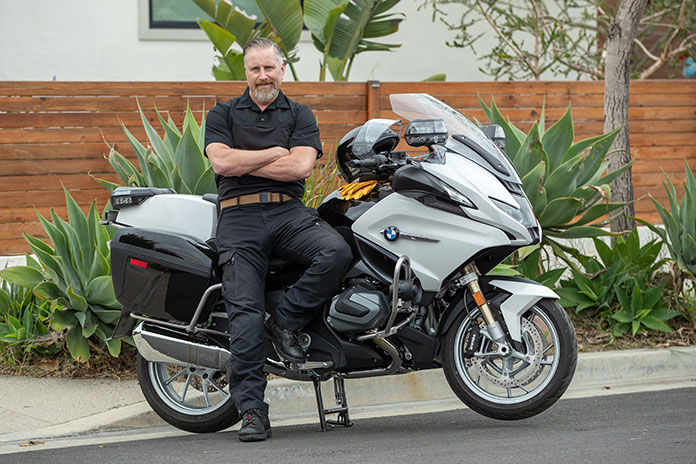
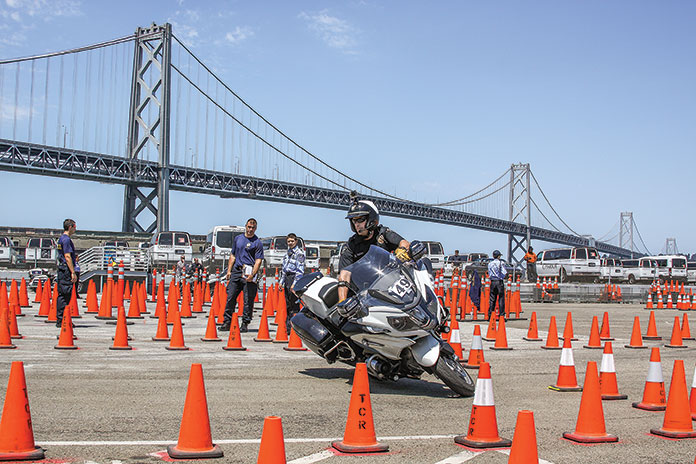
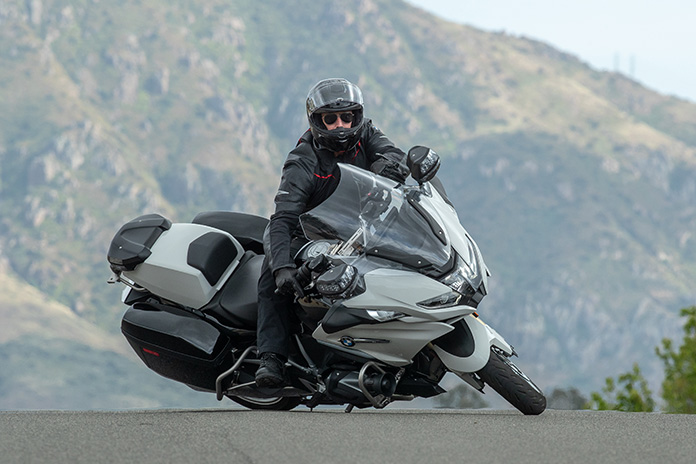
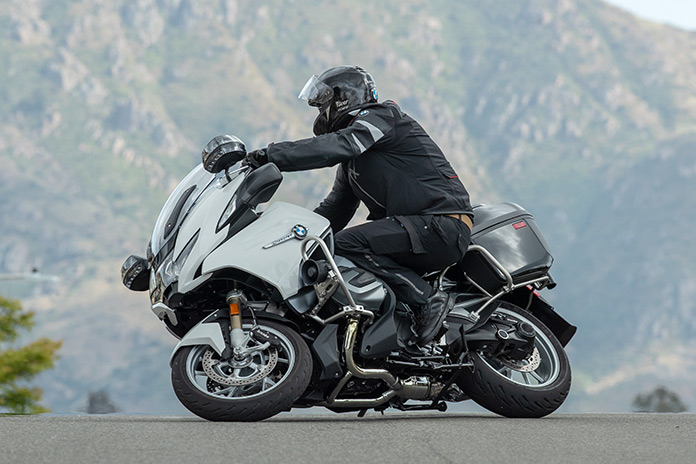
Also, while we’re together I’ll be listening to all city communication through my helmet, so I’m not ignoring your awesome Bazooka Joe jokes, I’m just determining if I need to respond to an emergency request for help somewhere in the city. A few years back a call went out about a swimmer in distress off the east side of the Ventura pier, and because I was on my BMW RT-P, I was able to squirt around downtown traffic, get onto the pier, dodge some angry fishermen, and climb over the railing in time to make a successful water rescue. Of course, these situations are exceedingly rare, but because motor cops can get anywhere faster than any other first responder, we need to prepare our minds for that possibility when we roll around on the bikes.

Motor School with Quinn Redeker Motor Cop Ride Along
When stopped, never rest your foot in the greasy unpredictable middle of a traffic lane. Ask me how I know.

Speaking of the pier, this is a beach city, so there are lots of pedestrians, surfers, bicyclists, motorcyclists, and random tourists everywhere. We will need to pay extra attention to the late afternoon sunlight, because the glare will be directly in our eyes as we head westbound and that, coupled with the ocean glare, will easily blind us. To help with this, I run a thin strip of electrical tape along the very bottom of the sunshield on my modular helmet so I can block out the sun – a poor man’s visor of sorts. Maybe set that up and try it out before next weekend. Speaking of glare, pack some anti-glare glasses if you have some because between new brighter headlights on the road and our pupils’ dilation at night, they really help with vision and overall safety while we ride.

And like any fun beach town shortly after that delightful last call of 0200 hours, we will be sharing the road with sozzled drivers. In anticipation for this unfortunate eventuality, we’re going to slow down quite a bit more than usual when we visually clear intersections. But regardless of where we are in the city or what time of day it is, let’s just assume and plan that every car everywhere will try to hit us. And by “assume,” I mean if our wheels are in motion, we have our heads on a swivel looking for threats, we are ready to execute evasive maneuvers, we’re covering the front brake, and we’re cerebrally resetting repeatedly. Bottom line, we should be completely brain fried by the end of our shifts next weekend.

Now relax, were gonna have a great time. I’ll make sure nothing bad happens to you. After all, if my 4th-grade math is correct, it’s your turn to buy donuts next time we ride to Rolling Pin. 

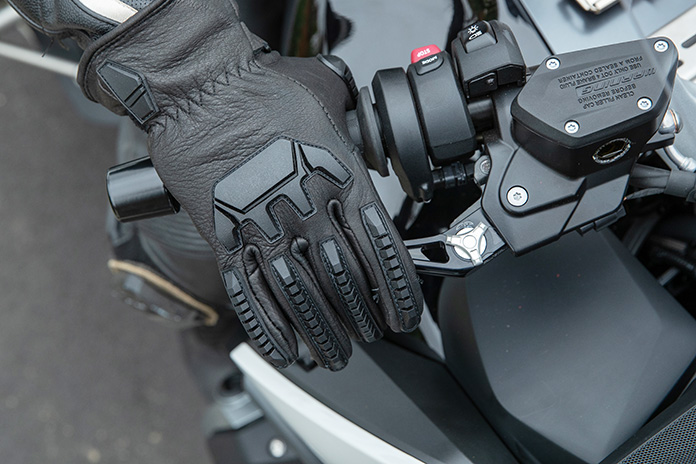
For more information on Total Control Training and available clinics, go to the Total Control website. Quinn wears Lee Parks Design gloves exclusively. Find Quinn at Police Motor Training.

See all Motor School with Quinn Redeker articles here.

The post Motor School with Quinn Redeker: Motor Cop Ride Along appeared first on Rider Magazine.

Source: RiderMagazine.com

Motor School with Quinn Redeker: As Easy As Walking

Motor School with Quinn Redeker As Easy As Walking
No muss, no fuss. When we lock our body’s centerline with the bike and maintain an upright position, the negative forces of the incline vanish before our eyes. Comfortable and controlled U-turns are all that remain. Scout’s honor! (Photos by Kevin Wing.)

Cruising down the freeway, I clicked into 6th gear and noted that the day was warming up nicely. It felt amazing. And not just because the salty breeze was creating another Southern California moment. It was also the final day of instructing an intensive four-week police motor academy in Ventura.

This final day’s training segment would be an unofficial “city survival” induction, where I go off-script and show my eager ducklings the real-world complexities of working enforcement on a motor. In other words, I expose them to as many things as I can dream up before buttoning up their raincoats, kissing them on the cheek, and sending them out into the storm. 

After a short briefing, with a Starbucks venti skinny iced caramel macchiato coursing through my bloodstream, I led them through slippery hiking paths, rain-rutted fire roads, steep off-cambers, stairs, beach sand, railroad tracks, rocky hill climbs, and anything else I could manage. After four hours of on-bike training, we successfully navigated the delicate but sublime incline of the In-N-Out Burger parking lot. In the end nobody got hurt, and the BMW crash bars worked aces.

Unfortunately, it wasn’t all rainbows and butterflies, especially when my flock tried to navigate steep incline U-turns. Observing from the sidelines, I noticed they were dealing with two primary issues: 1) Fear: the steep inclines promised that their motorcycles would skate to the bottom of the hill if they even lightly kissed the deck, so they mentally locked up, and 2) Technique: they believed that in order to avoid crashing, they had to slip the clutch, counterbalance, drop the bike over, lock the bars, keep their speed up, and get their head and eyes around. In other words, they made it way harder than it needed to be.

Motor School with Quinn Redeker As Easy As Walking
Yes, it really is this simple. If you can stand and balance yourself on an incline without falling over, then you can do the same on your bike! Your natural equilibrium is the key.

After witnessing a few underwear emergencies, I hit the pause button on the Hindenburg debacle and imparted a little hillside riding hack that made the process much easier. Since you weren’t on hand to watch the demonstration, I thought now would be a good time to walk you through it so you can learn how to perform effortless U-turns on steep inclines. Ready?

First, find a steep incline such as a wide public driveway, alleyway, service road, or similar – just make sure it’s free of vehicular traffic during our science lab. Park safely on the hill, dismount, and stand next to your bike. While standing in place, balanced and comfortable, slowly rotate 360 degrees, taking short pauses at each point on the compass. Notice that as you stand, you have no momentum, yet you remain perfectly balanced on the hill without needing to transfer your weight to regain any stability. Also notice that your body’s angle or center line in relation to the incline of the hill does not shift, regardless of the direction you face on the incline.

Next, walk in a 30-foot circle on the hill. Notice that as your position and orientation changes from walking uphill, downhill, and sideways, you never fall up, fall down, or lose your balance on the incline. In other words, your body’s balance point, or center line, remains consistent and intact regardless of momentum or direction of travel.

The important point here – which applies to riding your motorcycle – is that because your body’s equilibrium works to keep you vertical and balanced no matter which direction you are facing, you can go, stop, turn, and move freely and effortlessly on the incline without requiring massive lean angles and oodles of forward motion. Less lean angle means no scary bike drops due to miscalculating weight transfer, clutch control, momentum, and 10 other complicated but unnecessary things while attempting the U-turn. In the words of Greg Brady, pretty far out, right?

Motor School with Quinn Redeker As Easy As Walking

Now let me be clear: Nothing changes once we get on the motorcycle. Your motorcycle, like you, has an equilibrium of sorts, a balance point or center line that enables it to remain perfectly balanced on a hill when it’s straight up and down, regardless of the incline it encounters or the direction it faces. And in the same way you make subtle adjustments to remain perfectly balanced while standing on your feet, you will make those subtle adjustments on the bike. Now let’s pump some helium into this leviathan and get her airborne…but no smoking please.

Here’s your first drill: Ride your motorcycle relaxed and easy, in 1st gear, up the incline. When you feel comfortable, I want you to initiate a turning movement and stop at a 90-degree angle, or perpendicular, to the roadway – like you are starting to turn into the Frosty Queen but you stopped short of the driveway entrance.

The rules are as follows: 1) you must keep your body’s mass in line with the motorcycle’s mass (no shifting body weight to one side or the other in the cockpit), and 2) at no time during the turning movement are you allowed to introduce any lean angle to the motorcycle. Remember, just like when you walked around on the hill and remained straight up and down, you must do the same on the bike. After a calm and uneventful pause on the hill, remain perfectly upright and balanced, turn the bars downhill without leaning over, and take off down the hill. Hey, I love Frosty Queen too, but we’re training here…

Here are a few keys to your success. Keep in mind your feet will not be equal distance from the ground as you sit on the hill in the 90-degree position due to the incline, so use the high side of the roadway to plant your foot and rest the other on the peg. Also, resist the urge to lean your bike towards the downhill when you take off from the 90-degree position. This will only serve to make the bike fall over toward the downhill and require you to chase it by engaging the clutch and adding power. Always keep everything straight up and down. Rinse and repeat.

Once you get comfortable riding into the 90-degree position, stopping, then completing the U-turn without any lean angle, start turning around without stopping at all. You may find yourself wanting to carry more speed now that we’re executing a full U-turn, but added momentum can force a lean angle that we don’t want. Instead, resist the urge, go slow and smooth, and concentrate on always keeping the bike upright. Yes, I’m beating a dead horse here, but by keeping the bike balanced and upright, we don’t need speed (or lean angle) in our turning process to remain comfortable and in control, which is why this works so well. 

And that’s it. If you can walk, you can execute this technique. For a visual example, go to Police Motor Training with Quinn Redeker on YouTube and find “Motorcycle U-Turns on Steep Hills – Easy as Walking.”   

For more information on Total Control Training and available clinics, go to the Total Control website. Quinn wears Lee Parks Design gloves exclusively. Find Quinn at Police Motor Training.

See all Motor School with Quinn Redeker articles here.

The post Motor School with Quinn Redeker: As Easy As Walking appeared first on Rider Magazine.

Source: RiderMagazine.com

Motor School with Quinn Redeker: Benefits of Being Last

Motor School Quinn Redeker Benefits of Being Last
When lane splitting, which is legal in California and several other states, playing follow the leader helps open up a wider space for you to ride between lanes of gridlocked traffic. (Photo by Kevin Wing.)

Despite the fact that I’m getting up there in age, I still like to think of myself as a motorcycle racer. But if I’m honest, it’s more of a dream than reality. I’ve won zero purse money, never had sponsorship funding past dear old Mom and Dad, and not once has Broc Glover spooned a free set of Dunlops onto my race steed. Still, if ever our paths have crossed on track, you know I don’t like to follow, I won’t get out of the way, and I’m going to do everything in my power to lead to the checkers…

They say with age comes wisdom. No, I’m not talking about the increased bran uptake or the geriatric mobility stretching I’ve incorporated into my daily life. I mean that I’m growing to appreciate the benefits of pulling up the rear when I go on motorcycle rides. While I pass up the potential for champagne, roses, and adoration, I gain valuable insights that I can’t get if I’m trying to stay up front all the time. Give me a second to pop some vitamin I (ibuprofen) and I’ll explain.

At first glance, being the caboose doesn’t sound great. Your scenery gets cluttered with Big Tom on his three-wheeler, you lose influence on speed and direction within the pack, and if someone is going to miss the green light, odds are it’s going to be you. But let me make the case for some of the tangible benefits of removing ourselves from the lead group.

First, the obvious: Your riding group probably goes a tad over the speed limit from time to time. Now I’m not saying they ride like they’re evading Sheriff Buford T. Justice to win a bet with Big Enos, but I am suggesting that being at the back of the line when the speeds pick up improves your odds of making it home without a ticket. Just sayin’.

Second, while we’re playing backmarker, we have a fantastic vantage point for watching the lead riders manage traffic hazards, road imperfections, and camber changes, all with a bit of processing time before it’s our turn to move to the dance floor and show everybody what we’ve got. It’s like having a crystal ball, allowing you to see a bit into the future and increase your margin of safety.

Also, should you steer yourself to a local track, there is no better way to get acclimated than by following a skilled rider around the circuit. From behind, you learn proper corner entry, braking markers, line selection, and everything necessary to be safe and have fun. In fact, I regularly introduce myself to riders I’ve observed pounding laps to ask if they’d slow a bit and allow me to follow so I can figure things out, and usually they are happy to oblige. Think of it as getting a friendly “tow” around the track until you map out the terrain.

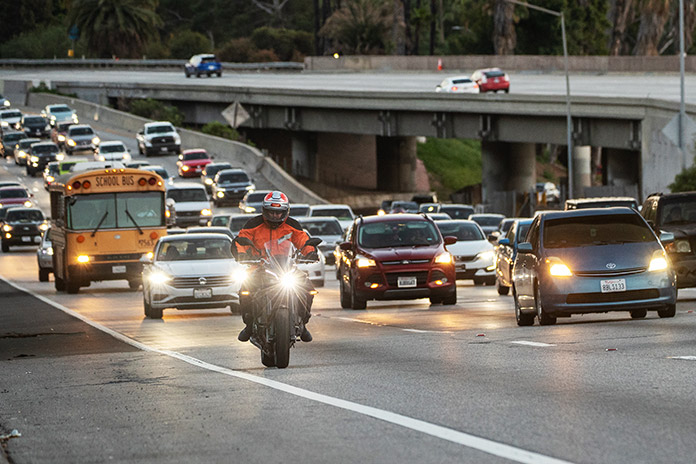
Here in Southern California, we do plenty of lane splitting on the highways, and while it’s a huge timesaver and safer than being stuck in traffic between bumpers, it can be tricky. Some cars give you a wide birth while others wander around blindly. Whenever possible, I hang back a bit and let other riders forge a path, as it tends to “sound the alarm,” making drivers aware there are motorcyclists coming through by the time I squirt past.

Here’s one for you motorcycle-riding content creators: Ever watch a POV motorcycle video shot by a lead rider? There are no motorcycles in the video, just scenery rolling by. You might as well have your friend hold a GoPro out the sunroof of your Datsun 280ZX. At least then you might pick up some righteous tunes with Foghat blaring out of the car’s speakers. Instead, shoot video from the back of the pack so your content shows motorcycles in action, leaning into corners, and doing all the things that made you want to saddle up in the first place.

At Total Control Training, we teach on-track Advanced Riding Clinics, where we instruct students using road-speed concepts within a track setting so they learn what to do, when to do it, and how to do it properly. In this setting, my role is that of instructor. And while melting a set of Metzeler supermoto tires in the front of the group undeniably contends with my childhood joys of Christmas morning, staying behind allows me to get a better sense of how students are interpreting and applying the instruction we provide. Yes, we lead students at times to show techniques by example, but by following, I am a far more impactful instructor. This same thinking applies to the street and pays big dividends with my riding buddies too.

Motor School Quinn Redeker Benefits of Being Last
During Total Control Training’s Advanced Riding Clinics, instructors often lead from behind, as founder Lee Parks is doing here. It’s the best vantage point to observe students’ technique. (Photo by Austin Soboleski.)

Another aspect of the Advanced Riding Clinics is suspension theory and practical set-up. All those suspension dials and clickers you sometimes throw screwdrivers at? Well, they can make a huge impact on how a bike feels and performs, and following behind someone while riding is a great way to see if a bike is set up correctly. Trust me, your riding group could do itself some big favors by taking a little time and systematically rotating each member to the tail-gunner position to observe each other’s motorcycles in varying environments. At the minimum, it might catch that Steve did a lousy job of securing his camping gear to the pillion, and that alone is a win in my book.

And let’s not lose sight of the fact that every riding group needs a “mother hen” to keep a lookout from the back of the pack. No, it doesn’t have to be the same person on every ride, but it’s good sportsmanship to serve as the team’s sweeper from time to time. Not only will you be able to observe potential mechanical problems, but you will also see who might be struggling and could use some helpful feedback when you get to the coffee stop.

Now before you argue these are obvious and uninspiring ideas to add to your riding plan, let me push back and say that having information and putting it into practice aren’t the same thing. I’m suggesting here that you drop back more often than you do now and spend more time in the role of observer. Over time, you will see more, learn more, and ultimately improve the quality of both your own ride and that of your team. And who knows, maybe if you keep your eyes open, you might find the Coleman stove that liberated itself from Steve’s saddlebag.

For more information on Total Control Training and available clinics, go to the Total Control website. Quinn wears Lee Parks Design gloves exclusively. Find Quinn at Police Motor Training.

See all Motor School with Quinn Redeker articles here.

The post Motor School with Quinn Redeker: Benefits of Being Last appeared first on Rider Magazine.

Source: RiderMagazine.com

Motor School with Quinn Redeker: Stuff Motor Cops Know

Motor School September 2024 Stuff Motor Cops Know
Alexandros Varvounis and other motor cops share some advice and tips with readers in this installment of Motor School.

For this month’s Motor School, I thought it might be cool to reach out to a few of my motor officer buddies from around the country and task them with dispensing some rider-safety wisdom to the class. That’s not to say you haven’t gleaned substantial lessons from your time out on the range, but I think you would agree that the more hands we have, the more wells we dig, and the more water we drink. In other words, more ideas from more people is, well, more. And more is better when it comes to ideas we can employ to be safer on the motorcycle.

Speaking of more, I’m confident your neighbor Bob has loads more ideas, rituals, concepts, routines, and opinions than what we’ve assembled below, so think of these ideas as jumping-off points. What I don’t want you to do is hunt around to see if one of your foundational safety routines made the cut, only to lose your cool when you find that it didn’t. Instead, challenge yourself to find something useful here. My expectation is that some of this will be new information and some will be old news, and that’s absolutely fine. After all, this isn’t your first rodeo.

Alexandros Varvounis, Metropolitan Police, Washington, D.C.

Motor School September 2024 Stuff Motor Cops Know
The District of Columbia’s Alexandros Varvounis lives on a steady diet of police motor competitions and endless traffic details. It’s harder than it looks.
  • Always assume other cars are going to steer into you – in alleys, out of bus-lane drop-offs, at all intersections. It’s never if, but when.
  • Be ready to stop your motorcycle at any moment. You know that intense focus your dog has while he waits for you to throw the stick? Be ready like that.
  • While it takes practice and experience, try to anticipate the movements and actions of other drivers. Know what they are going to do before they do.
  • Calm down and ride accordingly. No good decisions will arrive when your mind is spun up.
  • Egos and motorcycles don’t mix. You will lose the game with that mindset. 

Mike Ericson, California Highway Patrol 

Motor School September 2024 Stuff Motor Cops Know
Now retired, Mike Ericson has tons of California miles under his belt.
  • In CHP motor school, my instructors told us that when faced with the choice of either laying the bike down in an emergency or keeping it upright and trying to ride it out, keep riding the motor. And I can tell you firsthand this one was a lifesaver.
  • Keep your head on a swivel. Threats come from all directions, not just from in front of you.
  • Keep working through the problem – don’t give up physically or mentally when things start to go bad on the bike. Maybe you can’t avoid a situation entirely, but odds are you can mitigate it to some degree.
  • Any time you find yourself angry at a driver who startled you by doing something that put you at risk, let that be a reminder that you didn’t see it coming, weren’t prepared, and didn’t have a plan. Sure, it’s the driver’s fault, but in the end, it’s the rider who loses.
Motor School September 2024 Stuff Motor Cops Know
As a “CHiPy,” Ericson completed the California Highway Patrol Academy, one of the toughest motor programs in the country.

Dale “Chip” McElhattan, Vienna Police Department, Virginia

Motor School September 2024 Stuff Motor Cops Know
Virginia’s “Chip” McElhattan is a tough-as-nails competitor, but he’s also one of the nicest motors you’ll ever meet…assuming you aren’t speeding, that is.
  • Try to keep eye contact with drivers when clearing intersections, changing lanes, or pulling into/out of driveways. If they’re looking at you, they probably see you.
  • Visually clear every intersection no matter what color the traffic light is. Not some of them, not most of them, all of them.
  • When stopped, make sure you’re checking your mirrors. Crazy stuff can happen behind you!
  • Have a ride routine: visual oil level check, quick air pressure check, start the bike and do a quick walk-around: check the headlight, turnsignals, and brake lights. Once you’re rolling, do three hard straight-line emergency braking runs from 25 mph. In all, you spent just two minutes to confirm your bike is set, your tires have some heat in them, and your body and mind are warmed up for the ride.
Motor School September 2024 Stuff Motor Cops Know
Dale “Chip” McElhattan

Luis Vela, Houston Police Department

Motor School September 2024 Stuff Motor Cops Know
Quinn teamed up with Luis Vela at a Texas motor competition last year, and he was impressed: “I can tell you, this guy knows how to ride!”
  • One of the best tips I was taught when I first came to motors was to not outrun your headlight in the dark. In other words, don’t speed at night!
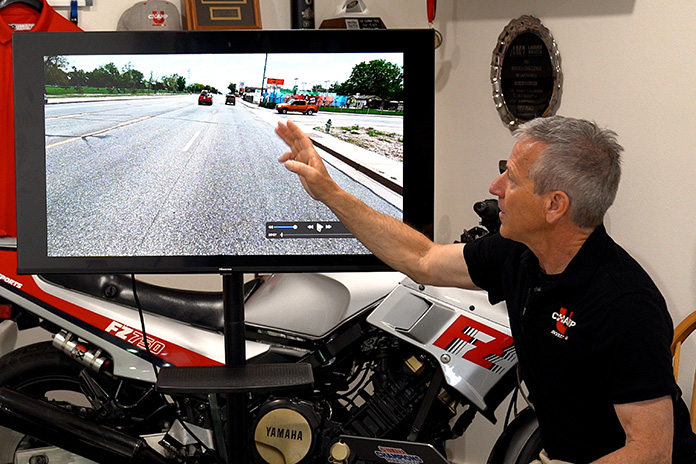
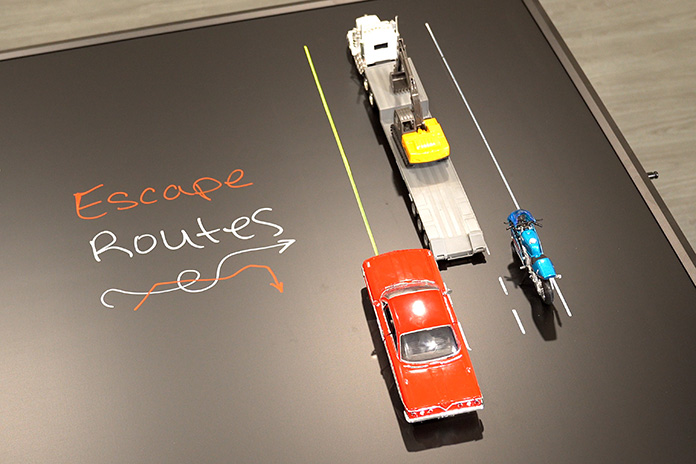
  • Always have an escape plan so you can get out of a bad situation when needed – at a traffic light, on the highway, or on a canyon road.
  • Ride like you are invisible and assume you will be cut off every time you cross an intersection. That way you won’t be surprised when it happens, and you can get on with working through the problem.
  • Always keep your bike in gear when at a stop so you can get moving immediately if necessary.

If you have a powerful safety-related tip you want to share, shoot me an email outlining the finer points, and we’ll consider including it in a future issue. Remember, the road goes on forever. 

Quinn wears Lee Parks Design gloves exclusively. Find Quinn at Police Motor Training.

See all Motor School with Quinn Redeker articles here.

The post Motor School with Quinn Redeker: Stuff Motor Cops Know appeared first on Rider Magazine.

Source: RiderMagazine.com

Harley-Davidson Riding Academy Trains One Million Riders

Harley-Davidson Riding Academy Trains One Million Riders
The Harley-Davidson Riding Academy has now trained one million riders across 225 dealerships in 43 states.

Harley-Davidson has announced that one million riders have been trained in the Harley-Davidson Riding Academy program, which includes a variety of classes to help both new and intermediate riders learn the basics and hone their skills.

The Riding Academy has classes at 225 Harley dealerships in 43 states. The New Rider Course is designed to teach the basics to students who may have never sat on a motorcycle before, and completion of the class allows the student earn a license waiver to get a motorcycle endorsement at the DMV. The Academy also has courses for intermediate level riders, 3-wheeled riders, and adventure-touring riders, as well as a Skills Practice course.

For more information, read the press release below, and find a Riding Academy course near you from the Harley-Davidson website.


Harley-Davidson Riding Academy Trains One Million Riders

Harley-Davidson announced today that it has trained one million riders through its Riding Academy program, cementing its status as the largest rider training program in the United States

“We’re proud to hit one million riders trained – and it’s a significant milestone for the Harley-Davidson Riding Academy. Promoting rider education and training for riders new and old is an important part of the overall riding ecosystem. At Harley-Davidson, we’re committed to building ridership and deepening our connection with customers, ultimately reinforcing our goal to be the most desirable motorcycle and lifestyle brand in the world,” said Jochen Zeitz, chairman, CEO, and president of Harley-Davidson.

Launched in 2000 as Rider’s Edge, the program was rebranded in 2013 as Harley-Davidson Riding Academy. Today, Harley-Davidson Riding Academy provides training through a network of more than 225 Harley-Davidson dealerships in 43 U.S. states, making it the largest rider training network in the United States and the only nationwide rider licensing program sponsored by a motorcycle manufacturer.

Harley-Davidson Riding Academy Trains One Million Riders

With a suite of premium rider development experiences designed to enhance and enrich any rider’s journey, Harley-Davidson Riding Academy is a leader in providing lifelong motorcycle riding skills development. The foundation of Riding Academy training is the New Rider Course that helps students to achieve their dream of riding a motorcycle.

Find all of Rider‘s Harley-Davidson motorcycle reviews and news here.

Riding Academy also offers courses for intermediate level riders, those wanting to learn how to operate a 3-wheel vehicle, adventure-touring riding, and skills practice for riders wanting to gain skills on their own motorcycles. In most states, successful completion of the New Rider Course, Intermediate, or 3-Wheel Course earn the student a license waiver to get a motorcycle endorsement on their license at the state DMV.

Harley-Davidson Riding Academy Trains One Million Riders

The majority of Riding Academy coaches are dual-certified by Riding Academy and the Motorcycle Safety Foundation (MSF) to ensure they adhere to the highest standards of professionalism, safety, and adult-learning principles. Riding Academy is proud to have more than 1,500 certified coaches in its network.

If you are interested in learning to ride a motorcycle, find a Riding Academy location near you.

The post Harley-Davidson Riding Academy Trains One Million Riders appeared first on Rider Magazine.

Source: RiderMagazine.com

Motor School with Quinn Redeker: Balance Ball 2.0

Motor School with Quinn Redeker Balance Ball 2.0
Let’s find your center in this Motor School installment. There is nothing more sublime than the moment you discover perfect balance on your motorcycle. (Photos by Kevin Wing)

In an earlier column, I mentioned that my background was primarily in off-road riding and racing before I got into the police motorcycle thing. So it was inevitable that some of my lifelong dirty habits would bleed over into my techniques for riding heavy streetbikes. Hey, I was an old dog when I became a motor cop, and I had lots of old tricks. Of all the off-road skills that transferred into my urban traffic enforcement program, today’s class covers one of the best.

Let’s kick it off with some game show trivia. I’ll go with “Motorcycles” for $200, please. How do you hold on to a motorcycle when you ride? “With my hands on the handlebar.” Sorry, that’s incorrect. The answer our judges were looking for? We control the bike (push, pull, twist, and squeeze the controls) with our hands; we hold on to the motorcycle with our legs. Thanks for playing, pick up your free copy of Green Smoothies for Life on your way out the door.

Okay, that was the bell, please have a seat so we can begin. For today’s lesson, it’s important to understand that there is an optimal position within the rider cockpit that keeps the rider’s mass always balanced, minimizing the negative effects it has on the motorcycle when we experience weight transfer while riding on the street. 

Let me explain: When we ride around on our motorcycles, we encounter forces of acceleration and deceleration. Do you ever find yourself holding on to the bars like a water skier under hard acceleration or performing an involuntary push-up against the bars under heavy braking? That’s weight transfer, and the less we can include our own mass in the exchange, the less it unsettles our suspension or impacts our traction, braking, steering geometry, and more. In short, the less we throw our weight around, the better. And maintaining a consistent center of balance within the cockpit is key.

Now, to put this lesson into practice, let’s go to the land of make believe (or the garage) and do a visualization exercise while perched atop our motorcycles. With your bike standing straight up (either on the centerstand or balanced with both feet on the ground), pretend the motorcycle is one of those big exercise balls you see people balancing on at the gym.

Motor School with Quinn Redeker Balance Ball 2.0
Counteracting weight transfer under acceleration with only one hand on the bar.

Now play along, and in your mind, with your eyes closed and your hands off the handlebar, shift your body to the precise location on the ball (your seat) that puts you in the center of it. Pay attention to how far forward or back you are and imagine the ball moving around in all directions. Are you still balanced? If the answer is yes, this final position is ground zero. Bullseye. Home plate. From this point forward, this will be the spot you operate from when you encounter forces of acceleration and deceleration (weight transfer) that push and pull you as you go and stop. Oh yeah, you can open your eyes now.

Let’s go ahead and gear up. I’m going to put you through an exercise that will force proper body position during weight transfer and help you develop a better sensitivity for when you get it wrong. This will allow you to self-diagnose and make the necessary corrections, because I can’t always be there to wave my pom-poms and get your special lemon drink.

The Tank Drill: This is a 1st-gear, straight-line, less-than-20-mph exercise. Pick a safe, uncongested strip of roadway or parking lot that will allow you to ride 300 feet or more in a straight line without dealing with pedestrians, cross traffic, or road hazards. Start by pulling away from a complete stop and accelerating to 15-20 mph. Then use your brakes to smoothly and comfortably slow down to approximately 5-10 mph, but don’t make a full stop. Fantastic. Now, while still in motion, accelerate back up to 15-20 mph again. At some point in the process, you will need to turn around, so go ahead and do that in whatever safe manner you choose. That’s all there is to it. Great work, you’re a ringer. Oh, I forgot to mention…

We are going to do this drill with your right hand on the bar and your left (clutch) hand resting on the tank. That’s correct: Only your throttle hand is allowed to grip the bar except during take-off and turnaround. Other than those two exceptions, your clutch hand must rest on the gas tank where I can see it. No cheating.

Motor School with Quinn Redeker Balance Ball 2.0
Shifting your weight back counteracts braking forces, and the Tank Drill helps you learn to get it just right.

You will immediately notice that to avoid pulling on the bar during acceleration (and generating an uncomfortable turning movement), you will be forced to move your upper body forward. Same goes for the braking portion, but you will need to shift your upper body weight back to remain balanced and generate no additional force on the handlebar.

Take it slow, breathe, and concentrate on getting to a balanced centered position like you’re floating on top of the bike throughout the exercise. That’s how you’ll know you got it right. Rinse and repeat, look to the sky, and proclaim “Hallelujah!”

Work this drill until you can comfortably maintain a place of perfect balance when encountering forces that occur while accelerating or braking without feeling the need to grab the handlebar with your left hand to offset any weight transfer. Keep in mind, the harder you accelerate and brake, the greater the weight transfer, which means your range of motion will need to increase within the cockpit to keep the magic carpet ride going.

In time, the pushing and pulling pressure you exert through your hands will decrease as you gain sensitivity to weight transfer. And don’t be surprised when you have more comfort and dexterity at the controls too. Most important, now that you’ve quit upsetting the physics equation with your body weight, your bike will perform better and safer beneath you. That’s huge.

If you want to watch a live-action version of this lesson, go to Police Motor Training with Quinn Redeker on YouTube and find “Perfect Balance On A Motorcycle – Balance Ball 2.0.” The Tank Drill is one of a few exercises I cover in the video, so feel free to fast forward – you won’t hurt my feelings.

Quinn wears Lee Parks Design gloves exclusively. Find Quinn at Police Motor Training.

See all Motor School with Quinn Redeker articles here.

The post Motor School with Quinn Redeker: Balance Ball 2.0 appeared first on Rider Magazine.

Source: RiderMagazine.com

Motor School with Quinn Redeker: The Art of Being Slow

Motor School with Quinn Redeker The Art of Being Slow
Learn how to use the windscreen as a level to ensure both rider and bike work as one balanced mass in this Motor School installment. Photos by Kevin Wing.

A little while back, I took a ride up the coast. It was around 75 degrees outside, the sun was shining, and the ocean was waiting just nine miles from my driveway. I remember smiling, a bit embarrassed at myself for getting caught up in the coolness of my Vanson riding jacket and my retro Ray-Ban Wayfarer sunglasses. Maybe I even started feeling like Top Gun’s Maverick – if he wore a helmet. But there I was, effortlessly clicking through gears on my way to a much-needed reset button in the form of sun, sea, and wide-open air. God Bless America!

But as the ocean revealed itself, I knew I wasn’t the only one looking for coastal therapy. As I turned onto the Pacific Coast Highway, I was immediately wedged into heavy traffic in both directions. Sure, I could see the ocean, but I was stuck in 1st gear, engine fan humming, beads of sweat trickling down my back. It looked like I was going to have to skip the gratuitous beach volleyball session and practice my slow-speed balancing work.

Lucky for me, riding really slow was always part of my gig as a motor officer. Parades, escorts, crowd control, and just plain old everyday traffic. And like anything else, you get good at the things you practice. I learned key concepts and skills that eliminated duck-walking, in-lane weaving, grabby clutch and brake work, and the general sense of fear when stuck in stop-n-go.

What components of slow riding are involved in creating magical on-bike-balance bliss? Slow riding can be broken down into three parts: the rider, the motorcycle, and the rider’s inputs. Let’s look at each one, starting with the rider.

The first thing to appreciate is that slow riding is all about balance points: the bike’s balance point, the rider’s balance point, and the relationship between the two. This means we need a good sense of our own body’s center of balance to minimize any negative impact it might have on the motorcycle’s equilibrium. In other words, if you can’t control your own balance, things only get worse when you get on the bike.

Now let’s look at the motorcycle. No matter what you ride, big or small, long or short, your motorcycle was engineered to have a magical spot where it maintains vertical balance. In fact, the motorcycle is capable of slow-riding on its own, but then we come along and screw up the program by throwing our weight around like a mid-level manager at a big box store on Black Friday.

The last ingredient in our slow-riding skills concoction relates to the rider’s controls and how we exercise them. If we’re prone to on/off, light-switch clutch work and grip-it-and-rip-it throttle action, then we’ll struggle to keep the bike in balance each time we engage the controls. But when you get the proportions right, you’re in for a sublime slow cruise through the worst traffic imaginable. The key is to engage the controls sparingly and calmly, with the goal of having them support rather than upset our balance.

Below I’ve condensed my slow training into two simple (but not necessarily easy) parking lot drills. These, along with a few ideas to keep in mind, will help your slow-speed skills improve exponentially with minimal risk or effort.

Motor School with Quinn Redeker The Art of Being Slow
Improving your slow-riding skills will pay off every time you throw your leg over the bike. Just practice a few simple drills and say goodbye to all your fears of going slow.

Slow Weave Drill: This drill helps you understand how your bodyweight shifts as the motorcycle changes direction. Our goal here is to become sensitive to subtle weight shifts as we sit on the bike and how they impact our overall balance profile.

Find a traffic-free area and set up six cones in a line, approximately 9 to 18 feet apart depending on bike type and skill level (if you don’t have cones, use parking stall markings, which are usually 9 feet apart). With the bike in 1st gear and the clutch partially engaged, weave through the cone pattern. Do your best to control your speed to around 2-3 mph with minimal bike lean. To keep the speed down, you can gently drag the rear brake but avoid mashing it. We want to upset the bike as little as possible when using the controls.

Now position your body so it’s aligned with the motorcycle’s center line. Our objective is to take two parts – you and the bike – and make them move as one balanced mass. And once we arrive at this perfect balance spot on the bike, we want to live there as long as we can, deviating from it as minimally and as infrequently as possible. Easier said than done, but you get the idea.

A great way to help keep you and your bike working together is by using your windscreen as a “level.” Keep your eyes tracking the top edge of your windscreen, and you will spot even the slightest body movement in relation to the bike using this visual cue. With practice, you’ll make fewer big weight shifts and more micro adjustments to remain balanced. Rinse and repeat the drill until you and your bike feel like Maverick and Goose going inverted in the F-14 Tomcat. Feel the need…the need for (slow) speed!

Motor School with Quinn Redeker The Art of Being Slow
Move the bars full-lock left and right to shift the bike’s balance point beneath you.

Bar-to-Bar Drill: While parked, sit on your bike and slowly turn the bars lock-to-lock. Did you notice that the bike shifted a few inches in either direction? It did, and it’s this side-to-side movement that we’re going to exploit to help the bike balance beneath us when we come to a complete stop without putting our feet down. Welcome to hyper-slow mode.

Now that you understand my little handlebar trick, let’s go back and rework the Slow Weave Drill. Only this time I want you to go slower each time, eventually challenging yourself to come to a stop – with your feet up, steady clutch engagement, and light rear brake – at several points along the path.

The task here is to recognize and correct the subtle instabilities in balance by smoothly but assertively moving the handlebar in either direction to regain stability beneath you. If you need to roll forward to find balance and reset, that’s fine. Stay relaxed and keep at it. Your sense of balance will improve over time, and you will see huge gains.

For a live-action example of all this, go to Police Motor Training with Quinn Redeker on YouTube and watch the video “Quinn Redeker Riding Slow.” If it’s easier, you can swing by my house, and we’ll set up some cones over here. But it’s currently 5:30 p.m., so you might hit some traffic.

Quinn wears Lee Parks Design gloves exclusively. Find Quinn at Police Motor Training.

See all Motor School with Quinn Redeker articles here.

The post Motor School with Quinn Redeker: The Art of Being Slow appeared first on Rider Magazine.

Source: RiderMagazine.com

California Superbike School Review – Level I

California Superbike School Level I
California Superbike School is all about teaching students the fundamentals and building from there. The step-by-step method of instruction resulted in measurable improvement throughout the day. (Photos by etechphoto.com)

Like any hobby, sport, or activity, riding a motorcycle gets better as the rider gets better. While nothing quite compares to the initial thrills of early riding days, improving riding skills opens doors to new opportunities, builds confidence, and makes riding safer by reducing panic when unfamiliar situations arise. 

California Superbike School Level I
NCM Motorsports Park in Bowling Green, Kentucky, is just one of 11 tracks in the U.S. that host California Superbike School yearly.

For a while, I’ve been a good enough rider for the type of riding that I do with my family and friends, which is usually relaxed day trips in low-traffic areas. But since I’ve started working as associate editor at Rider, I’ve ridden a variety of bikes in diverse locations alongside very experienced riders, and it’s led me to believe that “good enough” isn’t quite, at least not for me anymore. I want to be a better rider. 

My journey to improve my riding starts with the California Superbike School’s Level I class, which I attended at the NCM Motorsports Park in Bowling Green, Kentucky. Before attending the class and with the help of Cobie Fair of CSS, I graded my current riding on a list of skills using a scale of 1-5, with 5 being the most confident. When I revisited my list after the class, I saw definite improvement almost across the board. As I continue to practice what I learned in the class, I’ll return to this brief questionnaire to measure my progress before jumping into Level II. 

California Superbike School Level I
California Superbike School classes take place rain or shine. Luckily, we had a beautiful day with temps in the mid-80s and sunny skies.

California Superbike School: First School of Its Kind 

California Superbike School was created by Keith Code in 1980 as the first of its kind track school, and it was based on the techniques and concepts that Code used to coach professional racers. Code has a long list of champions that he’s trained, and although his son, Dylan, runs the day-to-day aspects of CSS now, Keith was present when I attended the class, chatting with students and overseeing the program. 

California Superbike School Level I
CSS founder Keith Code (right) addresses students at the beginning of the day. His son, Dylan (center), now runs California Superbike School’s day-to-day operations.

The school is divided into four levels. Those new to CSS start at Level I, regardless of experience or skill set. Levels II and III build on the techniques taught in Level I, while Level IV is a more tailored class that coaches individual students based on their unique needs. Each level can be completed in a day, and two-day camps are available. 

Pricing is the same for each level, and you can choose to rent one of CSS’s track bikes, or you can save a couple hundred dollars by bringing your own bike. One-day classes are $845 to rent a bike and $645 if you bring your own. That’s a significant investment, but the class was well worth the price for me. If I’m willing to invest in gear to protect myself while riding, investing in myself to become a better and safer rider is a no-brainer. 

California Superbike School Level I
The BMW S 1000 RR is the standard rental bike at California Superbike School. Although I rented a smaller BMW G 310 R for the day, the students who rode the S 1000 RR said they enjoyed the bike.

California Superbike School: Gotta Start Somewhere 

Before the class, I used my questionnaire to grade myself after a ride close to home. Skills included setting the correct entry speed for a corner, quickly steering the bike to avoid unexpected obstacles, steady throttle use throughout the corner, choosing a good line through a decreasing radius corner, and others. Knowing I didn’t quite panic in these situations as I did in my early riding days, I felt like I was at least above a 1 rating on most of these skills, but not much beyond that, so I gave a grade of 2. By the end of the class, I confidently bumped my score up to a 2.5 or 3 on many skills on the list, and I expect those levels to continue to rise. 

California Superbike School Level I
When asked who in the class was returning for the second day of the two-day camp, the majority raised their hands.

Upon arriving bright and early on the day of the class, I signed up at the registration table in the paddock, where coaches were greeting students and snacks, coffee, and water were available. The BMW S 1000 RR bikes rented by the school for the class were lined up outside the paddock. Knowing I’d be more comfortable on a smaller bike, I had called ahead to reserve a BMW G 310 R for myself. 

Related: 2023 BMW S 1000 RR and M 1000 R | First Ride Review

When it was time to get started, we headed into the classroom for a safety presentation and an explanation about how the day would go. The coaches and instructors introduced themselves, and they explained that we would be divided into three levels for the rest of the day. 

California Superbike School Level I
This was not only my first time at a track school; it was also my first time on a track! Now I understand why many riders enjoy track days.

GEAR UP

Throughout the day, we stayed with our assigned group. Level I had six students including myself, and each level covered five lessons throughout the day. Each lesson started with a few minutes in the classroom, followed by a 20-minute track session to practice the exercise explained in the classroom. Right after the track session, we’d meet with our coaches to talk about the session and our individual progress on that lesson. Each group rotated through these three steps, so while our group was in the classroom, another group was on the track, and the other one was talking with their coaches. This system kept everything running smoothly, and it kept the track and other areas from becoming too crowded. 

California Superbike School Level I
Seeing the checkered flag signaling the end of the session was my least favorite part of each session, but I looked forward to meeting with my coach to get feedback on how I could improve in the next session.

California Superbike School: Diving In 

Our first lesson was about throttle control. To start, Dylan Code, the Level I instructor that day, asked our class a few questions to gauge our understanding of throttle control and address any misconceptions. He used a white board to write out and draw concepts as he explained, and he also used photos and videos of both professional racers and CSS coaches that demonstrated correct throttle control. In each lesson, Dylan broke down the basic science behind the technique in a way that was simple enough to understand and paired that knowledge with real-world examples. 

California Superbike School Level I
Dylan Code was the Level I instructor for our class. He used a white board and a TV displaying videos and graphics to help us understand each lesson. (Photo by the author.)

As we lined our bikes up to begin our first track session, our on-track coaches introduced themselves. My coach was Lyle, and since we had a smaller group, I was his only Level I student. Even with larger class sizes, each coach will only have 2-3 students per group, which is also why it’s important to register early, as space is limited. Registering a few months in advance is the best way to ensure you’ll get a spot. 

California Superbike School Level I
The BMW G 310 R was a great choice for me. I was able to comfortably focus on each exercise rather than worry about riding a larger bike. Most of the students in my group trailered their personal bikes to ride during the class.

Lyle explained that he’d watch me while trackside to observe how I was doing on the track with the throttle control exercise. Then he’d catch up to me and follow me to observe my progress. After following me for a few turns, he’d ride in front of me and use hand signals to communicate what I should be doing with the throttle. 

California Superbike School Level I
Wanting to become a better rider, I attended Level I of California Superbike School with five other dedicated students.

When I started following Lyle’s hand signals as a guide to using the throttle, the classroom lesson began clicking into place, and I began to understand not just the concept of throttle control but also the feeling of correct throttle control. At each corner, my throttle usage smoothed out, and I was better able to judge a good entry speed that wouldn’t require me to make panicked adjustments in the middle of the corners. Before long, we were heading off the track and toward our coaching session. 

California Superbike School Level I
When our group lined up before the first session, our individual coaches came out to introduce themselves and explain how they would help us with the throttle control exercise.

I met Lyle in the paddock at a table with a map of the track. Lyle made it clear that his job was to make me a better rider and asked how I felt and what I wanted to focus on. He used a dry-erase marker to mark turns where I was doing well and turns that needed improvement. He told me that in our next session, I should focus on smoothing out two particular turns and gave me advice on how to do that. After grabbing some snacks and water in the paddock, it was back to the classroom for the second lesson. 

California Superbike School Level I
By following my coach, Lyle, I was able to get a better understanding of the right way to do the exercises.

California Superbike School: Step By Step 

The lessons continued in a similar way, each one adding concepts and exercises and building on the lessons before. We were told to use no brakes at first and reintroduce brakes in a later session, again slowly adding in extra things without overwhelming students with too much to remember at once. 

California Superbike School Level I
Lyle and I meet up in the paddock to discuss the session over a dry-erase map of the track on the table.

Once we got into the second half of the day, I told Lyle I was having a hard time choosing the best line at each corner, so although we continued working on the lessons from the classroom, we also worked on choosing lines. He marked a couple of turns where he noticed I would turn in too late or too early, and then on the track, he signaled by pointing to the ground where I should begin the turns and where I should apex. Having this visual cue was a great help, and it felt fantastic to see my lines improving after each session. 

California Superbike School Level I
My coach, Lyle, points to the apex of the turn ahead of me to help me find my line.

Five sessions after the start of the day, it was 5 p.m. and time to get off the track. We were each given a folder with brief explanations of our levels’ lessons, a completion certificate, and more information about the school. 

California Superbike School Level I
An instructor demonstrates lessons on a bike in the paddock. Later in the day, these students sat on the bike while the instructor guided them on body positioning.

My day at California Superbike School was everything I wanted. The step-by-step system of lessons gave me the tools to continue improving without feeling overwhelmed, and I ended the day tired but excited by my progress. The coaches told me that I’d learn more about visuals and body positioning in Level II, and I’d get the chance to try out some of their specialized training bikes. 

California Superbike School Level I
By the end of the day, I was feeling confident in my progress and excited to return for Level II in the future.

This step in my journey to becoming a better rider covered more distance than most. Now it’s time to put in the work and practice what I’ve learned – not a bad way to spend my summer evenings. 

Learn more about California Superbike School, view the schedule, and register for a class at the CSS website. 

The post California Superbike School Review – Level I appeared first on Rider Magazine.

Source: RiderMagazine.com

Motor School with Quinn Redeker: Brain Racing

Motor School Quinn Redeker Brain Racing
Does your left hand know what your right hand is doing? In this Motor School, we discuss how to hop up your internal processor with neuro training exercises. This one is the Tennis Ball Drill.

Over the years, I’ve done plenty of things to stay ahead of the next guy during motorcycle competitions. Mondays and Wednesdays were my heavy days when I’d do four to five credit-card lifts to purchase titanium bolts, special suspension coatings, and maybe a dash of custom motor work. On Tuesdays and Thursdays, I’d bulk up with some online shopping for protein supplements, rehydration drinks, and energy bars. If some guy with a cool haircut made performance promises and all I had to do was eat it, drink it, or bolt it on, then I was all in. Money well spent, right?

You know how this story goes. Over time I learned the uncomfortable truth that no amount of “stuff” was going to get me to the finish line ahead of the next guy unless it was matched with equal parts time and effort. Bottom line: No matter how trick your high-speed, sweat-wicking racer briefs are, they simply won’t do any of the work for you. Not even the ones with Grip Strips to stop them from riding up.

Alas, the inconvenient truth: If we want to see performance gains, we can’t cheat when it comes to climbing the mountain. In my case, the mountain was a combination of seat time on the bike, fitness training off the bike, and an academic journey to learn new and better ways to do things I’d already spent years doing. The climb was rarely joyous, but the view got better as the oxygen diminished, and I grew to appreciate all the hard-fought little battles that helped me improve as a result.

But I’m not here to give you the “hard work beats talent when talent doesn’t work hard” spiel because you probably know all that. Nope, today I’m bringing you some next-gen stuff that yields gifts that money just can’t buy. I call it Brain Racing, and it means improving your reaction time, hand-eye coordination, peripheral vision, and more. Known in pro sports circles as neuro training, it’s about stimulating your brain’s neural networks through games and drills to improve your performance and safety on the bike.

Motor School Quinn Redeker Brain Racing
Watch your perception-reaction time get faster after just a few rounds of the Ball Drop Drill. Jaco’s not available? Grab a friend.

But before we strap in, this is the part of the story where you can take the blue pill and stop reading, or you can take the red pill and take the ride with me. What’s it going to be, Neo? Do you want to see how deep the rabbit hole goes?

Since you’re still with me, you first need to understand that our reaction times are based on a few key factors: 

Perception: When we perceive something, we know, with high confidence, what we are seeing, hearing, and/or feeling. Perception can be negatively impacted by fatigue, lack of sleep, age, drugs, alcohol, and poor eyesight and/or hearing.

Processing: We need to process whatever we just saw, heard, or felt to know what to do with it. This means we must understand the information clearly. If we are not clear in our assessment of the stimuli, processing will be delayed and reaction times will suffer. More complex information takes longer to process.

Response: Once we perceive and process the information, we need good motor function to respond. This is where fitness and coordination work for us, and lack of physical conditioning or underlying motor problems work against us.

Make sense? Ready to order a 3-pack of Super Reflexes? Nice try, but you can’t call the 800 number on your screen or just wait for the Amazon delivery. No, we can’t just flip a switch, drink the magic elixir, and expect to see results. We need to invest some sweat equity in the form of coordination and reaction drills. So yes, I’m giving you work to do, but allow me to tidy up my hair and make you some outlandish promises: These drills will improve your coordination, processing, and reaction time. Remember, we don’t just want to grow older, we want to grow better. 

Motor School Quinn Redeker Brain Racing
The Crazy Cat Drill is staple in pro sports and promises quicker perception, processing, and response in high-intensity situations.

Tennis Ball Drill: Grab a tennis ball, stand 6 feet from a wall or garage door, and start by throwing underhand and catching overhand using the same hand. Simple. After a few minutes, do the same thing but catch in the opposite hand. Next, wick it up by closing your distance to 3 feet from the wall and using two balls, alternating between hands for both throw and catch. Watch your coordination blast off.

Ball Drop Drill: This exercise requires your riding buddy Jaco, but all we need are those two tennis balls you just threw over the fence. With Jaco holding a ball in each hand and his arms outstretched at chest height, you stand opposite, as if a mirrored reflection, and mimic his hand position and posture so that both your hands are touching each other’s at the knuckles. At some point, Jaco will drop one or both balls without warning, requiring you to snatch them from thin air as they fall. The lower you go, the harder it gets.

Crazy Cat Drill: Stand facing a wall from one foot away and hand Jaco a laser pointer. When he says “go,” Jaco will shoot little laser spots on the wall, and you must touch them as quickly as possible. The laser only hits for a millisecond, so you need to pay attention, tap where it hits, and get set for the next one. Once you get the hang of it, Jaco can ramp it up with more spots spaced farther apart.

From the comfort of your Lazy Boy, these might seem a bit silly. I get it, you became an adult and put away childish things. But these drills work. It’s no coincidence that pro athletes who live and die based on their ability to see, react, and respond in high-intensity situations practice these very drills. I’ll make you a bet: If you do these drills every day for one week and don’t have better focus, dexterity, and reaction time on the bike when Day 8 rolls around, I’ll buy you some racing stickers for your motorcycle. Placed correctly, those alone should be good for five to seven extra horsepower.

Quinn wears Lee Parks Design gloves exclusively. Find Quinn at Police Motor Training.

See all Motor School with Quinn Redeker articles here.

The post Motor School with Quinn Redeker: Brain Racing appeared first on Rider Magazine.

Source: RiderMagazine.com

Motor School with Quinn Redeker: Left Foot, Right Foot, Heavy Foot, Light Foot

Motor School with Quinn Redeker Left Foot Right Foot Heavy Foot Light Foot
Never skip leg day! In this installment of Motor School, Quinn discusses how working your legs and feet into the turning process pays huge dividends during low-speed turns. (Photos by Kevin Wing)

Hey, a smidge of Dr. Seuss-inspired thinking never hurt anybody. Moreover, while this article is dropping in May, I’m writing it during the holiday season, and I’m full steam ahead on a speed-train of hot cider and gingerbread treats, so loosen up. Now, where was I about the feet thing? The sugar coma is real.

Oh yes, your feet. Let’s kick it off with a question: When you ride your streetbike, do you ever give much thought to your feet? I don’t mean if they are cold, if they are comfortable, or if you think they look small when people, um, size you up. No, I mean do you use them to gain better control and comfort in slow-speed riding situations? Anyone?

No worries, have a gingerbread cookie and I’ll walk us through some footwork concepts while we initiate maximum carb-load protocol.

Now, if I’m known for one thing in police motorcycle competitions, it’s my extreme lean angles when I counterbalance. A close second is my ability to rapidly transition the motorcycle from one direction to the other. And while there are several techniques at play to make those things happen, a major contributing factor is how I use my feet.

No, I don’t expect you to sign up for any police motor competitions, but developing your footwork will provide you with a higher level of ability and control in street situations.
Motor School with Quinn Redeker Left Foot Right Foot Heavy Foot Light Foot
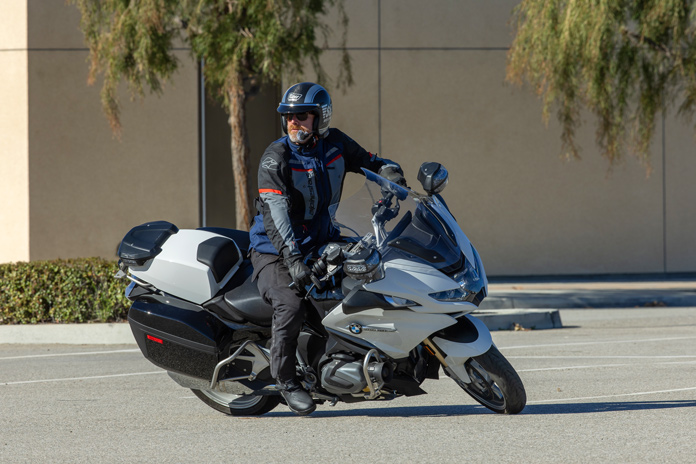
Don’t go down with the ship! A firm press on the inside peg helps maintain a steady platform when the motorcycle begins to lean.

As discussed in last month’s column (“Which Way Do You Lean?”), when executing slow-speed turns, we benefit from counterbalancing, which “counters” the motorcycle’s weight as it leans over by simultaneously shifting our weight in the opposite direction of the motorcycle. But there are two fundamental challenges riders have with this technique: 1) they don’t counterbalance nearly enough, causing the motorcycle to fall in faster than they wanted yet not as far as would allow for a tight turning radius, and 2) they struggle getting the motorcycle out of the lean once they accomplish the turn they initiated. Not great. But dammit, these cookies sure are, right?

Here’s where my feet come in to save the day. When it’s time to initiate a tight turn and lean my motorcycle over, I use my inside foot to push down on the peg. This not only helps push the motorcycle over, but simultaneously generates a stable platform from which I can push myself into a greater counterbalance position. Imagine we are turning a tight right-hand U-turn. We start to lean the motorcycle over, and the inside peg, along with the seat and bars, are all falling over, causing us to feel as if we are going down with the ship. In other words, everything we are connected to is falling over all at once. But if we use our inside foot to press against the peg as it falls over, we generate force that stabilizes us in the counterbalance position and more easily leans the bike over.

One final benefit to employing our feet is for the exact opposite reason I’ve mentioned already, namely to pick up the bike once we complete the turn. How? By adding force to the outside peg at the right moment. Three more cookies and I’ll land the plane, I promise.

Weighting the outside peg is useful in two important ways. First, by generating force in the opposite direction of the lean via shifting pressure onto the outside peg, I’m helping the motorcycle stand back up. And second, I’m taking my bodyweight away from the overall mass that needs to be picked back up, which further helps get my heavy bike upright and moving in a new direction.
Motor School with Quinn Redeker Left Foot Right Foot Heavy Foot Light Foot
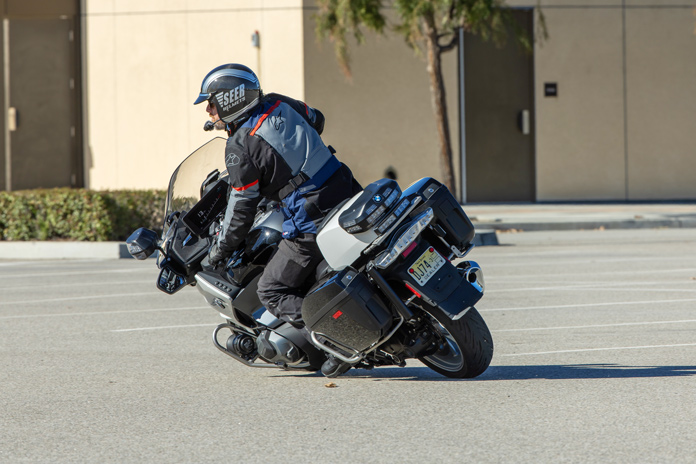
Picking up what you’re putting down. Come out of the lean by shifting your weight and steadily pressing the outside peg.

Here’s what this looks like. Say I’m dropped over in a slow, tight U-turn and I am now turned around and want to pull out of the lean. At that moment, I keep my body counterbalanced but concentrate my mass so that when I add pressure to the outside peg, I help lift the bike back up yet avoid “pushing” my bodyweight to the inside of the bike. Think of this technique in the same way as getting out of a car: You step one leg out, but before you add pressure, you ensure your weight is over the foot so you don’t simply fall back inside the car when you add force, then you press yourself up and out.

With your motorcycle leaned over, you place your weight over the outside peg and then press, causing both your leg force and lack of body mass to work together to upright the bike. And just like the car example, if you press without getting your weight over the peg first, you will push your body in the direction the motorcycle is already leaned over (causing you to “fall back into the car”), which will only make it harder to stand the bike back up. Do you need another cookie, or are we clear up to this point?

To get a feel for this, we’ll work some figure-8s to practice both the drop-in and pick-up components of the technique. With your bike in 1st gear, start riding a moderate-sized figure-8 pattern. You don’t need to slip the clutch here, just execute the pattern while staying smooth and relaxed. What you are looking for is awareness of what your feet are doing (or not doing) as you turn within the pattern. Let’s focus on your inside foot first, adding pressure on the peg to gain stability, help the bike lean over, and increase counterbalance range of motion.

Once you can employ the inside foot efficiently and confidently, isolate the outside foot. Concentrate on a stable, balanced push on the peg, making sure that the push doesn’t shift your weight toward the direction of the lean. Remember, you are helping the bike pick itself up here, so shifting your weight to the inside with a bad push only hinders this goal. Once you master it, put it all together.

This technique works just fine whether you have footpegs or footboards. Yes, footboards are farther forward, and you will need to rework your foot placement, but where there’s a will there’s a way. To see this lesson in action, go to Police Motor Training with Quinn Redeker on YouTube and look for “Foot Technique For Better Riding.”

Find Quinn at Police Motor Training.

See all Motor School with Quinn Redeker articles here.

The post Motor School with Quinn Redeker: Left Foot, Right Foot, Heavy Foot, Light Foot appeared first on Rider Magazine.

Source: RiderMagazine.com